In this article, we will learn how to get a free SSL certificate for your website.
Let’s Encrypt is an SSL certificate authority managed by the Internet Security Research Group (ISRG).
It utilizes the Automated Certificate Management Environment (ACME) to automatically deploy free SSL certificates.
What is SSL?
SSL stands for Secure Socket Layer. It creates an encrypted layer of data transmission between the two systems.
Whether it is server-to-server communication or server-to-browser communication. SSL allows encrypted data transmission and prevents its access to an outsider.
For creating an SSL connection, a server needs an SSL certificate.

How does SSL make your website secure?
The encryption of the transmitted data makes sure that all information remains private.
If the data is transmitted without encryption, hackers can steal personal information such as Login ID, Credit card numbers, Email Addresses, Mailing Addresses, Passwords, etc.
SSL Encryptions: How do they work?
- A browser tries to make a secure connection with an SSL-secured website after obtaining its IP Address from a DNS server. The web address of an SSL secure site begins with ‘HTTPS’ instead of ‘HTTP.’
- The browser initiates a request for the SSL certificate copy of the server.
- After receiving the copy of the certificate, it ensures that the certificate is not expired, matches the domain name, and confirms security standards, such as key length, etc.
- Once the certificate seems trustable, the browser creates a symmetric session key.
- In addition, the server acknowledges the encryption.
- All communication between the web server and the concerned browser is now encrypted.
Case 1 – Configure SSL in case of a single domain
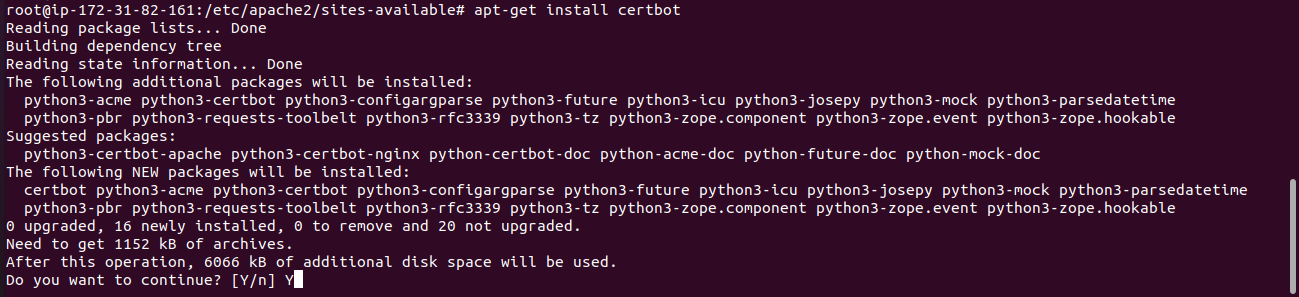
Step 1 – Installing Certbot
It is a free open-source software tool for automatically using Let’s Encrypt certificates on
manually-administrated websites to enable HTTPS.
Run the following command
apt-get install certbot
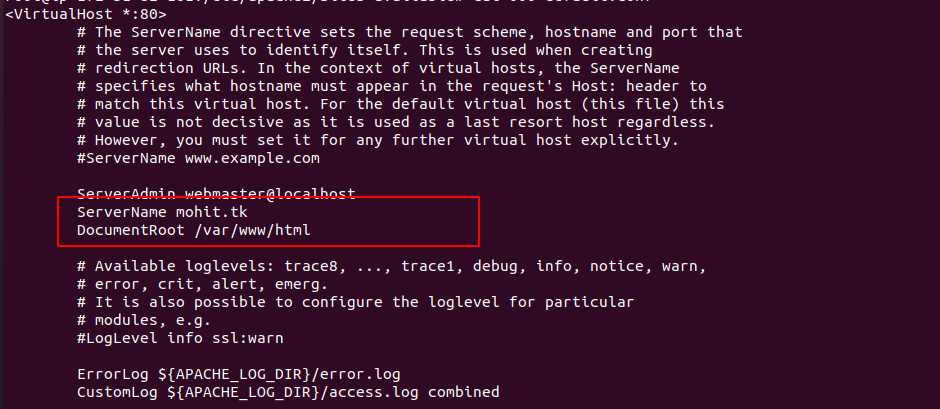
Step 2: Check your domain name
cat /etc/apache2/sites-available/000-default.conf
Step 3: Generate an SSL certificate for your domain
Run the below command and Replace mohit.tk with your domain name.
|
1 |
certbot --server https://acme-v02.api.letsencrypt.org/directory -d mohit.tk --manual --preferred-challenges dns-01 certonly |
Going into the command
- certbot: the certbot program
- certonly: run the certbot once, certbot-auto runs certbot automatically
- manual: run certbot in manual mode
- d: domains to be included in the certificate, use your domain
- preferred-challenges: The way used to verify domain ownership, We used the DNS challenge
- server: The letsencrypt ACME server
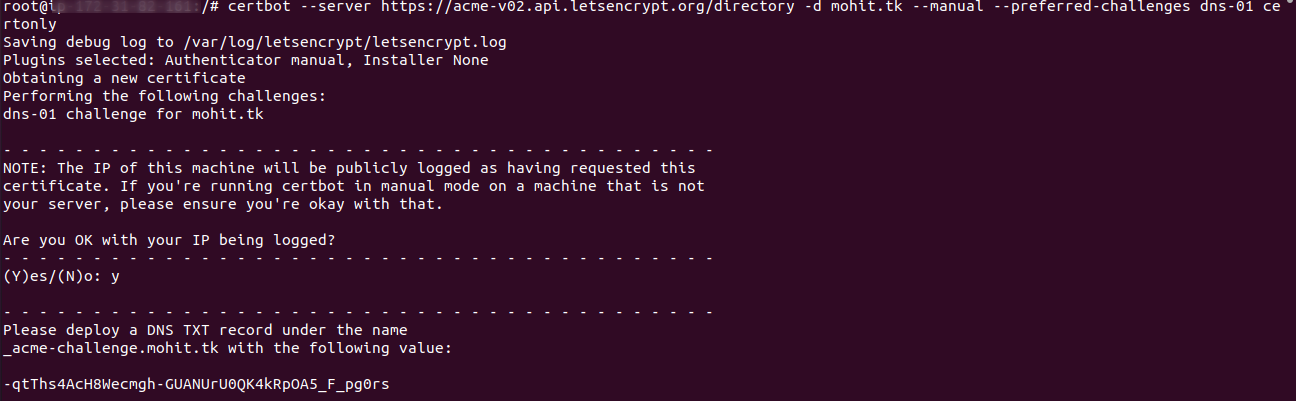
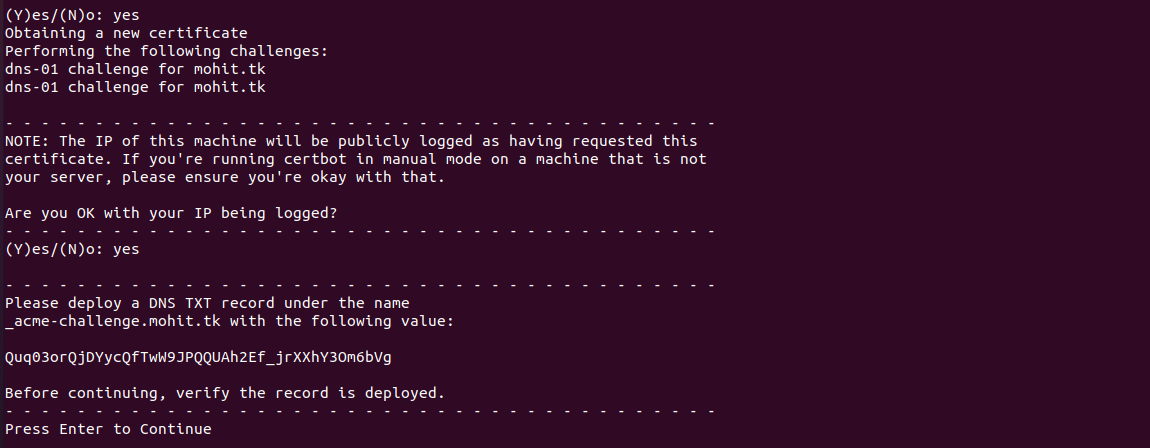
Once you run the above command, you will get the following output.
You need to press Enter
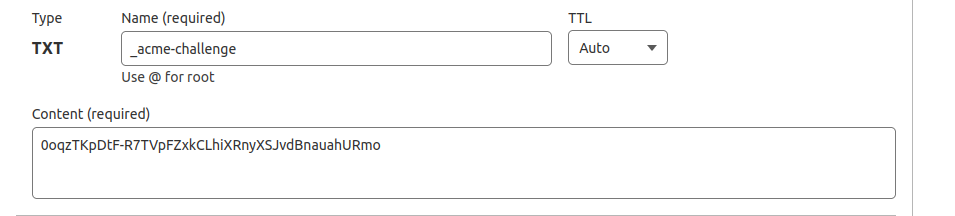
In this step, you need to create a DNS TXT record under the name _acme-challenge. It needs to be configured inside your DNS panel like Cloudflare, GoDaddy, etc.
Here are my Cloudflare Entry details
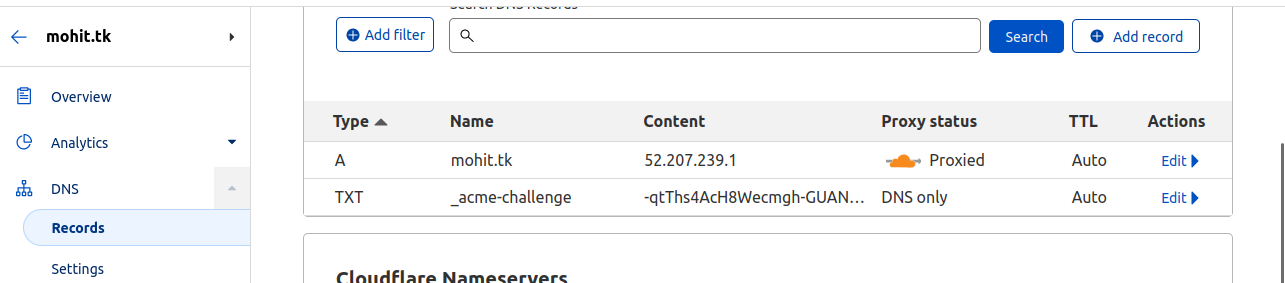
Once you’ve entered the TXT record on your DNS panel (Cloudflare) get back to your console and again press Enter you will receive the below message

Step 4: To configure your Apache configuration
using your favorite editor
vi default-ssl.conf
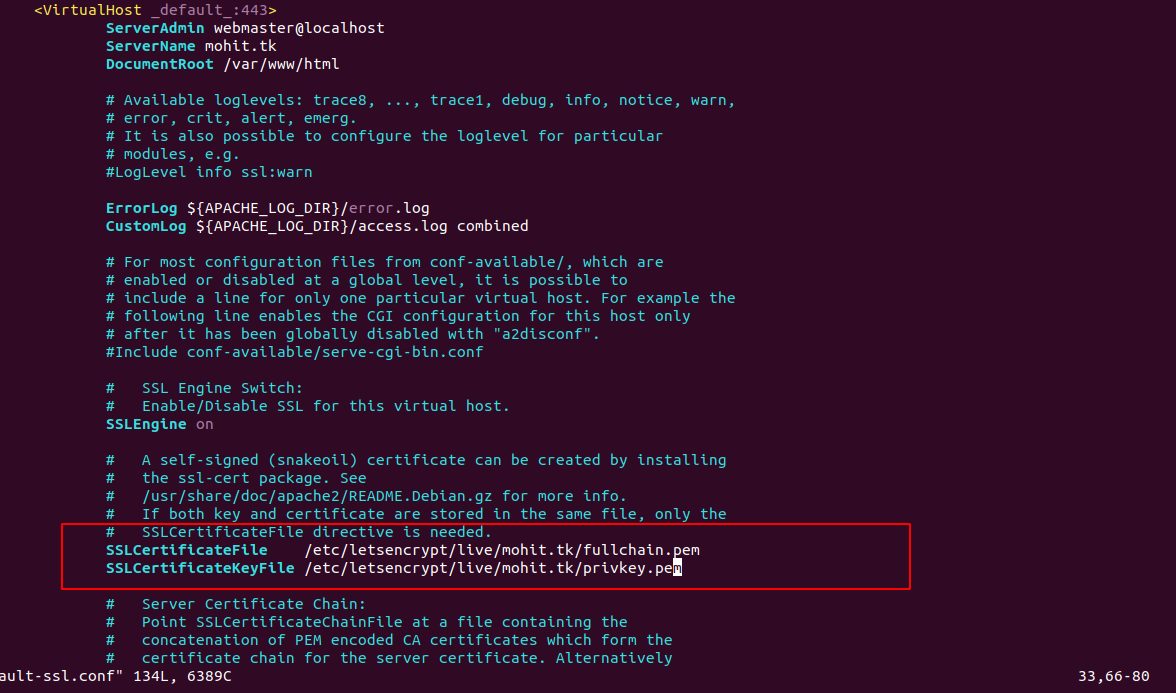
You have to define the SSL certificate path, find your certificate path inside /etc/letsencrypt/live/
Step 5: Run the below command to enable the SSL module of Apache
a2enmod ssl

And then restart the Apache service
service apache2 restart
Step 6: Run the below command to enable the SSL conf file
“a2ensite is a script that enables the specified site (which contains a block) within the apache2 configuration. It creates symlinks within /etc/apache2/sites-enabled”.
a2ensite default-ssl.conf
And then restart your Apache service.
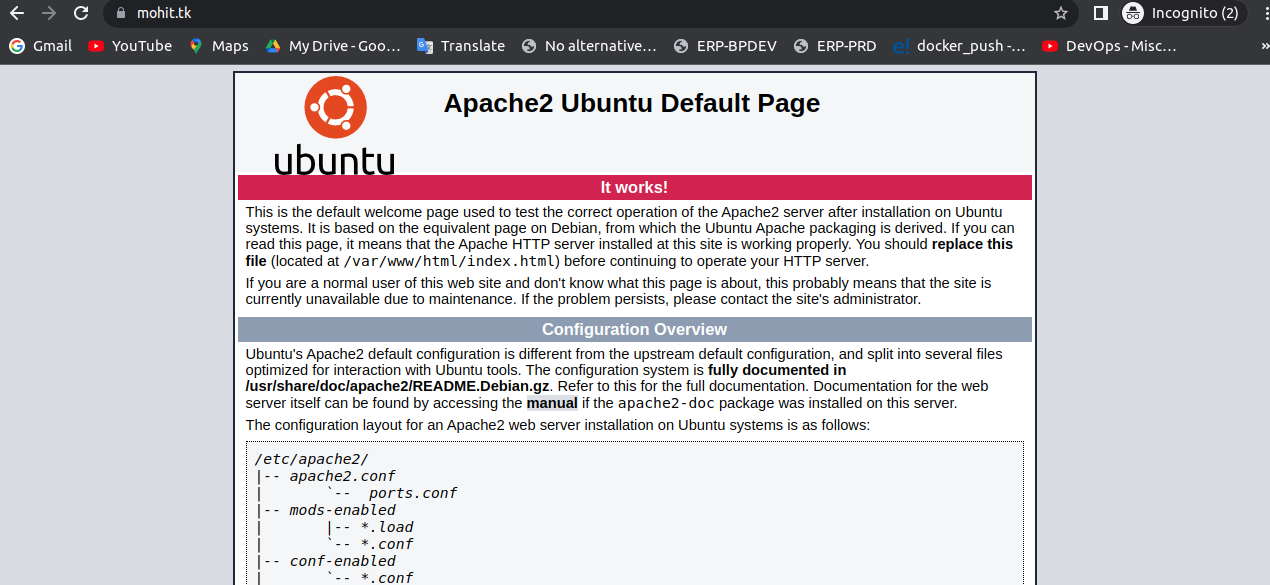
Now, Go to the browser and enter your domain name
Case 2 – Configure wildcard SSL in case of multiple subdomains
Note: If you have already installed the certbot don’t need to install it again
Step 1 – Installing Certbot
It is a free open-source software tool for automatically using Let’s Encrypt certificates on
manually-administrated websites to enable HTTPS.
Run the following command
sudo apt install certbot
query
to continue the installation press “Y" and then ENTER to accept.
Certbot is now installed on your server. Next, you’ll verify Apache’s configuration to make sure your virtual host is set appropriately.
Step 2. Check your Domain name
to check your domain, We need to check the vhost file
vi /etc/apache2/sites-available/000-default.conf
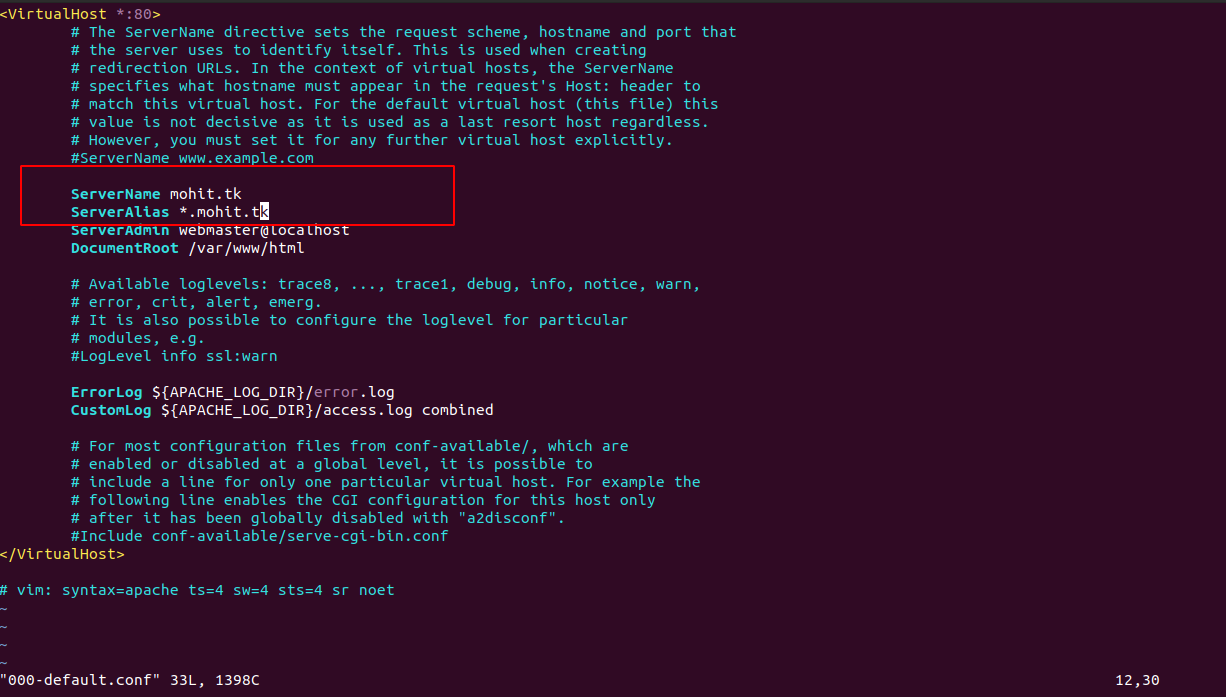
You can check your vhost file under /etc/apache2/sites-available/
A wildcard SSL provides a way to secure an unlimited number of subdomains with a single certificate. This certificate works with any subdomain of the main domain name.
For example, if your domain name is “mohit.tk”, your wildcard certificate would also protect “test.mohit.tk” and “dev.mohit.tk”.
On wildcard SSL certificates, an asterisk (*) is placed before your domain name as a placeholder.
We are using mohit.tk domain name and also using wildcard subdomain entry
Step 3 – Generate a wildcard certificate
|
1 |
certbot --server https://acme-v02.api.letsencrypt.org/directory -d mohit.tk -d *.mohit.tk --manual --preferred-challenges dns-01 certonly |
Going into the command
- certbot: the certbot program
- certonly: run the certbot once, certbot-auto runs certbot automatically
- manual: run certbot in manual mode
- d: domains to be included in the certificate, use your domain and its wildcard instead of exampledomain.com
- preferred-challenges: The way used to verify domain ownership, We used the DNS challenge
- server: The letsencrypt ACME server
Replace mohit.tk with your domain name.

Once you run the above command, you will get the following output.
You need to press Enter
In this step, you need to create a DNS TXT record under the name _acme-challenge. It needs to be configured inside your DNS panel like Cloudflare, GoDaddy, etc.
We are using Cloudflare in our case
You need to press Enter
Once you’ve entered the TXT record on your DNS panel (Cloudflare) get back to your console and again press Enter.
You will receive one more TXT record because we are using the wildcard subdomain and you need to enter the TXT record on your DNS panel (Cloudflare)

press Enter you will receive the below message
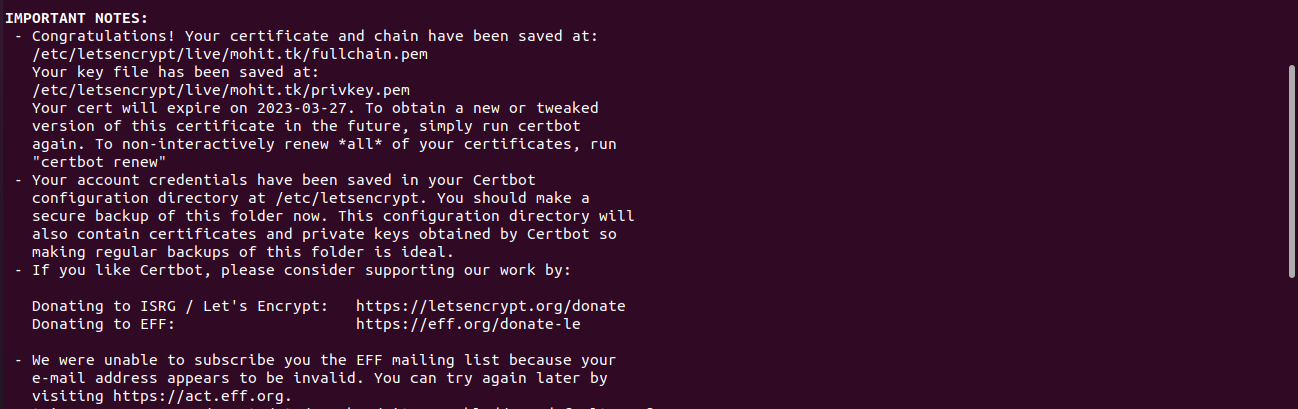
Congratulations!! Your wildcard certificate is generated. You can use this wildcard certificate with any sub-domain you create for your domain name.
After that, you need to manually configure Apache with the correct SSL cert path.
You have to copy this file location and map from your Apache server
Step 4 – Configure your Apache configuration
using your favorite editor
vi default-ssl.conf
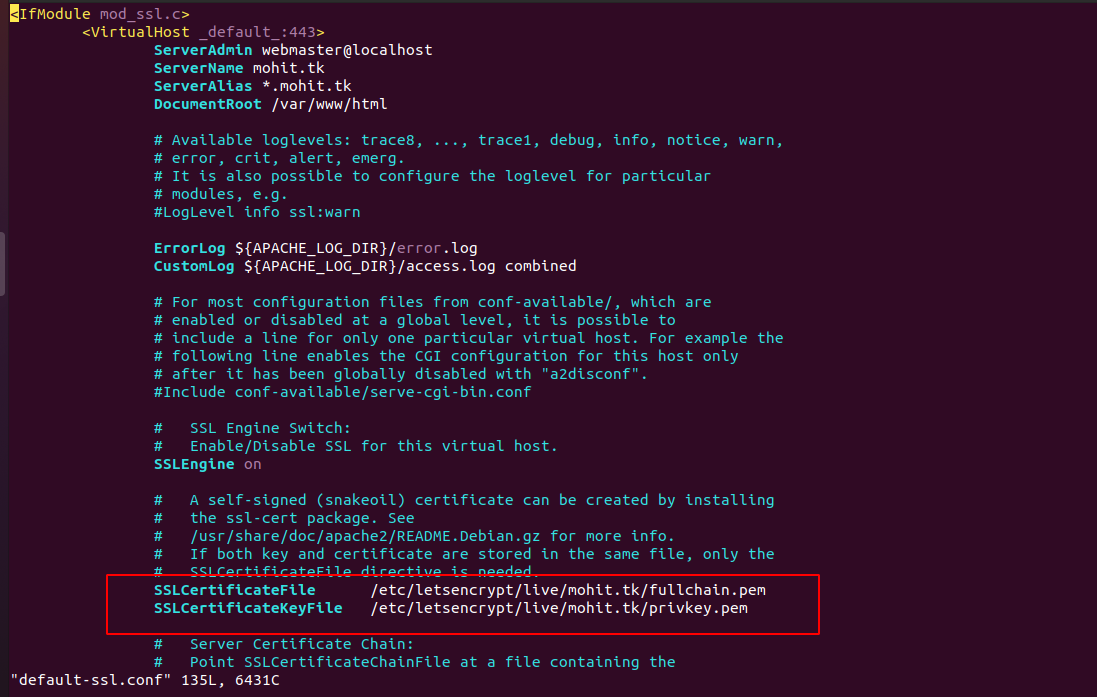
You have to define the SSL certificate path, find your certificate path inside /etc/letsencrypt/live/
Step 5: Run the below command to enable the SSL module of Apache
a2enmod ssl
And then restart the apache service
service apache2 restart
Step 6: Run the below command to enable the SSL conf file
“a2ensite is a script that enables the specified site (which contains a block) within the apache2 configuration. It creates symlinks within /etc/apache2/sites-enabled”.
a2ensite default-ssl.conf

service apache2 restart
As we have used an asterisk (*) subdomain entry It means we can use anything as a subdomain before the main domain(mohit.tk)
Here are my Cloudflare Entry details
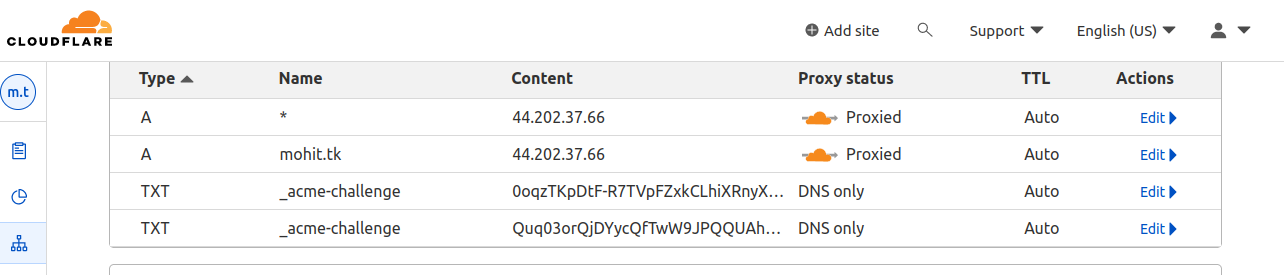
Now, Go to the browser and enter your domain name with the subdomain as you can see below
query
check another subdomain
Case 3 – How to auto-renew the SSL certificates
To learn how to automatically renew your free SSL certificates then please refer to my next blog.
You may also visit our Magento development services and quality Magento 2 Extensions.
For further help or queries, please contact us or raise a ticket.

1 comments