Introduction:
In our previous blog, we discussed about how to create a compute engine VM on GCP. In this blog, we will discuss about LAMP installation with multi-tier architecture on GCP. We will be using the Compute Engine service of GCP for Linux server, Apache Web server and php. For the Mysql database, we will use the SQL service of GCP as a separate micro service. We will connect both the services to design a multi-tier architecture for LAMP installation. For Installing LAMP on GCP, you need to have a registered GCP account. For this blog, we assume that you already have a registered GCP account.
Creating a Compute Engine VM:
For creating a Compute engine VM, you may refer to my previous blog on running a compute engine VM on GCP. In this blog, we will use the following:
- Linux OS: Ubuntu 16.04
- Apache Version: v2.4
- Mysql Version : v5.7
- Php Version: v7.0
First create a Compute Engine VM on your GCP account and once you have created a VM instance, ssh login to the VM server to install apache and php. You can login to ssh either via GCP provided web console or third-party ssh tools like terminal or putty. Here we will use the GCP web console for ssh login. For details on using third-party ssh tools, please refer to my previous blog.
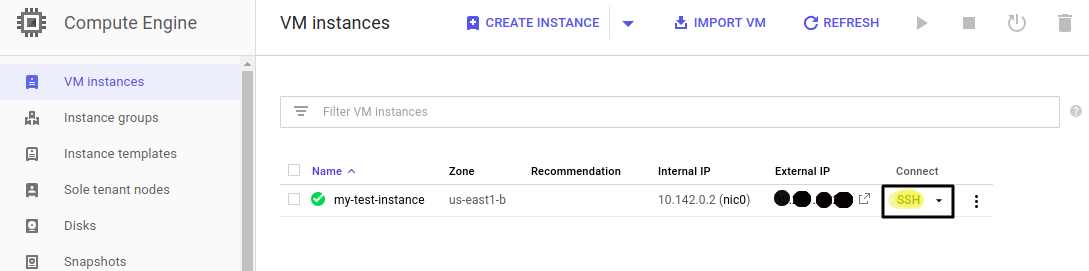
To SSH login to the VM instance via “ssh web interface”, click on the SSH button of the instance from the console by going to Navigation menu > Compute Engine > VM Instances. On clicking on the ssh button of the VM instance, an ssh web interface will be prompt where you will be logged in to that particular instance. Here you can perform any operations on the server via ssh.
Installing Apache and PHP:
After login into the VM instance, you can install apache web server and PHP. You can define your preferred php version for installation.
To install apache web server, Use the following commands.
|
1 |
sudo apt-get -y install apache2 |
To install php and its extensions, use the bellow commands. We will use php7.0 for the demo.
|
1 2 3 4 5 6 7 8 |
sudo locale-gen en_US.UTF-8 export LANG=en_US.UTF-8 sudo apt-get update sudo apt-get install -y software-properties-common python-software-properties sudo LC_ALL=en_US.UTF-8 add-apt-repository -y ppa:ondrej/php sudo apt-get update apt-get -y install php7.0 php7.0-curl php7.0-bcmath php7.0-intl php7.0-gd php7.0-dom php7.0-mcrypt php7.0-iconv php7.0-xsl php7.0-mbstring php7.0-ctype php7.0-zip php7.0-pdo php7.0-xml php7.0-bz2 php7.0-calendar php7.0-exif php7.0-fileinfo php7.0-json php7.0-mysqli php7.0-mysql php7.0-posix php7.0-tokenizer php7.0-xmlwriter php7.0-xmlreader php7.0-phar php7.0-soap php7.0-mysql php7.0-fpm libapache2-mod-php7.0 sed -i -e"s/^memory_limit\s*=\s*128M/memory_limit = 512M/" /etc/php/7.0/apache2/php.ini |
To check apache and php installations and its version, use the below command.
|
1 2 |
apache2 -v php -v |
Enable apache rewrite and headers module.
|
1 2 3 |
sudo a2enmod rewrite sudo a2enmod headers sudo service apache2 restart |
Now Apache webserver and php has been installed on your server.
Further you may also need to install mysql-client to login to the remote database instance i.e. on SQL service of GCP.
To install mysql-client, use the below command.
|
1 |
sudo apt-get -y install mysql-client |
To check the mysql installation and its version, use the below command.
|
1 |
mysql --version |
Creating a MySQL database using SQL service of GCP:
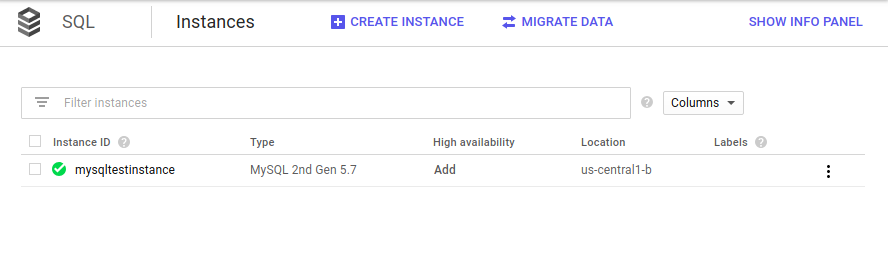
To create a mysql database using SQL service of GCP, go to Navigation menu > SQL. Now click on “create instance”, choose database engine as MySQL and click on next. Next you need to choose the use case i.e. for development, staging or production. Here we will choose development. Next in the configure step, choose Instance Id, Root Password, Region and zone. You can also change other configuration parameters as per your requirement but we will keep it default for this demo. Now click on create button to create the mysql instance. Once the Mysql Instance is created, you can click on its instance id to see its details. You can also find the Public IP of the MySQL instance in the Overview section.
Connecting MySQL Database with VM instance:
Once you have created a Mysql Database on SQL service of GCP, its time to connect the Database to the Compute Engine VM instance. For this, you need to allow the public IP of the Compute VM, in the firewall rules of the MySQL service. Click on the MySQL database Instance Id that you created and select the Connections Tab, and under the connectivity section, click on “Add network”. Now give a name to the network and add the IP of the Compute VM instance in the CIDR format i.e. <ipv4_address>/32 and finally click on done and save. This will allow the Compute VM instance to connect with the MySQL database instance.

To verify that the database is properly authenticated to the MySQL database, ssh login to the Compute VM instance and check if you are connected and able to login to the database instance. For this you need the Public IP of the database instance which you can easily get in the overview section of the MySQL Instance.
|
1 |
ping <public_IP_of_MySQL_instance> |
|
1 |
mysql -h <public_IP_of_MySQL_instance> -u root -p |
If you are able to login to the MySQL instance through the public IP, then your Compute instance VM is properly authenticated the MySQL database instance.
Congrats, you have now successfully set up LAMP on GCP with multi-tier architecture with separate Instance for Compute and Database.
Stay Connected!
In case of any help or query, please contact us or raise a ticket at [email protected].

Be the first to comment.