Introduction:
Google Cloud Platform(GCP) is a suit of cloud computing services offered by Google. GCP runs on the same infrastructure that Google uses internally for its end-user products, such as Google Search, Youtube, etc. GCP was publicly introduced by Google in 2011 and since then, it provides a number of cloud services which includes computing, storage, data analytics, machine learning, etc. In this blog, we will discuss on how we can create a Compute Engine VM instance on Google Cloud Platform.
Before we start with creating a VM in GCP, you need to first register on the GCP console. You can register for Google cloud with your existing gmail account here. Registration requires a credit card or bank account details. On registering with GCP, you will also get a $300 free credit usage for 12 months. If you have already registered for GCP, you are good to go. For this blog, I shall assume that you already have a registered GCP account.
Creating a VM instance:
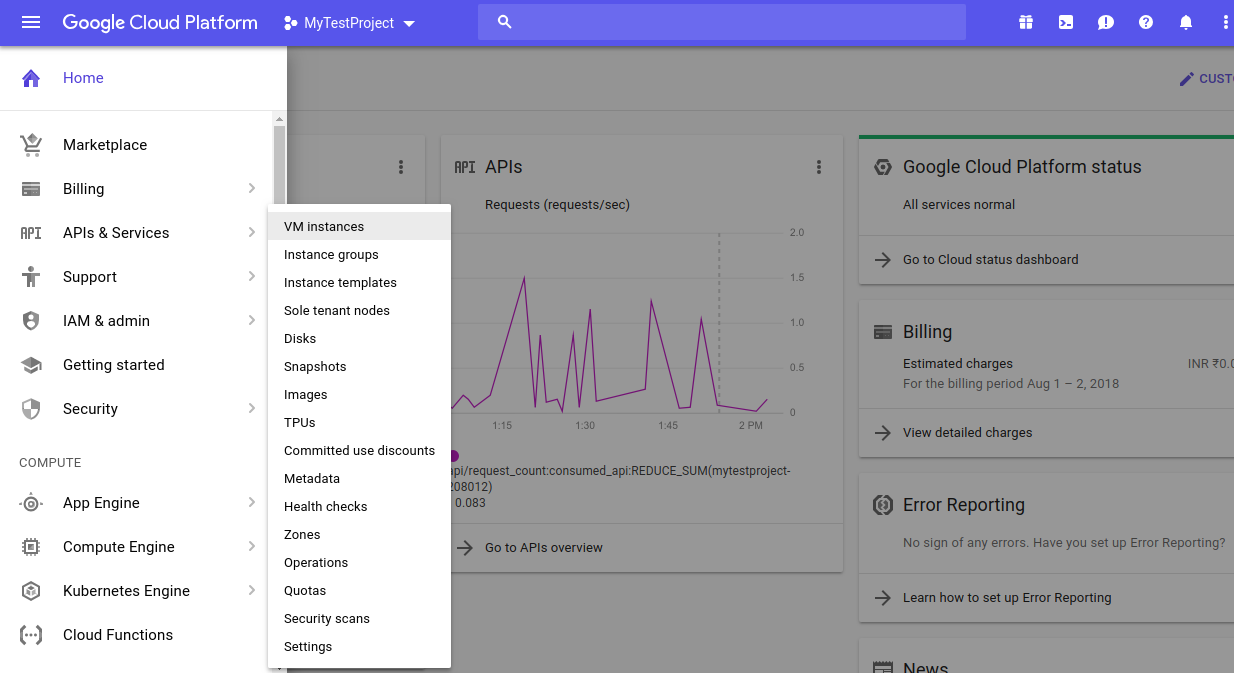
For creating a VM instance, first login to your GCP Console. Click on the navigation menu button on the top left of the console, under “COMPUTE” section, select Compute Engine > VM Instances. On clicking on VM Instances, a Compute Engine interface will appear. If there are no previously created instances, you may see a screen with few information about Compute Engine with a create button below. Click on the create button to proceed with creating an VM instance.
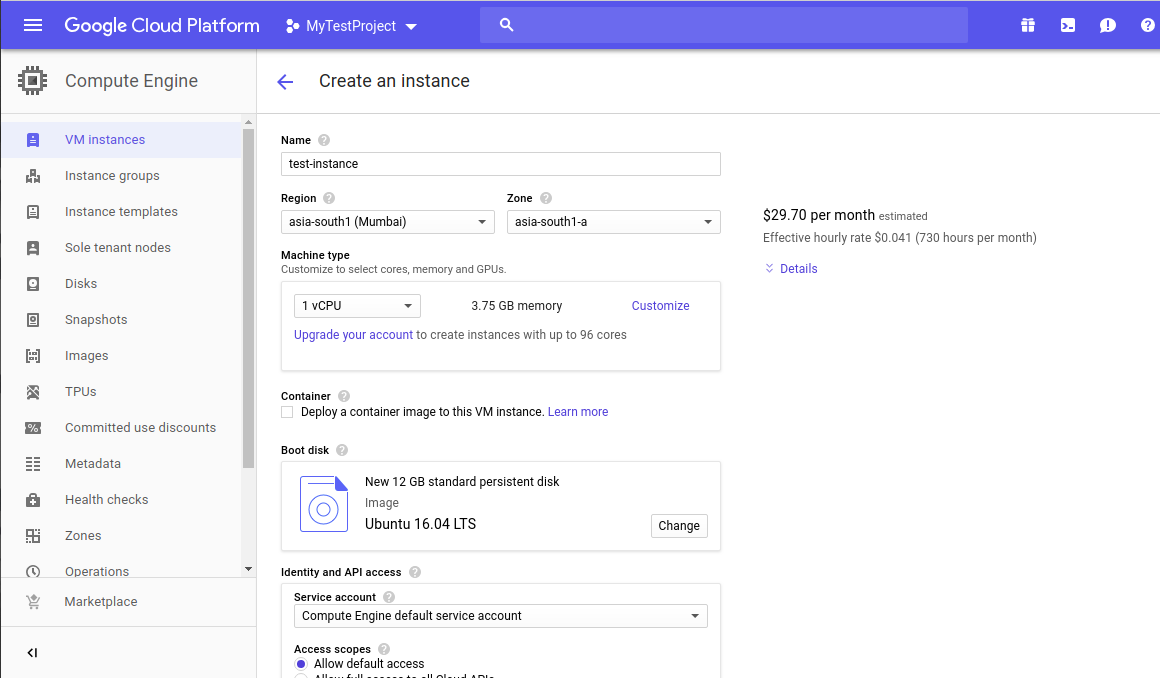
Next, you will see a “Create an instance” screen where you will need to provide the required configuration details. Fill in the Name of the instance as per your choice and provide the region and Zone information. Then choose your machine type with the desired CPU and memory. Leave the container section unchecked. From the Boot Disk section, click change to select the desired OS image and define the disk size. For this tutorial, I will select Ubuntu 16.04 image. In “Identity and API access” section, we will keep the default configurations. In the firewall section, we will select the “Allow HTTP traffic” and “Allow HTTPS traffic” sections.
Next, you will find the ” Management, security, disks, networking, sole tenancy” section which you can access from the drop-down arrow. These settings allows you to adjust the other settings as per your requirements. Here we will use the default settings.
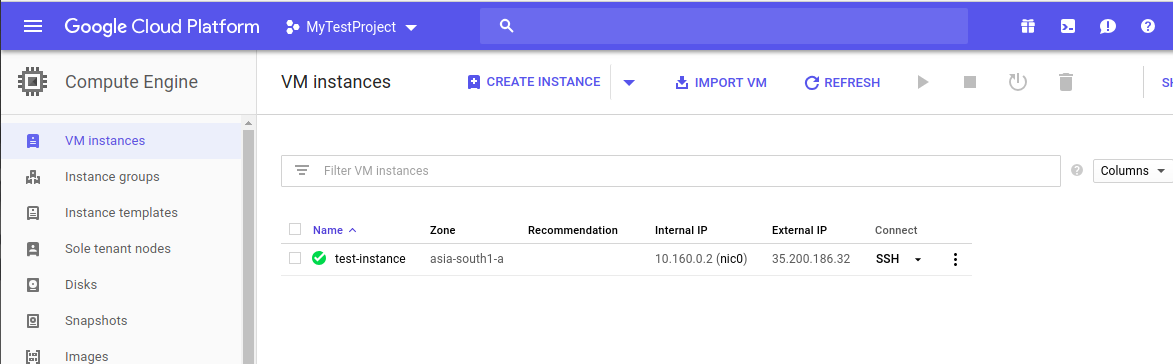
Finally, you can click the create button to create the instance. Your instance will be launched within a minute.
SSH Login to the Instance:
To ssh login to your Linux instance, you can login directly through the Google provided ssh “web interface” which can be accessed by clicking on the SSH button of the instance from the console. Alternatively, you can also ssh login remotely through either by using terminal in Linux systems and for windows systems, by a third party tool like “putty”.
Enabling Key based SSH Login:
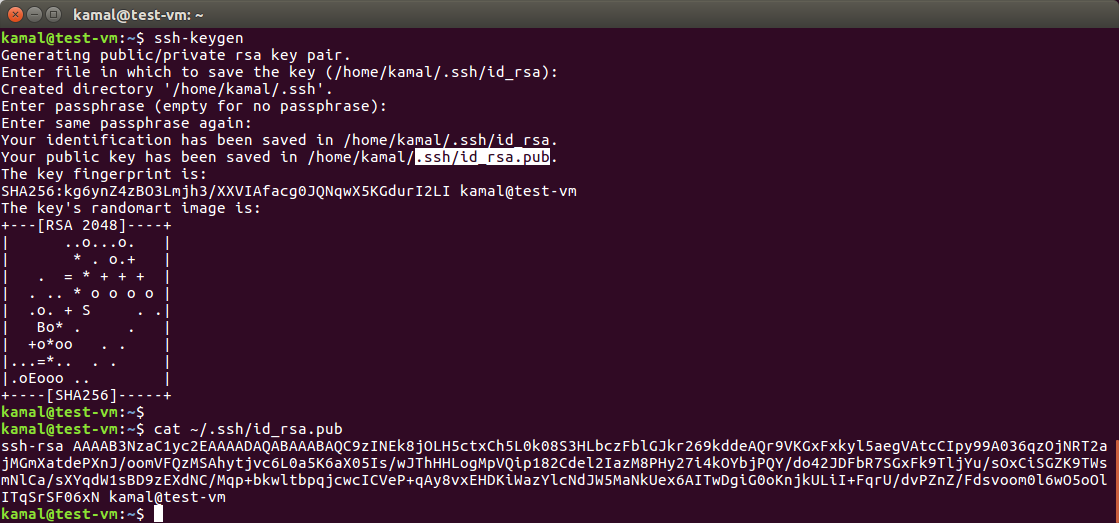
Key-pair Generation:- To ssh login remotely, first generate a public-private ssh key pair from your terminal for Linux and mac or putty for windows. Linux users can generate ssh key pairs by running the command “ssh-keygen” from the terminal. You can also generate the “key-pair” directly on the server by login through the ssh “web interface” of google cloud. The “key pairs” will be found in the users home directory in a hidden directory “.ssh” (path: ~/.ssh/) where “id_rsa” is the private key and “id_rsa.pub” is the public key.
|
1 2 3 4 |
ssh-keygen ls ~/.ssh/ cat ~/.ssh/id_rsa.pub |
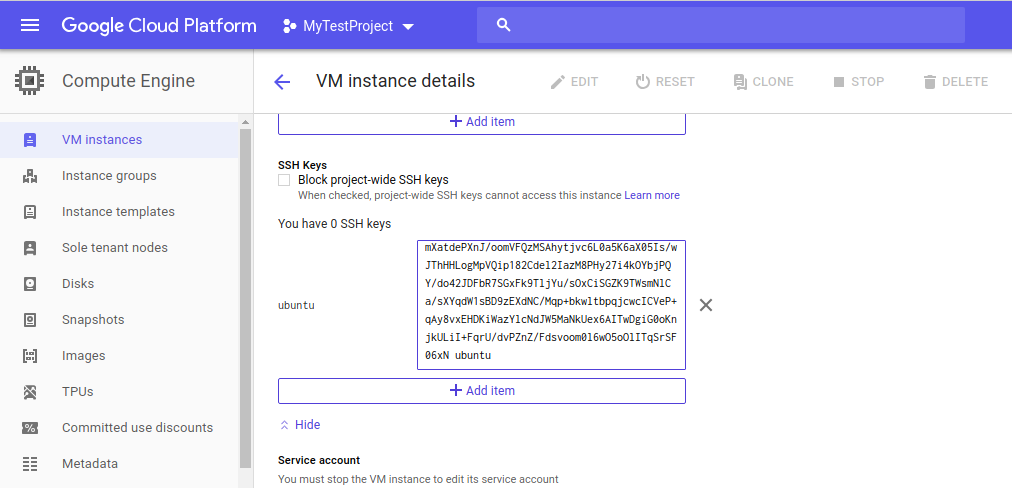
Configuring key-pair:- Now to configure ssh remote access, copy the contents of public ssh key to the GCP console. For this, click on the instance name on the GCP console, the details page of the instance will be shown. Click the edit button on the top of the page and then scroll down to the “SSH Keys” section. Click on the ” Show and edit” drop-down and copy and paste the generated public ssh key in the provided text box space.
Remember to change the “username@hostname” part at the end of the public key to a “username” that is already present in the instance. For example, for ubuntu instance, user “ubuntu” is present by default in the ubuntu instance. For other OS type, you can find the default users by ssh login into the instance through the Google ssh web interface. Then finally click on save and google will automatically insert the key into the instance for you. Now you will be able to login to the ubuntu instance using the private key.
For Linux users, use the below command from the terminal to ssh login to your instance with the same user using instance ip. Windows users can use the private key in putty to login to the instance with the specified user.
|
1 |
ssh ubuntu@instance_ip |

You can also use the private key with any other user or from any other instance by using the below command:
|
1 |
ssh -i /path-to-private-ssh-key-file ubuntu@instance_ip |
Enabling Password SSH Login:
To enable ssh login through password, you can edit the “/etc/ssh/sshd_config” file and change the line “PasswordAuthentication no” to “PasswordAuthentication yes” and restart the ssh server. Make sure you have a password set for the user.
|
1 2 |
sudo vim /etc/ssh/sshd_config service sshd restart |
You have now successfully created a VM instance on Google Cloud and configured remote ssh login.
Hope you enjoyed the blog… stay connected!
In case of any help or query, please contact us or raise a ticket at [email protected].

Be the first to comment.