Plesk can be installed on various Linux distributions and Windows, while Cpanel is mainly designed for a few Linux distributions.
For controlling all website-related services, such as DNS, Email, databases, FTP, and others, Plesk and Cpanel are web hosting control panels.
This guide will show you how to install the Plesk control panel and set up Bagisto on Ubuntu 22.04 on the AWS server.
The installation must meet the following minimal standards:
- OS- Ubuntu 22.04
- RAM – 1 GB
- Space- 30 GB
Step 1: Update your server.
# sudo apt update
Step 2: Download Plex Installer.
To be able to download the Plesk program, we need “wget.” Then run the below command to install it if you don’t already have it:
# sudo apt install wget
Now follow these steps to get the Plesk package:
# wget http://autoinstall.plesk.com/plesk-installer

Step 3: Install the Plesk control panel.
Once the file has been downloaded, create an executable file for the Plesk installer as seen below:
# sudo chmod 755 plesk-installer

then, execute the command below to continue with the installation:
# sudo ./plesk-installer
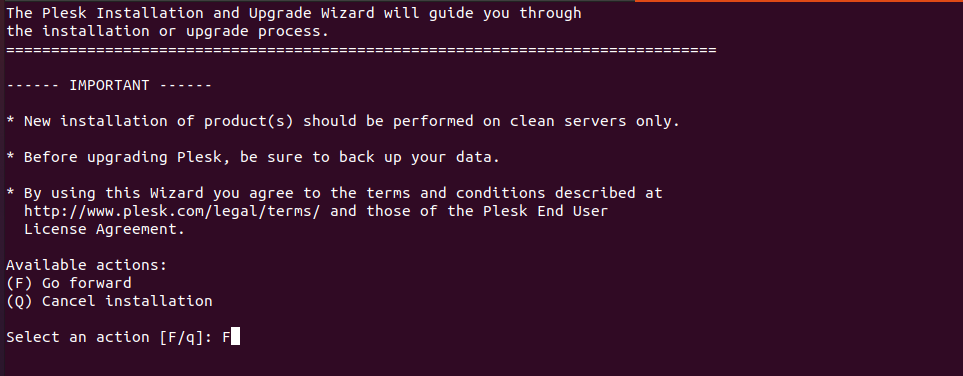
The license terms will be presented to you after the installation has begun operating. Press ‘Enter’ after typing ‘F’ to continue.
Then you will be asked if you wish to assist Plesk in improving their products by exchanging information with them before proceeding to the installation.
To accept or reject this, write ‘y’ or ‘n’ here.
Now select the Plesk installation type as shown below.
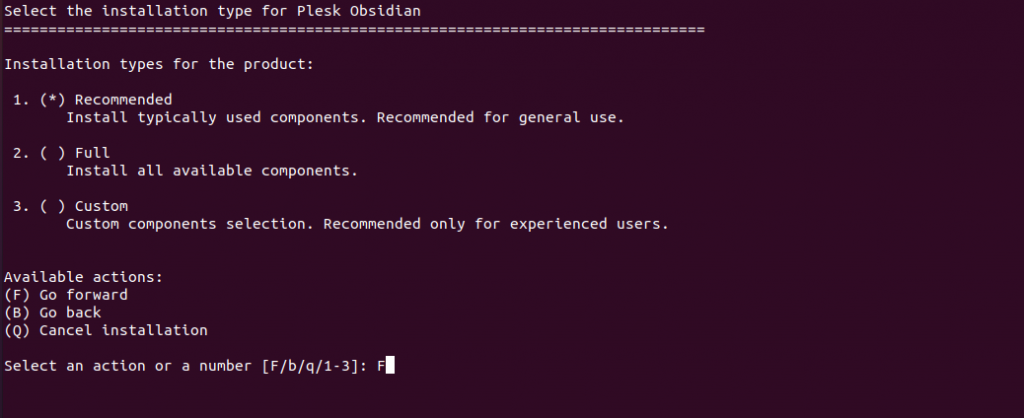
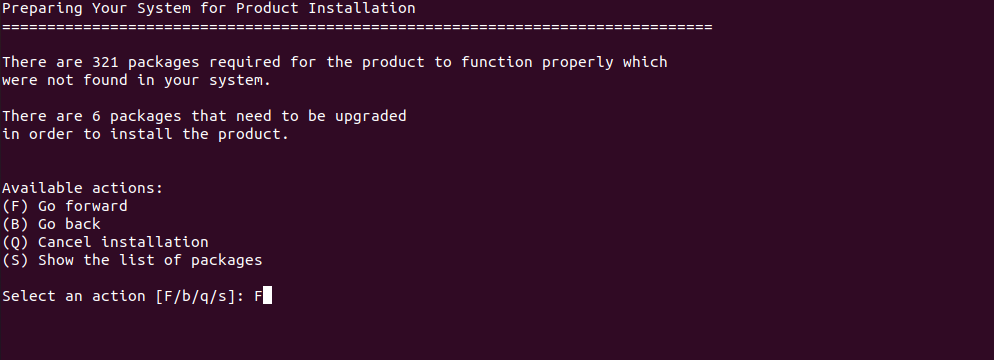
Further, type ‘F’ and hit ‘Enter’ to continue after choosing the installation type. If prompted to install any missing packages, choose F and press Enter to proceed.
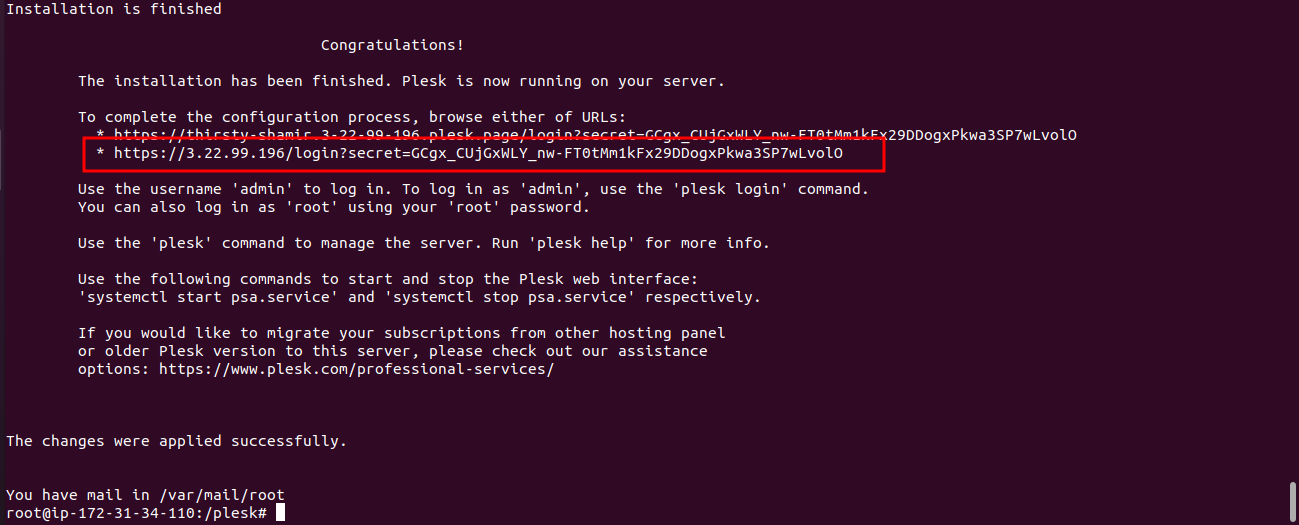
Now, Copy the highlighted URL and paste it into the Browser. Also, make sure ports 80 and 443 are open from the Security group.
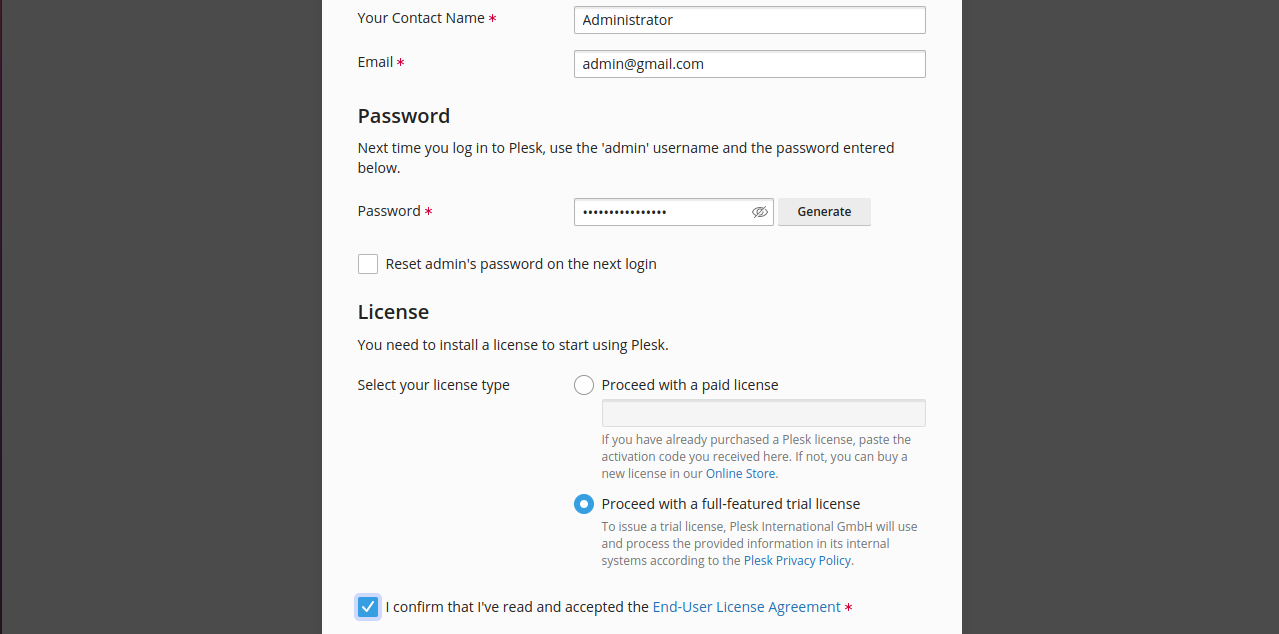
Step 4: Plesk Registration
Register for an admin password to login into Plesk. Enter all the details.
Note- Select the Radio button accordingly, if you don’t have a paid license then you can continue with the trial license.
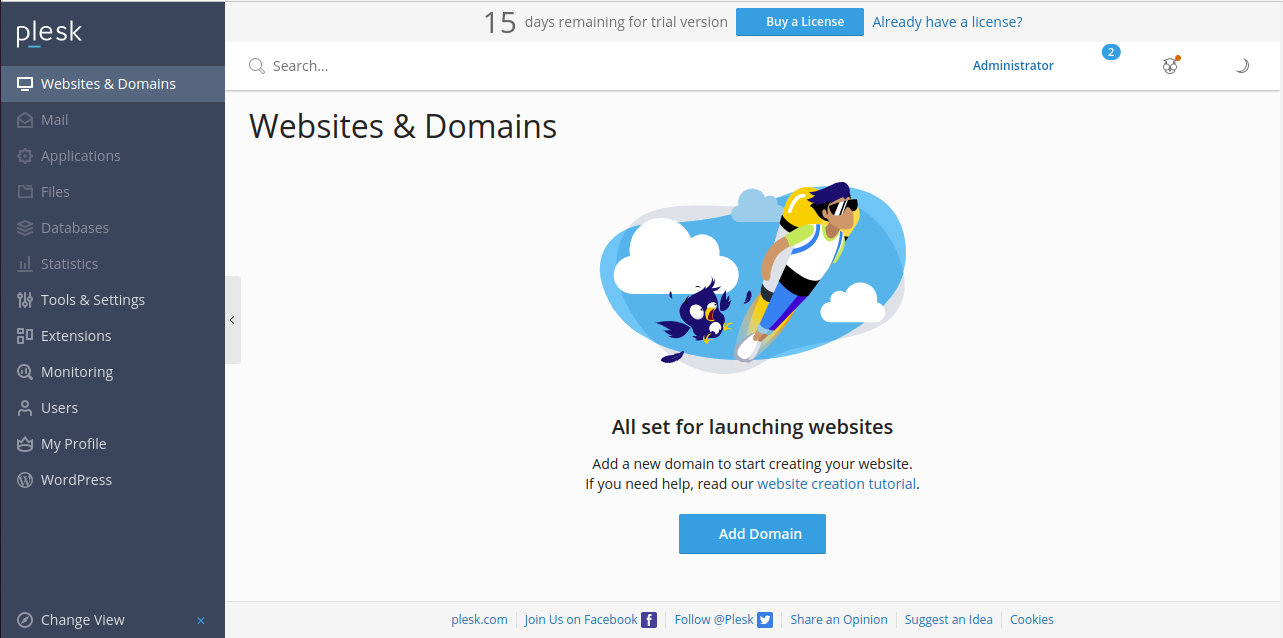
The Plesk installation has been successful and you will see the below page –
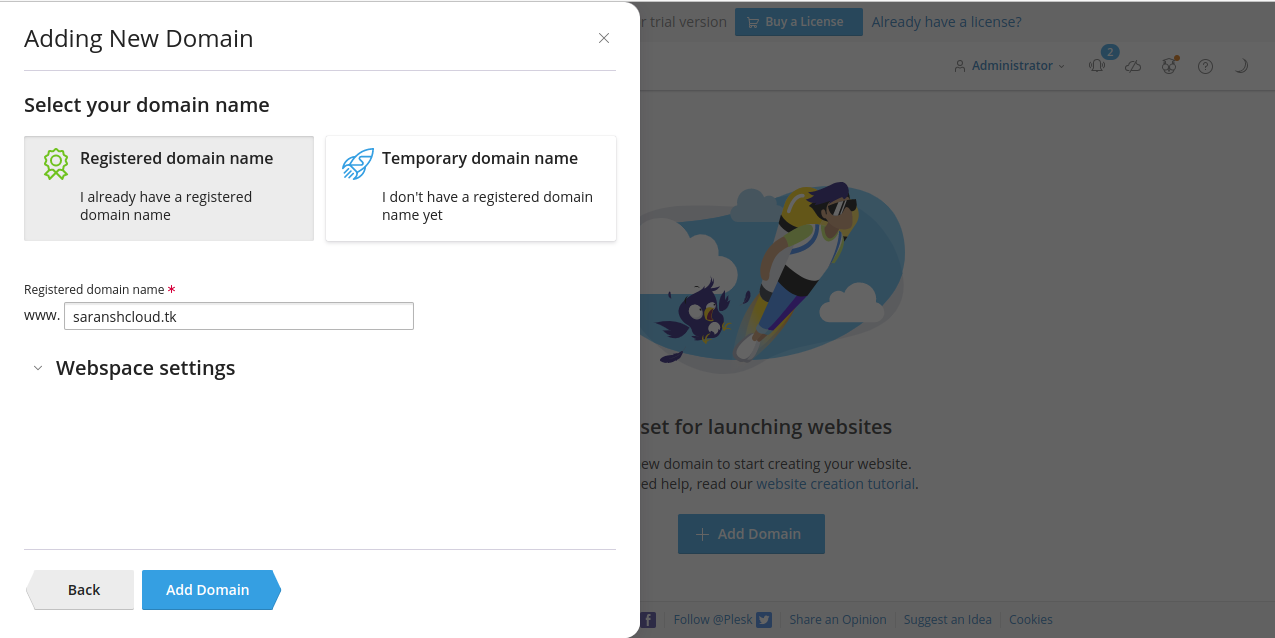
Step 5: Adding Domain
Click on Add Domain -> Blank Website. Enter your registered domain name here –
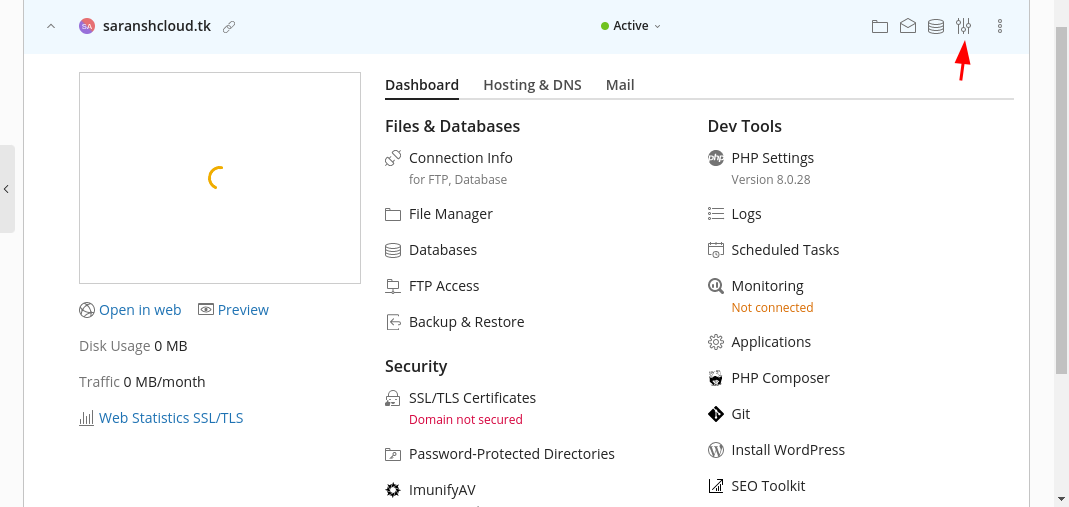
Click on the below icon to continue with the domain configurations –
Enter the Document root path and select your Preferred domain, if you want to access your website with www.<domain_name>.com then select the radio button accordingly.

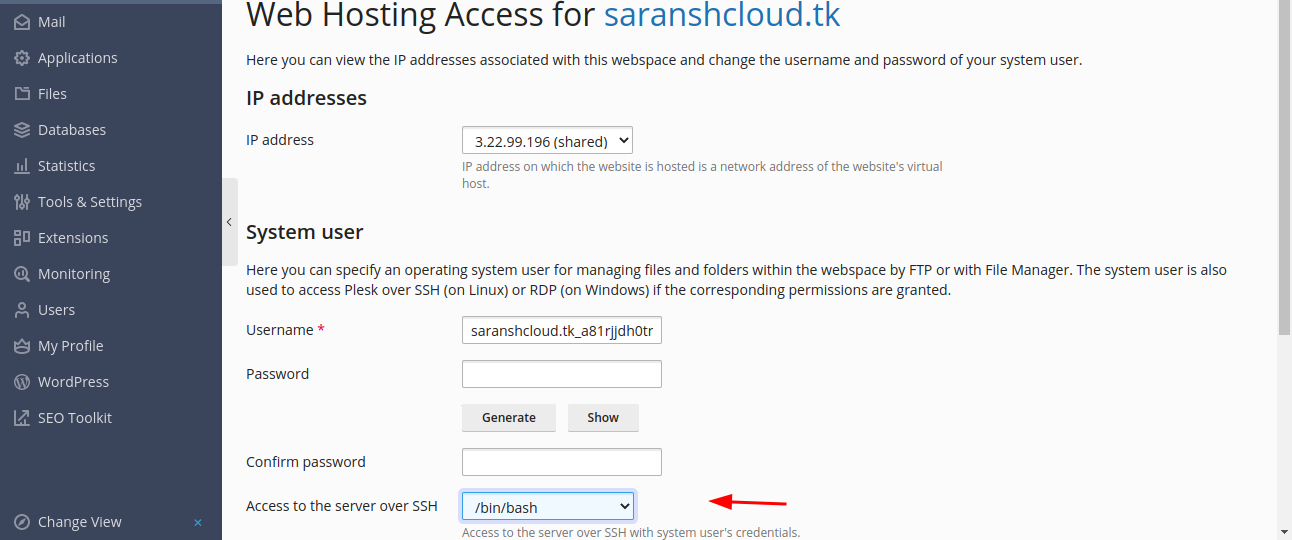
After setting up all the details now we need to allow SSH access to the user so that he can run the commands for the user which has already been created by default when we added the domain.


Provide /bin/bash shell to the user and click on apply and then ok
Step 6- Accessing the terminal
Now go back to the main dashboard and then click on “SSH Terminal” to access the terminal

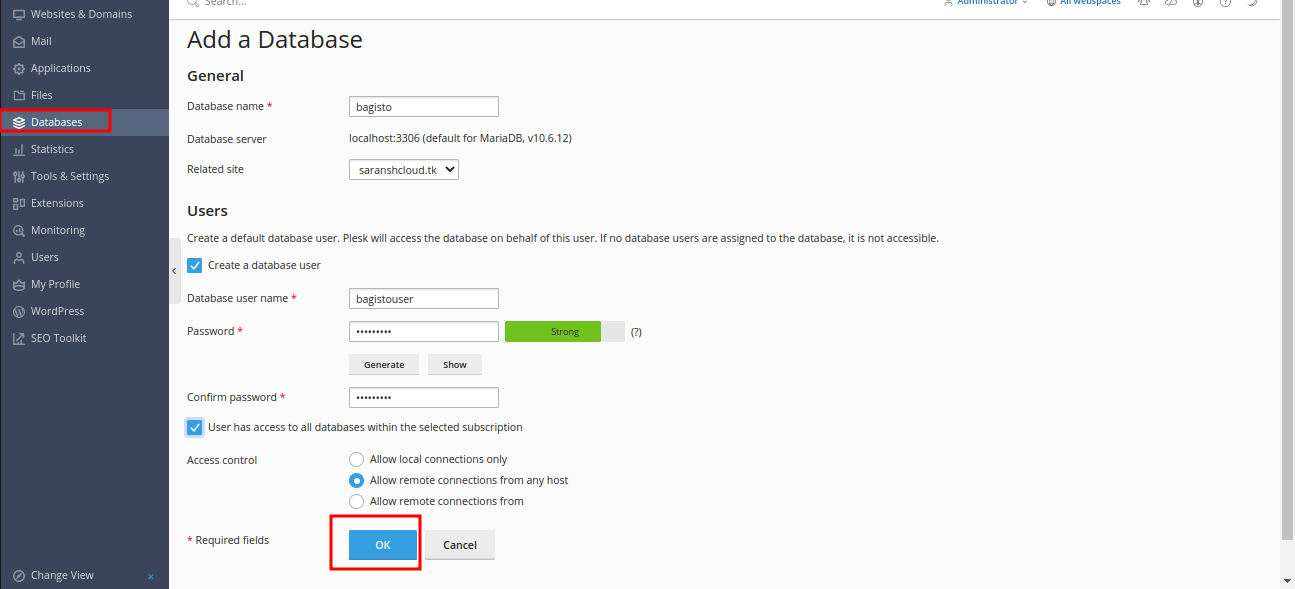
Step 7- Creating Database
In this step, click on the “Databases” section on the left and save all details in a notepad for future steps.
Fill in all the required details to create a database and then click on ok to proceed further.
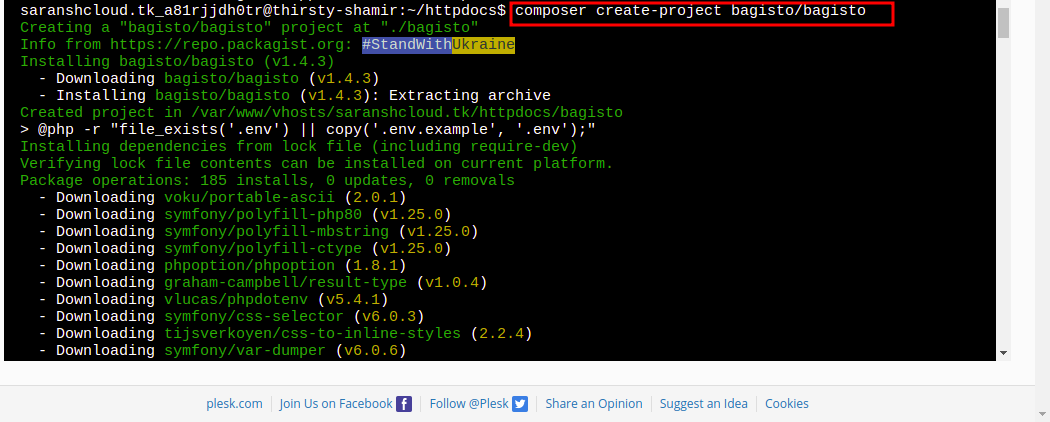
Step 8- Installing Bagisto
# cd /var/www/vhosts/saranshcloud.tk/httpdocs
Remove extra files if present in the above directory by using the below command
# rm -rf *
Now Create a bagisto project with the help of a composer
# composer create-project bagisto/bagisto
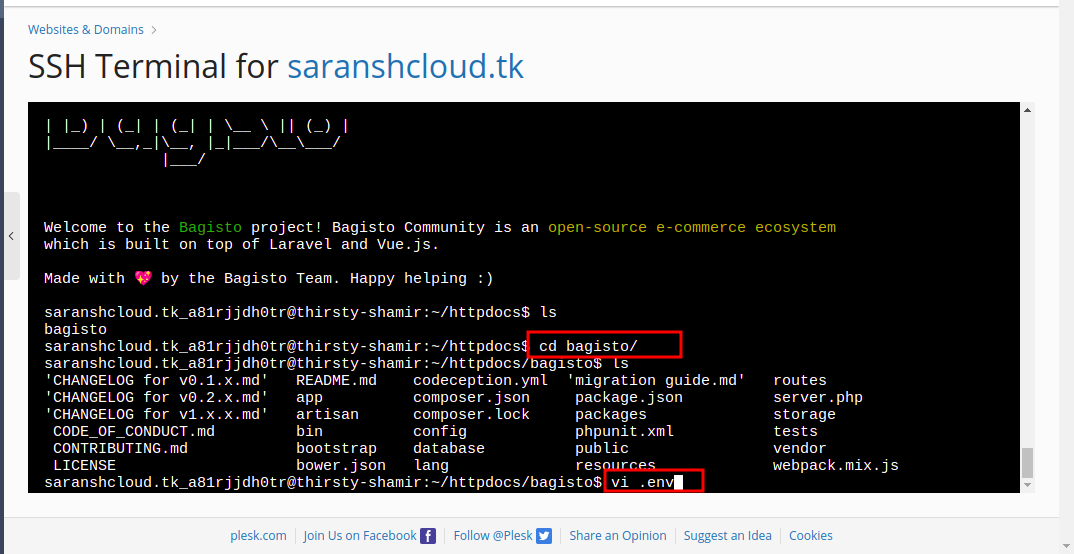
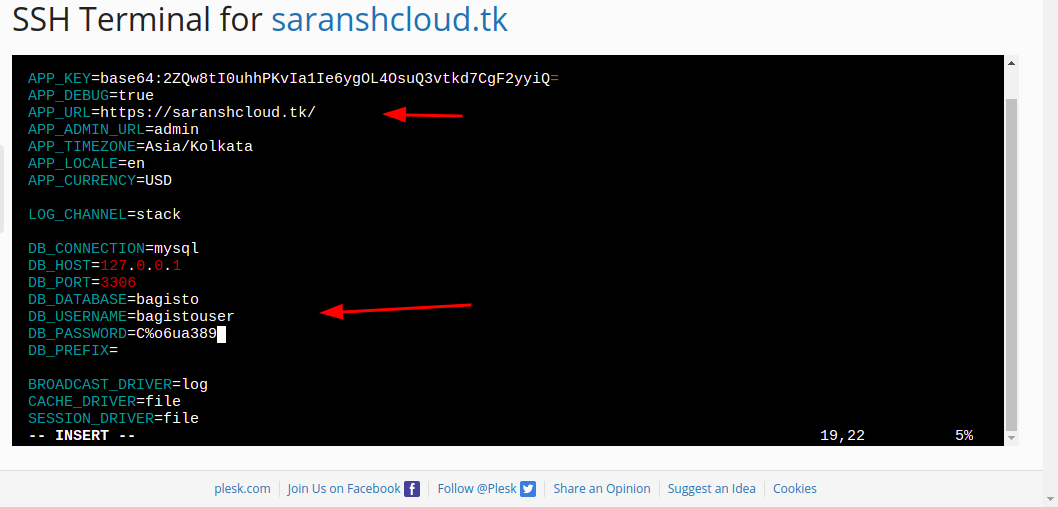
Enter Database details like DB name, user, password, and app URL inside the env file and then Save it.
Then run the below command to create tables in the created database.
# php artisan bagisto:install

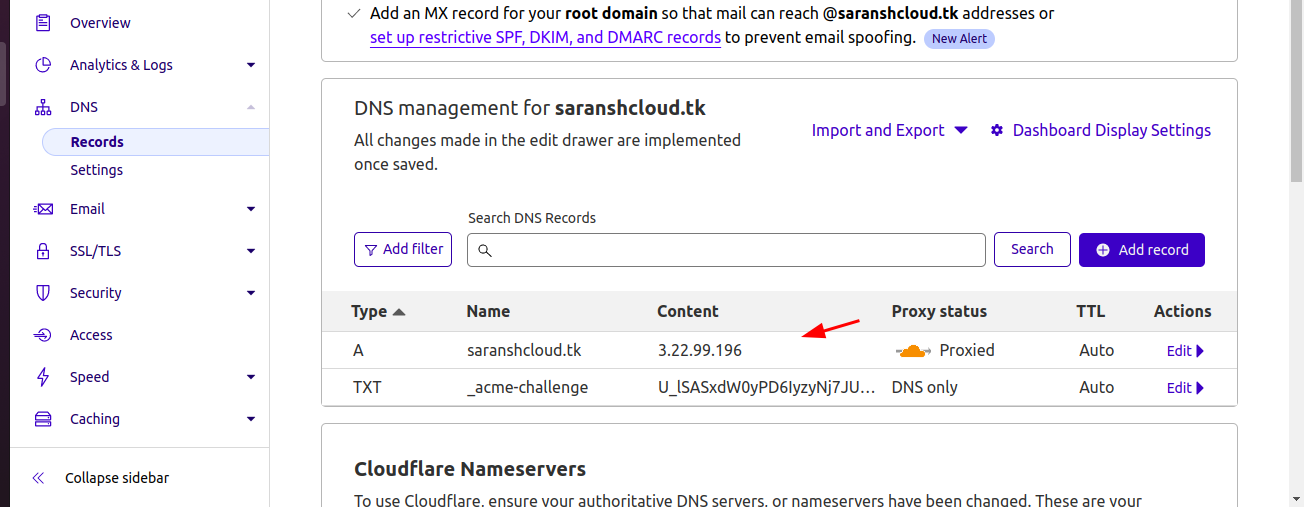
Step 9- Adding server IP to DNS
Now map the domain with the server IP. In my case, I am using Cloudflare as my DNS manager.
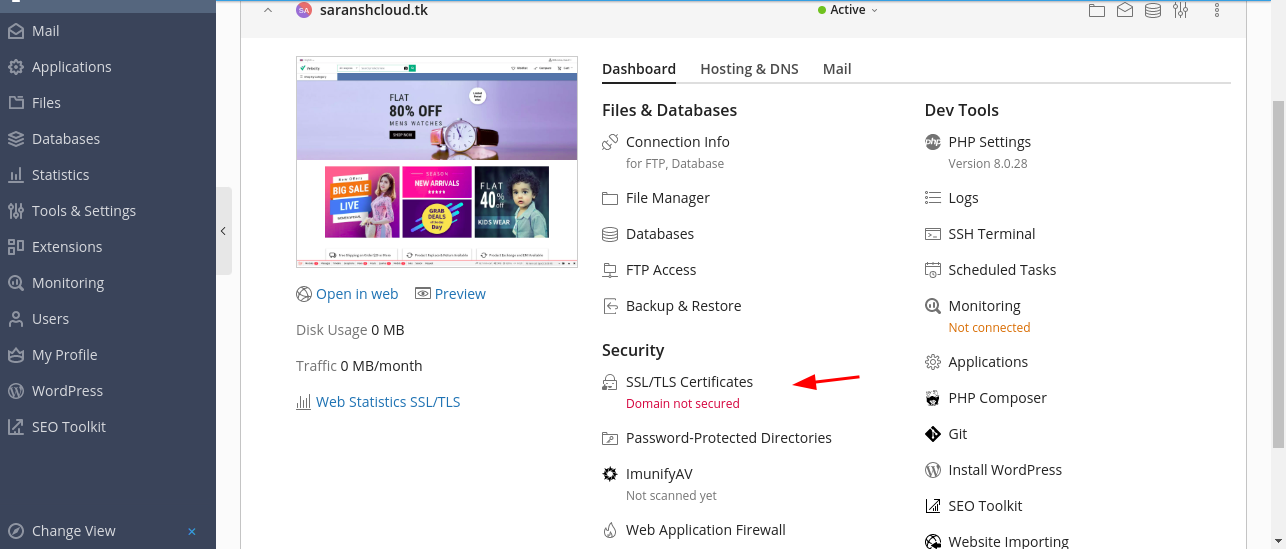
Step 10- Installing the Let’s Encrypt certificate
In this step, we are going to install an SSL so that the site can be secure and work with HTTPS protocol.
In this, we are going to install the Let’s Encrypt certificate which provides SSL free for 3 months.
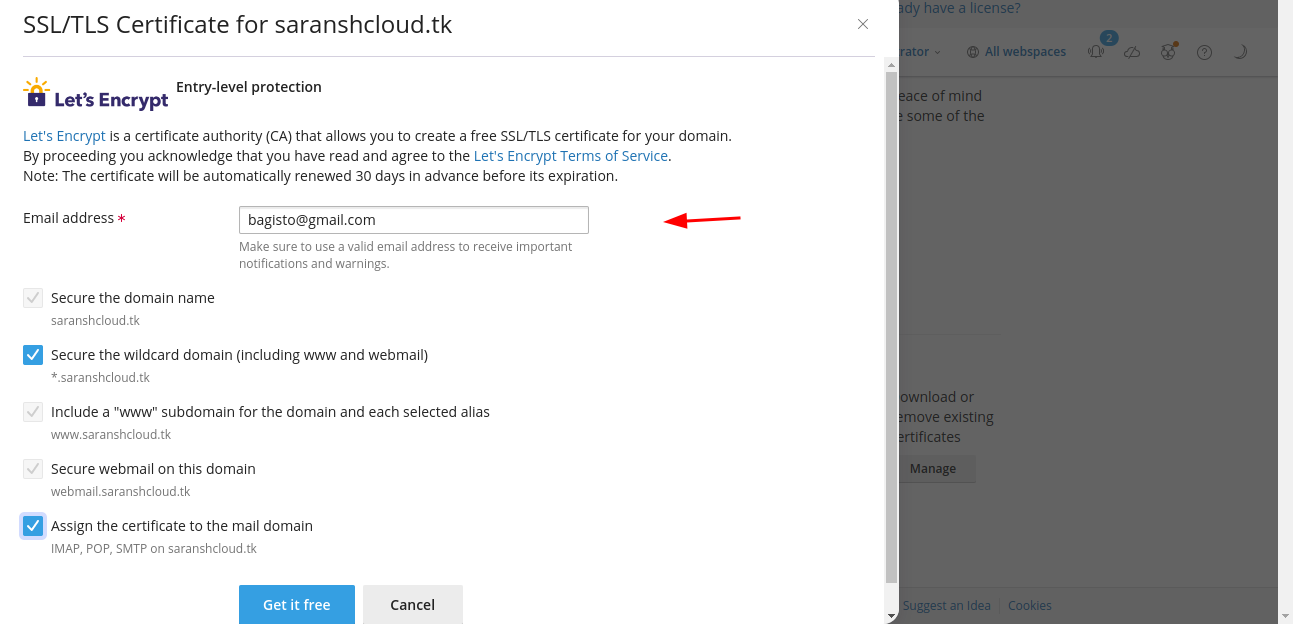
To enable SSL “Go to the SSL/TLS Certificate tab”
Click on Install
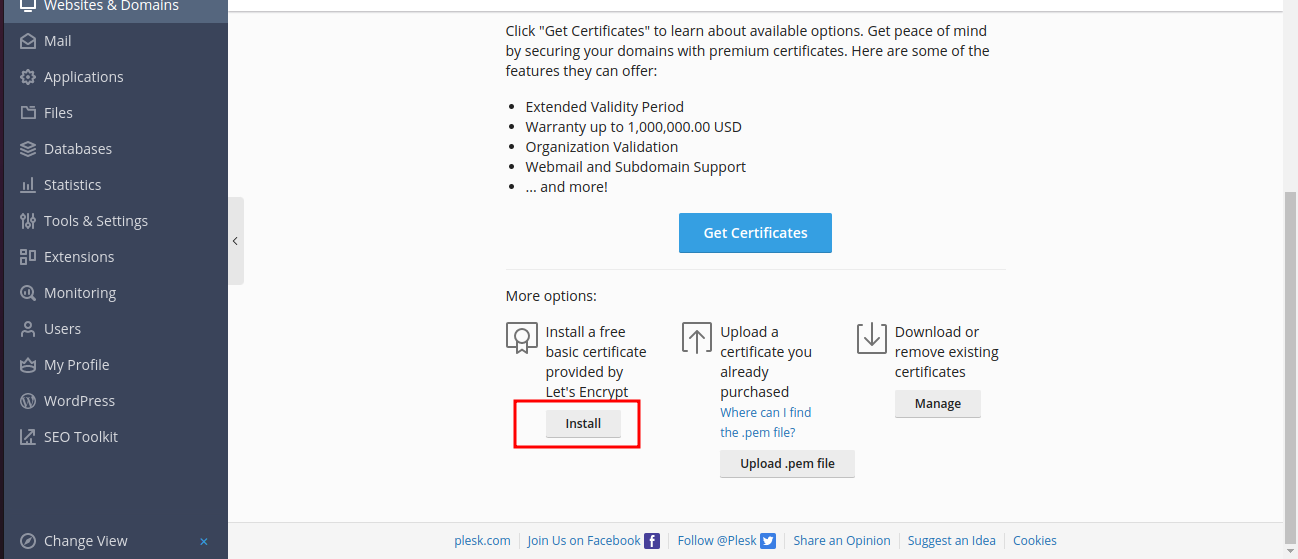
Enter your Email address and tick all the checkboxes after that click on ‘Get it free’
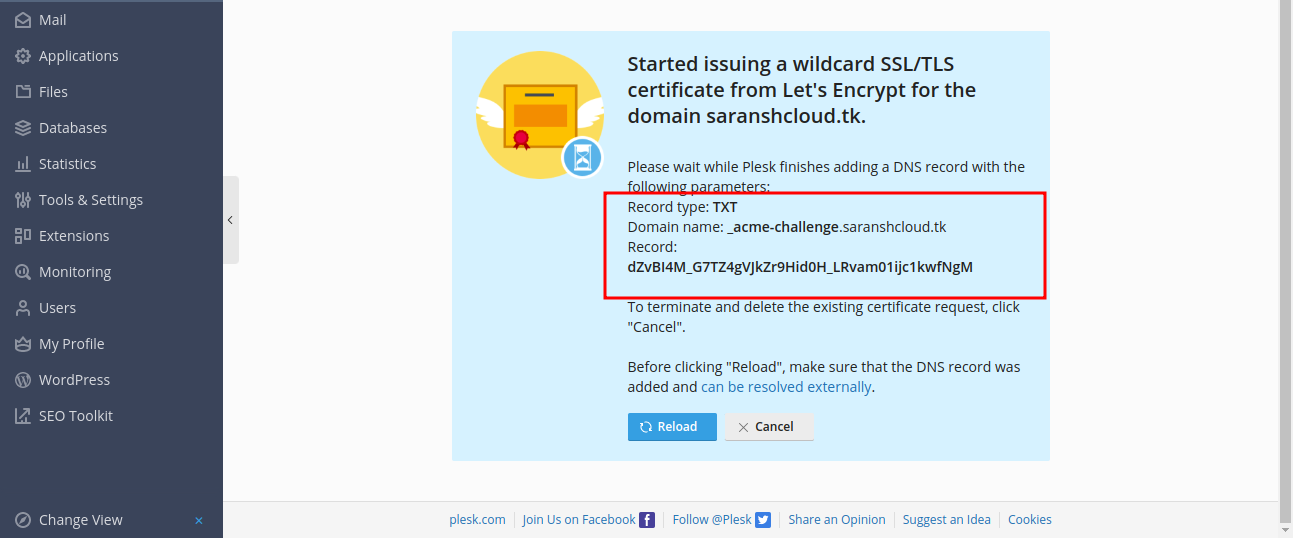
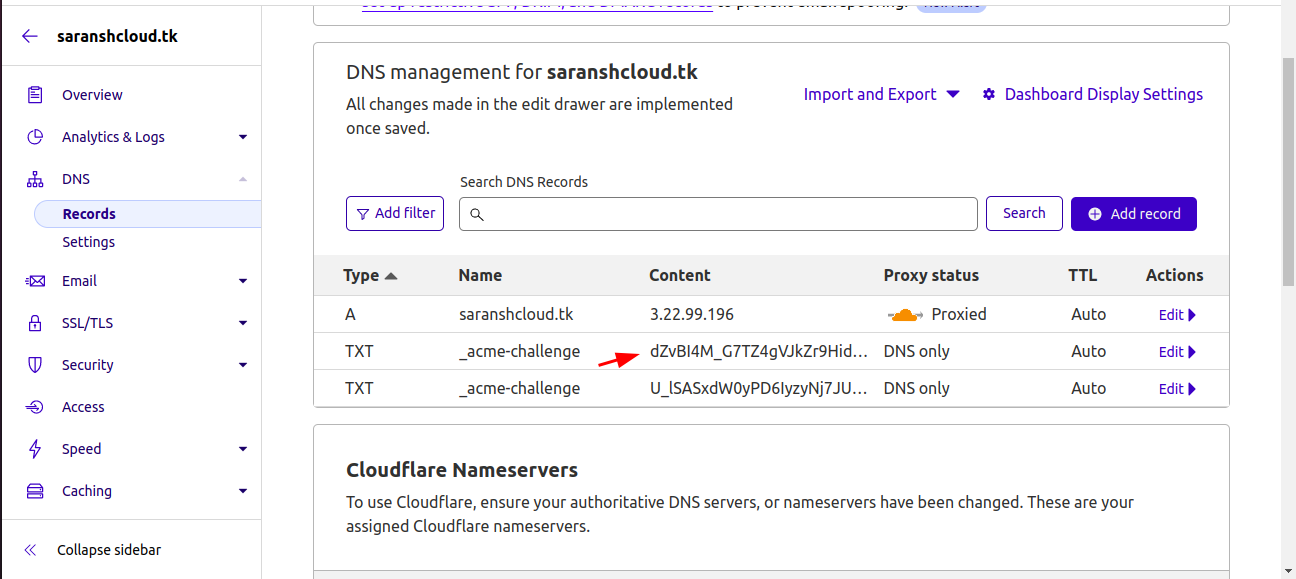
Add the TXT record with its value as given in the DNS manager
Step 11- Accessing the website
Finally, hit the domain name in the browser. You should get the below screen on the browser
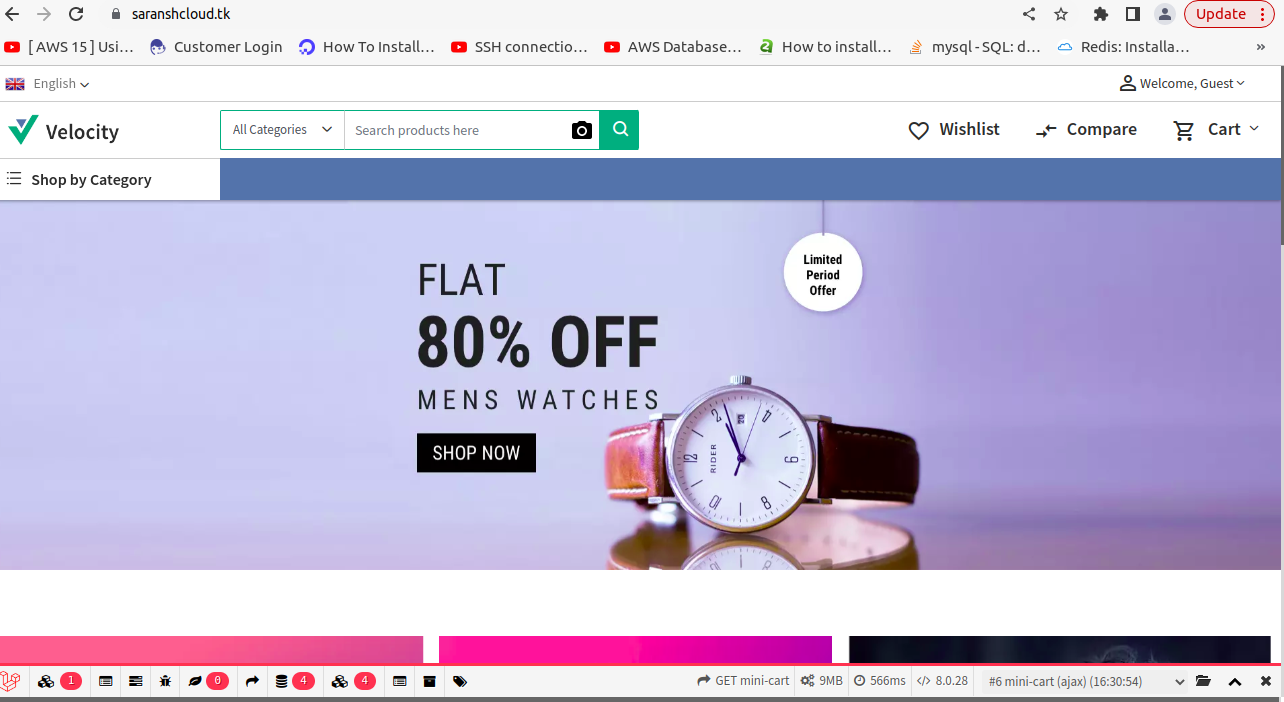
The bagisto installation has been done successfully.
Need Support?
Thank You for reading this Blog!
For further more interesting blogs, keep in touch with us. Also if you need any kind of support, simply raise a ticket at https://webkul.uvdesk.com/en/.
For further help or queries, please contact us or raise a ticket.

1 comments