In this blog, we will learn how to install and configure Apache Kafka, which is distribute publish subscribe messaging system and a robust queue which handle high volume of data and enables to pass message from one end point to another. It is use for both offline as well as online message consumption. Click here for more
Prerequisites :-
- Ubuntu 18.04
- Root privileges
What we will do?
- Install Java OpenJDK 11
- Install Apache Zookeeper
- Download and Setup Apache Kafka
- Add Apache Kafka and Zookeeper as s Service
- Test complete setup
Install Java OpenJDK 11 :-
Apache Kafka is written in Java and Scala, so we need to install Java in our server. Update and upgrade the repository and packages before installing new any new packages.
|
1 2 |
sudo apt update sudo apt upgrade |
Now install the OpenJDK 11 in ubuntu 18.04.
|
1 |
sudo apt install default-jdk |

|
1 |
java --version |

Install Apache Zookeeper :-
Apache Kafka uses zookeeper for electing leader in Kafka broker and use to store basic metadata like (information about topics, brokers, consumer offsets and so on).
Now we will install zookeeper in ubuntu 18.04 from ubuntu repository.
|
1 |
sudo apt install zookeeperd -y |

Download and setup Apache Kafka :-
In this part we will download Kafka from its official website, and then install and configure it as a non-root user.
Now add new user named ‘kafka’ and set password for the user.
|
1 2 |
sudo useradd -d /kafka -s /bin/bash kafka sudo passwd kafka |

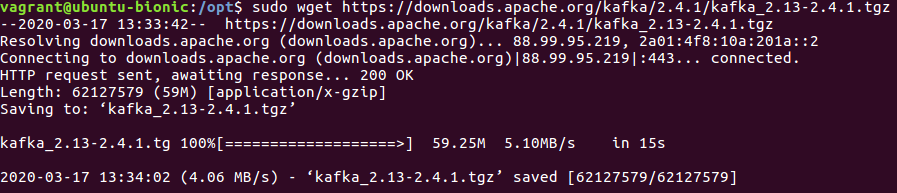
Now go to /opt directory and download the Kafka.
|
1 2 |
cd /opt sudo wget https://downloads.apache.org/kafka/2.4.1/kafka_2.13-2.4.1.tgz |
Then create new Kafka directory.
|
1 |
mkdir -p /kafka |
Extract the kafka_*.tgz in Kafka directory and change the owner permissions for the directory.
|
1 2 |
sudo tar -xf kafka_2.13-2.4.1.tgz -C /kafka --strip-components=1 sudo chown -R kafka:kafka /kafka |
Now login into Kafka user to configure some files.
|
1 2 |
sudo su - kafka vim config/server.properties |
Paste the following term to the end of file.
|
1 |
delete.topic.enable = true |
Then use “esc”, :wq! to save and exit from the file and then use exit to exit from kafka user.
The Kafka configuration has been completed.
Add Apache Kafka and Zookeeper as a Service :-
In this part of configuration we will add Kafka and Zookeeper as a service of our ubuntu machine.
For this go to /lib/systemd/system/ directory.
|
1 2 |
cd /lib/systemd/system/ sudo vim zookeeper.service |
Paste this lines in the file.
[Unit]
Requires=network.target remote-fs.target
After=network.target remote-fs.target
[Service]
Type=simple
User=kafka
ExecStart=/kafka/bin/zookeeper-server-start.sh /kafka/config/zookeeper.properties
ExecStop=/kafka/bin/zookeeper-server-stop.sh
Restart=on-abnormal
[Install]
WantedBy=multi-user.target
Save and exit the file with “esc”, :wq!.
Then create service file for Kafka.
|
1 |
sudo vim kafka.service |
Paste this lines in the file.
[Unit]
Requires=zookeeper.service
After=zookeeper.service
[Service]
Type=simple
User=kafka
ExecStart=/bin/sh -c ‘/kafka/bin/kafka-server-start.sh /kafka/config/server.properties’
ExecStop=/kafka/bin/kafka-server-stop.sh
Restart=on-abnormal
[Install]
WantedBy=multi-user.target
Save and exit the file with “esc”, :wq!.
Then after all this steps reload systemd configuration manager.
|
1 |
sudo systemctl daemon-reload |
Now start Zookeeper and Kafka service.
|
1 2 3 |
sudo systemctl enable zookeeper sudo systemctl start zookeeper sudo systemctl status zookeeper |

|
1 2 3 |
sudo systemctl enable kafka sudo systemctl start kafka sudo systemctl status kafka |

Now the Kafka and Zookeeper both are in active state and zookeeper is running on port ‘2181’ and kafka is running on port ‘9092’.
Test Complete Setup :-
Login to the kafka user and go to bin directory.
|
1 2 |
sudo su - kafka cd bin/ |
Now create a topic in Kafka.
|
1 |
./kafka-topics.sh --create --zookeeper localhost:2181 --replication-factor 1 --partitions 1 --topic CloudkulTesting |

Then run ‘kafka-console-consumer.sh’ for the ‘CloudkulTesting’ topic.
|
1 |
./kafka-console-consumer.sh --bootstrap-server localhost:9092 --topic CloudkulTesting --from-beginning |
Now open another terminal and follow the instructions.
Then run ‘kafka-console-producer.sh’ for the ‘CloudkulTesting’ topic.
|
1 |
./kafka-console-producer.sh --broker-list localhost:9092 --topic CloudkulTesting |

In the right side of image consumer consumes the message and in the left side of image producer produce the messages.
The setup as well as configuration of Kafka and Zookeeper on ubuntu 18.04 is completed successfully.

Be the first to comment.