An S3 bucket can be mounted in an AWS instance as a file system known as S3fs.
S3fs is a FUSE file system that allows you to mount an Amazon S3 bucket as a local file system. It behaves like a network-attached drive, as it does not store anything on the Amazon EC2, but a user can access the data on S3 from the EC2 instance.
Filesystem in Userspace (FUSE) is a simple interface for userspace programs to export a virtual file system to the Linux kernel. It also aims to provide a secure method for nonprivileged users to create and mount their own file-system implementations.
The S3fs-fuse project is written in Python backed by Amazon’s Simple Storage Service.
Amazon offers an open API to build applications on top of this service, which several companies have done, using a variety of interfaces (web, rsync, fuse, etc).
Steps to mount your S3 bucket to your Linux Instance
This tutorial assumes that you have a running Linux EC2 instance on AWS with root access and a bucket created in S3 which is to be mounted on your Linux Instance.
You will also require Access and Secret key pair with sufficient permissions of S3 or else an IAM access to generate or Create it.
We will perform the steps as a root user. You can also use the sudo command if you are a normal user with sudo access.
So let’s get started.
Step 1:- Update the system
If you are using a new Centos or Ubuntu instance then update the system.
-> For CentOS or Red Hat
|
1 |
yum update all |
-> For Ubuntu
|
1 |
apt-get update |

Step 2:- Install the dependencies
-> In CentOS or Red Hat
|
1 |
sudo yum install automake fuse fuse-devel gcc-c++ git libcurl-devel libxml2-devel make openssl-devel |
In Ubuntu or Debian
|
1 |
sudo apt-get install automake autotools-dev fuse g++ git libcurl4-gnutls-dev libfuse-dev libssl-dev libxml2-dev make pkg-config |

Step 3:- Clone s3fs source code from git
|
1 |
git clone https://github.com/s3fs-fuse/s3fs-fuse.git |

Step 4:- Install the code
Now change to source code directory, and compile and install the code with the following commands:
|
1 2 3 4 5 |
cd s3fs-fuse ./autogen.sh ./configure --prefix=/usr --with-openssl make sudo make install |

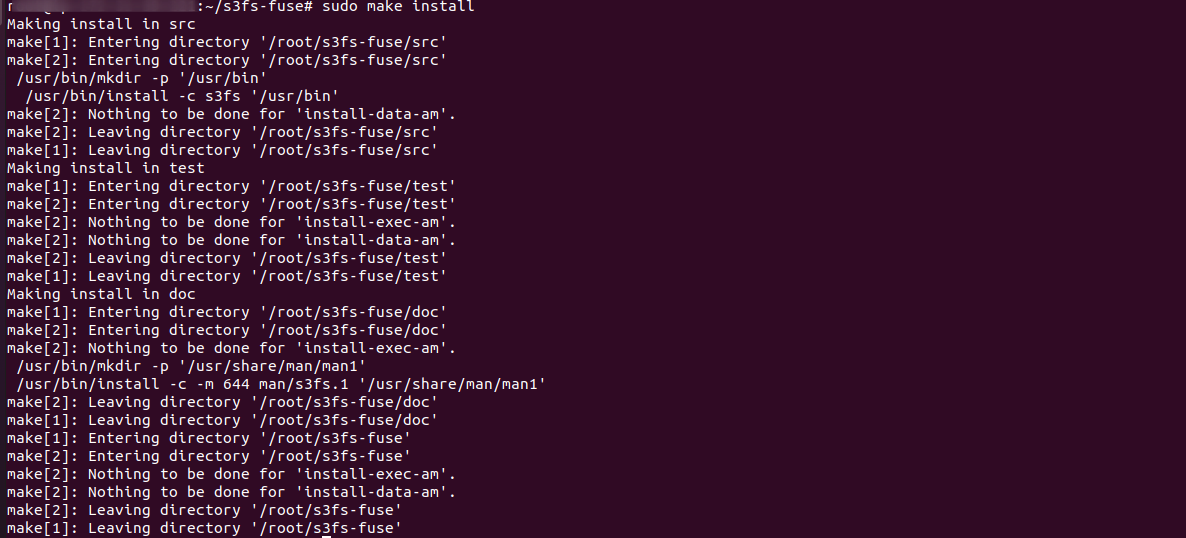
Step 5:- Check the s3fs command and installation
Use the below command to check where the s3fs command is placed in O.S. It will also tell you the installation is ok.
|
1 |
which s3fs |

Step 6:- Getting the access key and secret key.
You will need an AWS Access key and Secret key with appropriate permissions in order to access your s3 bucket from your EC2 instance.
You can easily manage your user permissions from the IAM (Identity and Access Management) Service provided by AWS.
Create an IAM user with S3 full access(or with a role with sufficient permissions) or use the root credentials of your Account. Here we will use the root credentials for simplicity.
Go to AWS Menu -> Your AWS Account Name -> My Security Credentials. Here your IAM console will appear.
You have to go to Users > Your Account name and under the permissions Tab, check whether you have sufficient access to the S3 bucket. If not, you can manually assign an existing “S3 Full-Access” policy or create a new policy with sufficient permissions.
Now go to the Security Credentials Tab and Create an Access Key. A new Access Key and Secret Key pair will be generated.
Here you can see the access key and secret key (the secret key is visible when you click on the show tab) which you can also download. Copy these keys separately.
Note that you can always use an existing access and secret key pair. Alternatively, you can also create a new IAM user and assign sufficient permissions to generate the access and secret key.
Step 7:- Paste the access key and secret key
Create a new file in /etc with the name passwd-s3fs and Paste the access key and secret key in the below format.
|
1 2 |
touch /etc/passwd-s3fs vim /etc/passwd-s3fs |
|
1 |
Your_accesskey:Your_secretkey |
Step 8:- Change the permission of the file
|
1 |
sudo chmod 640 /etc/passwd-s3fs |
Step 9:- Mount S3 bucket
Now create a directory or provide the path of an existing directory and mount S3bucket in it.
If you have a simple bucket without a dot(.) in the bucket name, use the commands used in point “a” or else for the bucket with a dot(.) in the bucket name, follow step “b”:
a) Bucket name without dot(.):
|
1 2 |
mkdir /mys3bucket s3fs your_bucketname -o use_cache=/tmp -o allow_other -o uid=1001 -o mp_umask=002 -o multireq_max=5 /mys3bucket |
where, “your_bucketname” = the name of your S3 bucket that you have created on AWS S3, use_cache = to use a directory for its cache purpose, allow_other= to allow other users to write to the mount-point, uid= uid of the user/owner of the mountpoint (can also add “-o gid=1001” for group), mp_umask= to remove other users permission. multireq_max= parameter to send request to s3 bucket, /mys3bucket= mountpoint where the bucket will be mounted.
You can make an entry in /etc/rc.local to automatically remount after reboot. Find the s3fs binary file by the “which” command and make the entry before the “exit 0” line as below.

|
1 2 |
which s3fs /usr/local/bin/s3fs |
|
1 |
nano /etc/rc.local |
|
1 |
/usr/local/bin/s3fs your_bucketname -o use_cache=/tmp -o allow_other -o uid=1001 -o mp_umask=002 -o multireq_max=5 /mys3bucket |
b) Bucket name with a dot(.):
|
1 2 |
mkdir /mys3bucket s3fs your_bucketname /mys3bucket -o use_cache=/tmp -o allow_other -o uid=1001 -o mp_umask=002 -o multireq_max=5 -o use_path_request_style -o url=https://s3-{{aws_region}}.amazonaws.com |
where, “your_bucketname” = the name of your S3 bucket that you have created on AWS S3, use_cache = to use a directory for its cache purpose, allow_other= to allow other users to write to the mount-point, uid= uid of the user/owner of the mountpoint (can also add “-o gid=1001” for group), mp_umask= to remove other users permission. multireq_max= parameter to send request to s3 bucket, /mys3bucket= mountpoint where the bucket will be mounted .
Remember to replace “{{aws_region}}” with your bucket region (example: eu-west-1).
You can make an entry in /etc/rc.local to automatically remount after reboot. Find the s3fs binary file by the “which” command and make the entry before the “exit 0” line as below.
|
1 |
which s3fs /usr/local/bin/s3fs |
|
1 |
nano /etc/rc.local |
|
1 |
s3fs your_bucketname /mys3bucket -o use_cache=/tmp -o allow_other -o uid=1001 -o mp_umask=002 -o multireq_max=5 -o use_path_request_style -o url=https://s3-{{aws_region}}.amazonaws.com |
To debug at any point, add “-o dbglevel=info -f -o curldbg” in the s3fs mount command.
Step 10:- Check mounted s3 bucket
Output will be similar as shown below but Used size may differ.
|
1 |
df -Th |
“or”
|
1 |
df -Th /mys3bucket |
|
1 2 |
Filesystem Type Size Used Avail Use% Mounted on s3fs fuse.s3fs 256T 0 256T 0% /mys3bucket |

If it shows the mounted file system, you have successfully mounted the S3 bucket on your EC2 Instance. You can also test it further by creating a test file.
|
1 2 3 4 |
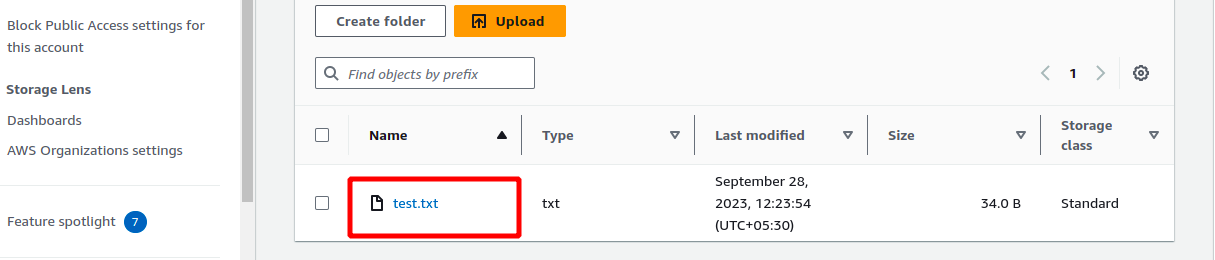
cd /mys3bucket echo "this is a test file to check s3fs" >> test.txt ls |
This change should also be reflected on the S3 bucket. So log in to your S3 bucket to verify if the test file is present or not.

You can check in s3 bucket test.txt file will show you
Note: If you already had some data in the s3 bucket and it is not visible, then you have to set permission in ACL at the S3 AWS management console for that s3 bucket.
Also, If you get any s3fs error such as “transport endpoint is not connected”, you have to unmount and remount the file system. You can also do so through a custom script to detect and perform remount automatically.
Congrats!! You have successfully mounted your S3 bucket to your EC2 instance. Any files written to /mys3bucket will be replicated to your Amazon S3 bucket.
Need Support?
Thank You for reading this Blog!
For further more interesting blogs, keep in touch with us. If you need any kind of support, simply raise a ticket at https://webkul.uvdesk.com/en/.
For further help or queries, please contact us or raise a ticket.

73 comments