Nowadays, cloud teams are struggling with how to maintain the security of apps and data in the cloud. Cloud storage services holding data that usually reside on target hackers are not susceptible fundamentally but because they are often configured incorrectly.
So, in this blog, we’ll learn about AWS RDS Database encryption.
AWS RDS encryption supported instance types
Most DB instance classes in Amazon RDS may be encrypted. The table below shows which DB instance types don’t support Amazon RDS encryption:
| Instance type | Instance Class |
|---|---|
| General-purpose (M1) | db.m1.small db.m1.medium db.m1.large db.m1.xlarge |
| Memory optimized (M2) | db.m2.xlarge db.m2.2xlarge db.m2.4xlarge |
| Burstable (T2) | db.t2.micro |
Limitations
For encrypting DB instances, Amazon RDS has the following constraints:
- When an Amazon RDS DB instance is created, encryption can be enabled but not after the creation of the DB instance. Therefore, it is possible to enable it for existing RDS by copying an encrypted snapshot of an unencrypted RDS.
- Encrypted DB instances can’t be modified to disable encryption.
Simply click the link to learn more about the limitations.
Encrypting New AWS RDS Database
1. Open the Amazon RDS console after logging into the AWS Management Console.
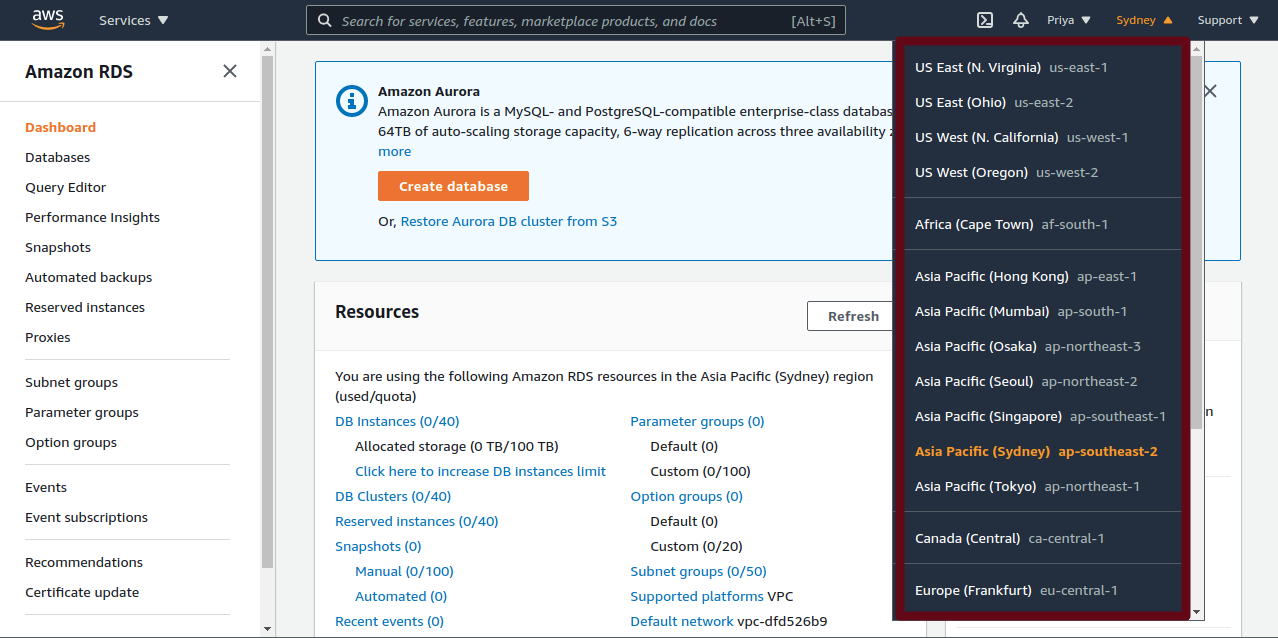
2. Then, Select the AWS Region you want to create the DB instance from the top right corner of the Amazon RDS dashboard.
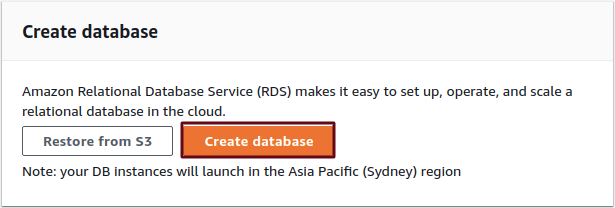
3. Scroll down and Choose Create Database.
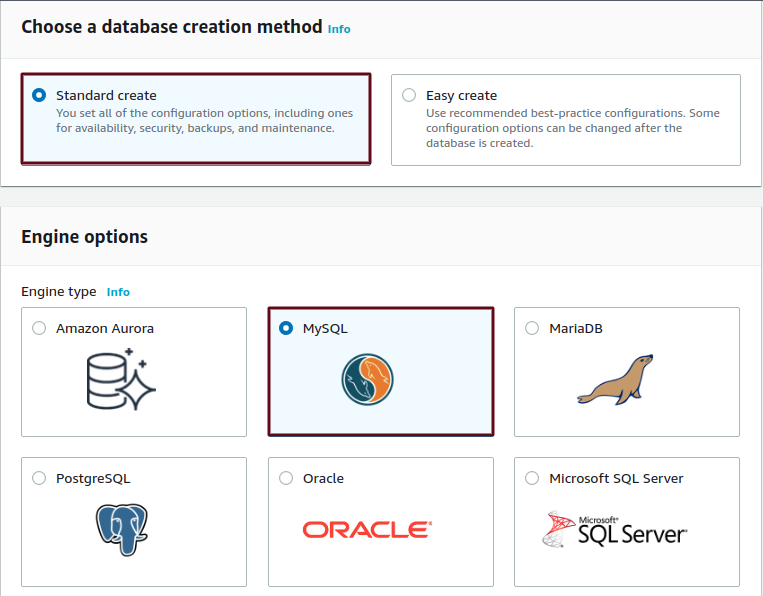
4. Select Standard Create as the database creation method, and then choose an engine type under the Engine options.
5. Similarly, choose the Edition, Engine Version, and Templates, and customize the parameters as per your preference. When it’s done, click the Additional Configuration Option.

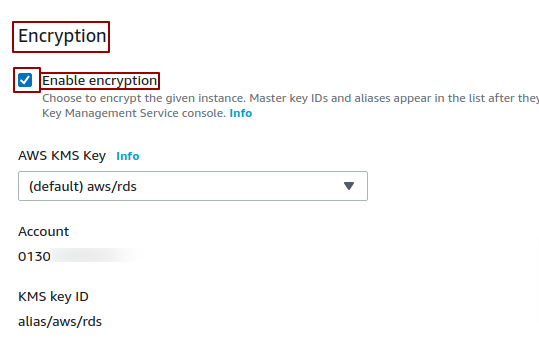
6. Furthermore, scroll down and tick the Enable Encryption Box.
7. At last, click on Create database.
As a result, your new database is encrypted.
Encrypting Existing AWS RDS Database
Prepare your existing database for encryption by following these steps:
1. Open the Amazon RDS console after logging into the AWS Management Console.
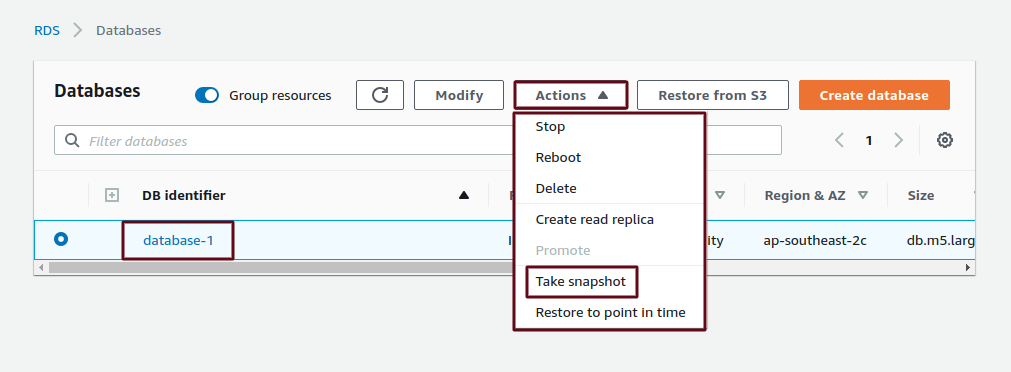
2. Make sure you’re in the right AWS region before choosing the database you want to encrypt.
3. Click the “Actions” in the upper right corner of your dashboard and then choose, “Take snapshot”.
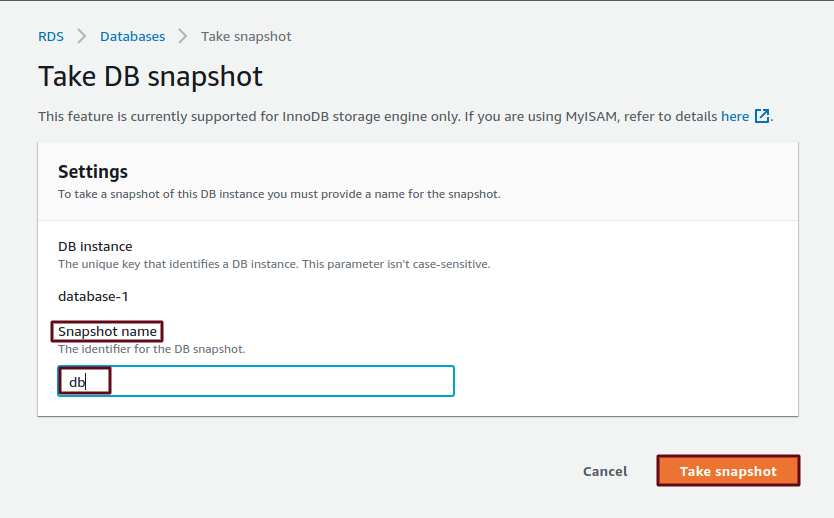
4. Provide a “snapshot name”, then click on “Take Snapshot”.
5. Wait until the snapshot is completed (the length of time will be determined by the size of your database).
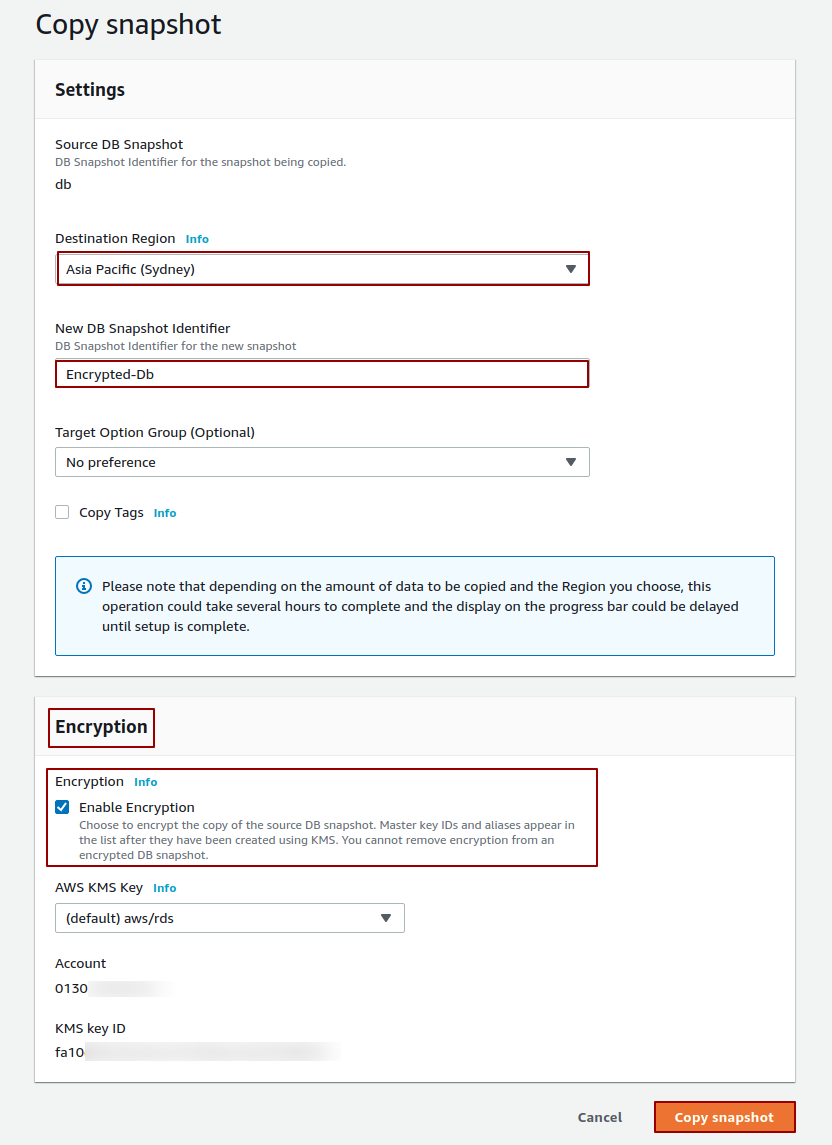
After you’ve completed it, click on the “Actions” in the upper right and choose “Copy Snapshot”.
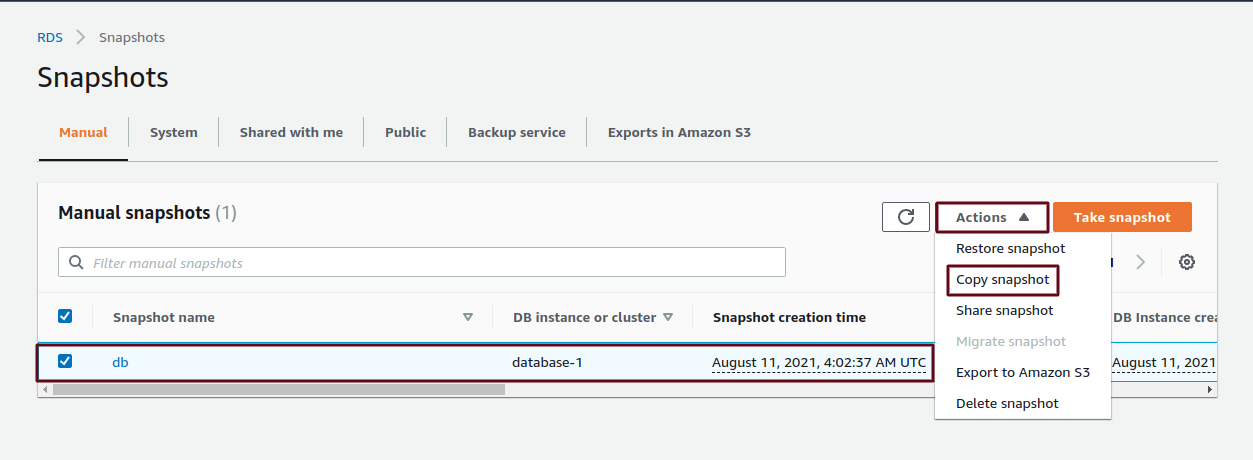
6. Choose a new snapshot name for this copy, Enable encryption, and then click “Copy snapshot”.
The process of backing up has now been completed. After that, we will start the restoration process.
Restore RDS Snapshot
In Addition, by simply restoring our snapshot, we will create a new encrypted database with data from our old database. You just need to follow the below steps:
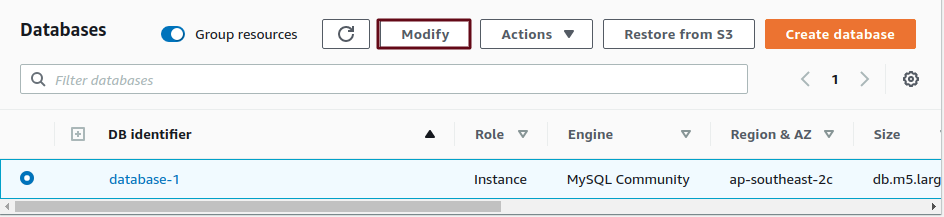
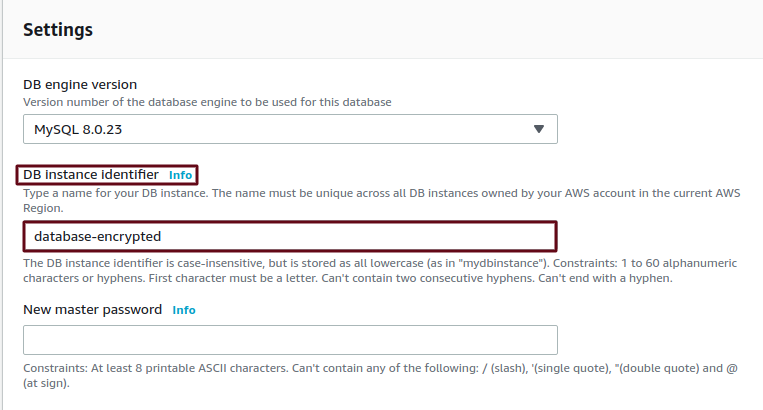
1. Go to the Amazon RDS console. After that, choose your existing database. On the top right of your dashboard, click the Modify icon. Edit the instance name in the Settings by changing the DB instance identifier, then click Continue.
2. Select “Apply immediately” on the confirmation screen, then select “Modify DB Instance”.
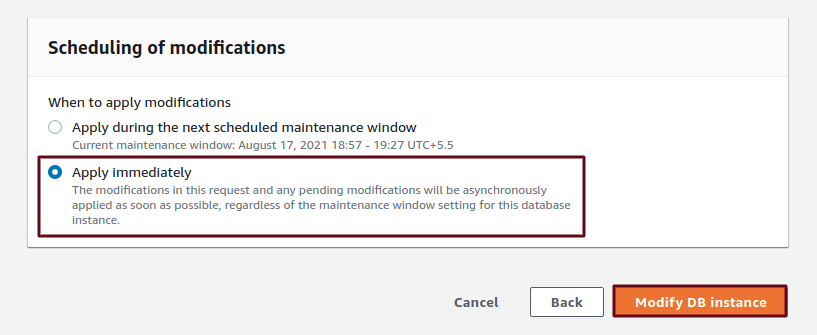
Furthermore, allow for the completion of this change. As a result, your database will no longer be reachable with its former ARN from now on, and your downtime will begin.
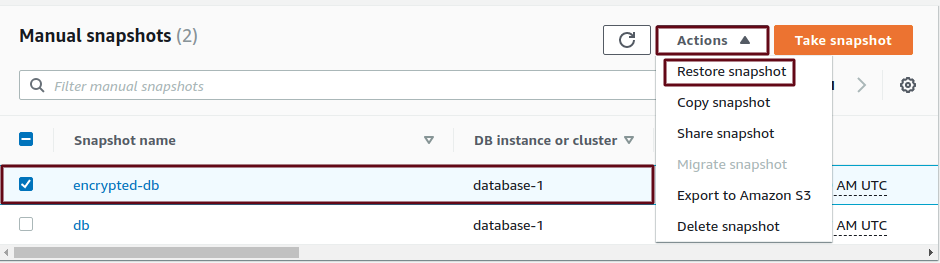
Now, go to the list of snapshots and then check the specifics of the encrypted snapshot you just made, and choose it.
3. Select “Restore Snapshot” from the “Actions” option in the upper right corner.
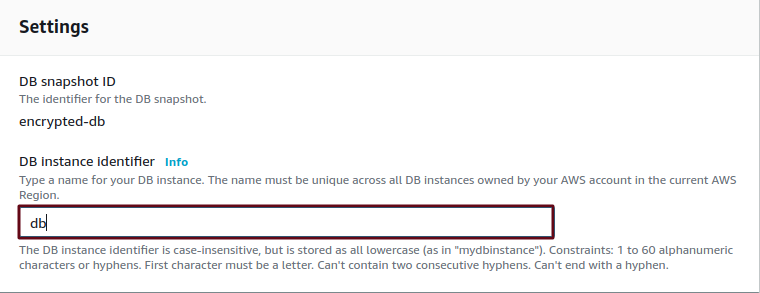
4. Fill in all fields on the restoration page with the same values as your prior database (particularly the DB Instance Identifier field, which must include the name of your previous database before it can be renamed), then click Restore DB Instance
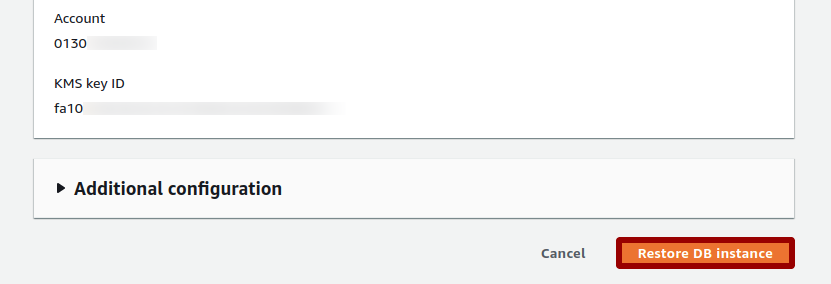
Wait for the snapshot restoration to finish (the time it takes may vary depending on the size of your database).
If your database was previously part of a VPC/Security group, then kindly check that your new instance is set up in the same manner, and make any modifications if necessary.
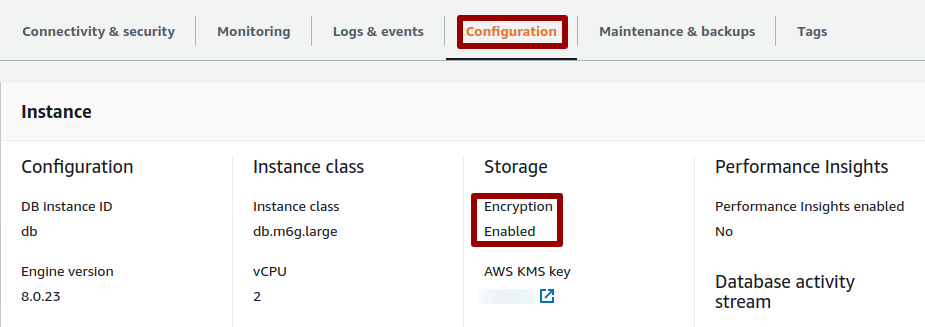
5. After that, go to the dashboard, choose the database, and then click the “Configuration Tab” to check whether your database has been encrypted or not.
You may now remove your old RDS instance to save money if you wish.
At last, your RDS database is fully encrypted, includes the same data as the old one, and can be accessed using the same ARN.
Need Support?
Thank You for reading this Blog!
For further more interesting blogs, keep in touch with us. If you need any kind of support, simply raise a ticket at https://webkul.uvdesk.com/en/.
For further help or queries, please contact us or raise a ticket.

Be the first to comment.