In this article, We’ll learn how to set CI/CD (Gitlab CI/CD) between the Gitlab and the server. You can configure the pipeline to deploy your code on the specific path of the server using Runner.
Introduction to GitLab
It is an open-source collaboration platform that provides powerful features beyond hosting a code repository.
You can track issues, host packages, and registries, maintain Wikis, and set up continuous integration (CI), continuous deployment (CD), and pipelines.
A runner is an application that works with GitLab CI/CD to run the job in a pipeline. It is open-source and written in the ‘Go’ Language.
You can install GitLab runner on different supported operating systems.

GitLab CI/CD concepts
It is a method to frequently deliver apps to customers by introducing automation into the stages of app development. %MCEPASTEBIN%
The main concepts attributed to CI/CD are continuous integration, continuous delivery, and continuous deployment.
The issues that development and operations teams may encounter when integrating new code are resolved by CI/CD.
The three primary approaches for the continuous method are:
Continuous Integration
Continuous integration is a DevOps software development practice where developers regularly merge their code changes into a central repository, after which automated builds and tests are run.
The key goals of continuous integration are to find and address bugs quicker, improve software quality, and reduce the time it takes to validate and release new software updates.
Continuous delivery
Continuous Delivery (CD) is a software delivery approach where development teams create and test code in short, automated cycles to enhance software quality.
This process enables development teams to build, test, and deploy software quickly.
In continuous delivery, every stage—from the merger of code changes to the delivery of production-ready builds—involves test automation and code release automation.
At the end of that process, the operations team can deploy an app to production very quickly and easily.
Continuous Deployment
Continuous Deployment is another step beyond “Continuous Integration”, similar to Continuous Delivery.
The difference is that instead of deploying your application manually, you set it to be deployed automatically.
Here, human intervention is not required.
Continuous Delivery vs Continuous Deployment
Continuous delivery requires manual approval before deployment, whereas continuous deployment will automatically roll out the update once the application has passed test cases.
You should have the following –
- Ubuntu server.
- Gitlab private repository which you own or have management permission.
- Basic knowledge of git and Linux/Ubuntu OS.
How it will work
- There will be a Runner (Gitlab runner), installed on your Ubuntu system
- The runner will get connected to your repo using the required configurations
- Your GitLab will create the job to run on your server when new changes are detected on your default branch(staging)
- Your runner installed on the system will run the required command on the server upon invoking from GitLab.
Runners :
GitLab Runner is an application that works with GitLab CI/CD to run jobs in a pipeline.
Types of Runners
- Group – Runner available for all projects and subgroups in a group
- Shared – Runner available for use by all projects
- Specific – Runner associated with individual projects
Let’s get started.
1. Install Gitlab runner on your Ubuntu server
First, you need to add the official GitLab repository to your Ubuntu server. You can run the following command.
2. Simply, download one of the binaries for your system:
|
1 |
sudo curl -L --output /usr/local/bin/gitlab-runner "https://gitlab-runner-downloads.s3.amazonaws.com/latest/binaries/gitlab-runner-linux-amd64" |

3. Allow it to execute:
|
1 |
sudo chmod +x /usr/local/bin/gitlab-runner |

4. Create a GitLab CI user:
|
1 |
sudo useradd --comment 'GitLab Runner' --create-home gitlab-runner --shell /bin/bash |

5. Install and run as a service:
|
1 |
sudo gitlab-runner install --user=gitlab-runner --working-directory=/home/gitlab-runner |

Note: As we above created a user whose name is “gitlab-runner” should have permission to execute the command in your server.
We need to permit the user with NOPASSWD because when the pipeline runs it will not ask for the password.
Edit your sudoers file vi /etc/sudoers
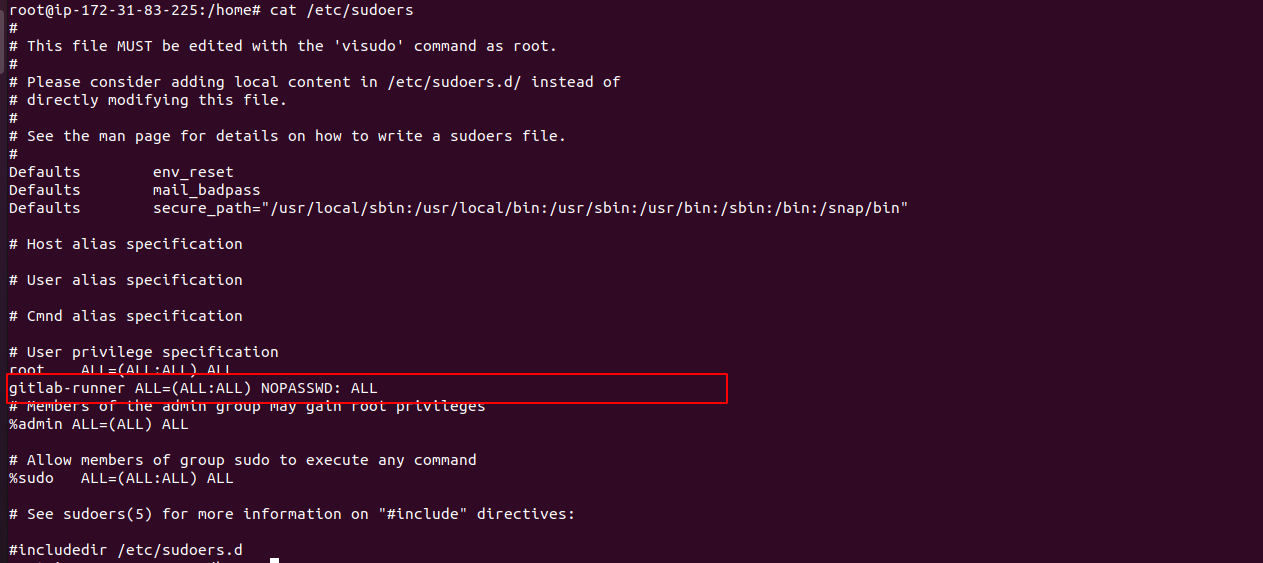
define your user with No password permission
start the GitLab runner using the below command
|
1 |
sudo gitlab-runner start |
Now, You can check your runner status
|
1 |
service gitlab-runner status |

Now, create the Repository on your Gitlab

Configure and register your runner on your server
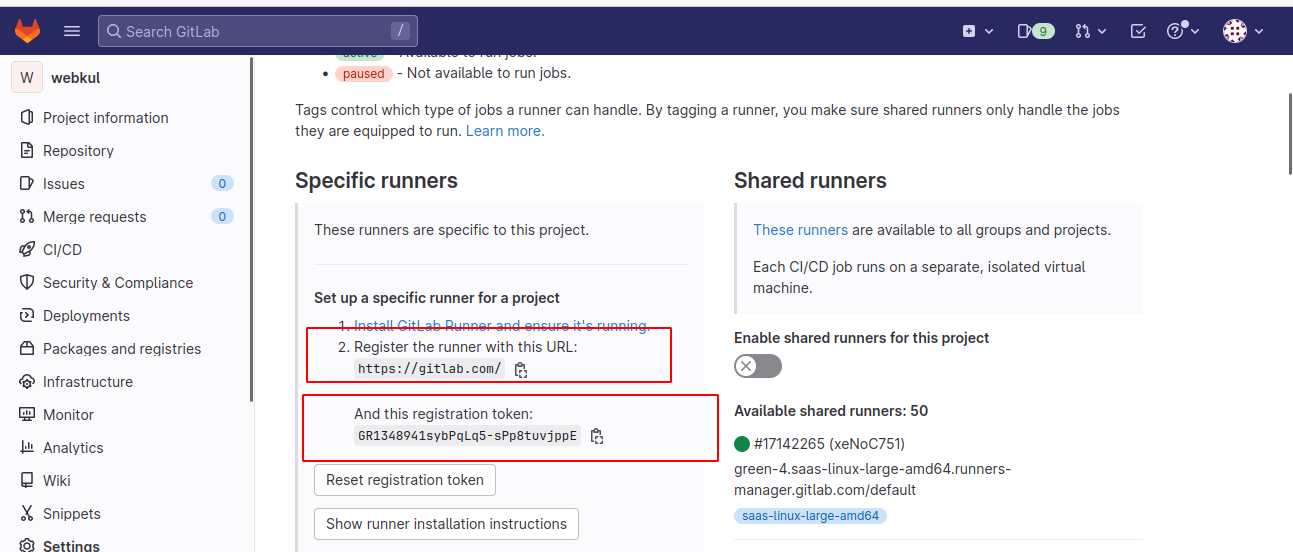
To configure your runner, open GitLab and open the repository where you want to set up your deployment.
Go to Project’s settings > CI/CD and expand the runner section.
You will see below information, GitLab instance URL & token
6. Now, Run the below command on your Ubuntu server
|
1 |
sudo gitlab-runner register |

This will start a short configuration with the following steps:
- Enter the GitLab instance URL (for example, https://gitlab.com/) — Simply copy and paste the URL exactly as shown in GitLab.
- Enter the registration token — Copy and paste the registration token exactly as shown in GitLab.
- Enter a description for the runner — Simply hit the Enter/Return key to use the default name.
- Enter tags for the runner (comma-separated) — You can leave this empty for now. You can change this later from GitLab. Hit the Enter and Return keys to continue.
- Enter optional maintenance note for the runner — You can leave this empty.
- Enter an executor: custom, docker, ssh, VirtualBox, docker-ssh+machine, Kubernetes, docker-ssh, parallels, shell, docker+machine —
If you have installed Docker, you can specify thedockerexecutor. - Enter the default Docker image (for example, ruby:2.7) — You can use the default and hit the Enter/Return key to continue.

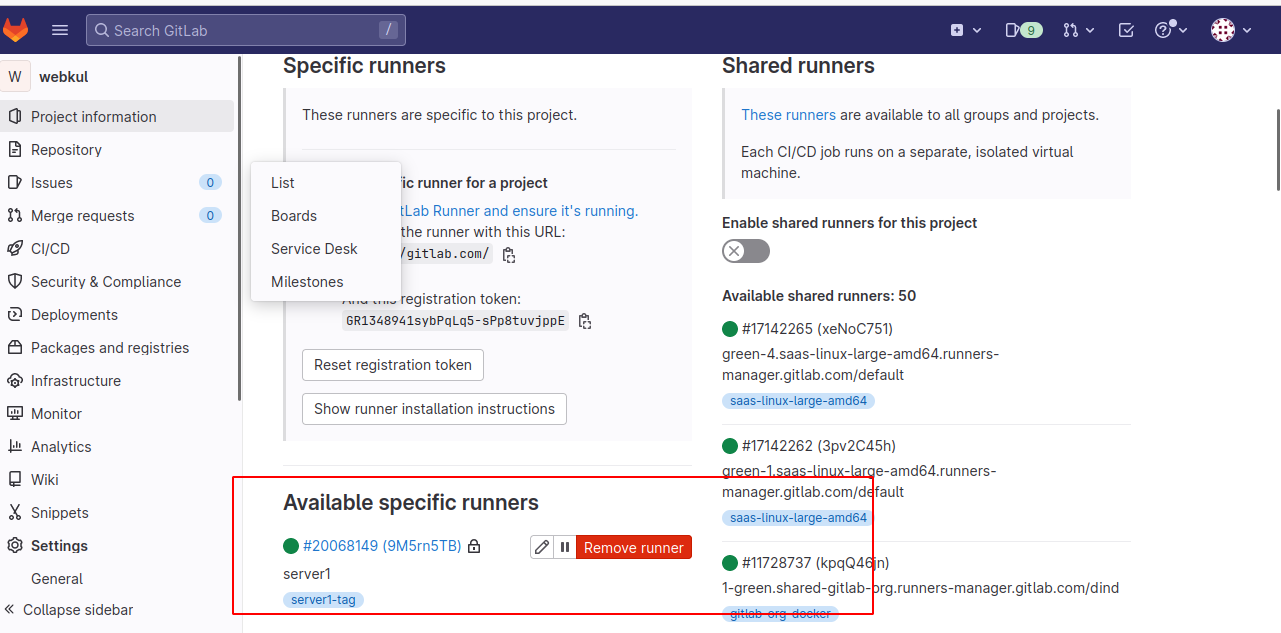
get back to Gitlab, and open Settings > CI/CD and expand the Runners configuration.
You will see the runner as being registered.
7. Here, We have two branches (the staging branch and the main branch).
The developer pushes code in the staging branch and whenever we merge the staging branch into the main branch, the code will automatically get deployed on the server.

8. Now, add files “file1” and “file2” in the staging branch and then merge them into the main branch

9. Add and configure the gitlab-ci.yml file in the main branch
In the .gitlab-ci.yml file, you can define:
- The scripts you want to run.
- Other configuration files and templates you want to include.
- Dependencies and caches.
- The commands you want to run in sequence and those you want to run in parallel.
- The location to deploy your application.
- Whether you want to run the scripts automatically or trigger any of them manually
When you add a .gitlab-ci.yml file to your repository, GitLab detects it and an application called GitLab Runner runs the scripts defined in the jobs.
|
1 2 3 4 5 6 7 8 9 10 11 12 13 14 15 16 |
stages: # List of stages for jobs, and their order of execution - build main build-job main: stage: build main script: - echo "Compiling the code..." - echo "Compile complete." - sudo rm -rf /home/ubuntu/* - sudo cp -r * /home/ubuntu/ - sudo cp -r . /home/ubuntu/ - sudo rm -rf * tags : - server1-tag only : - main |
here, I have added

merge the code into the main branch, GitLab CI/CD not only executes the jobs but also shows you what’s happening during execution, just as you would see in your terminal:
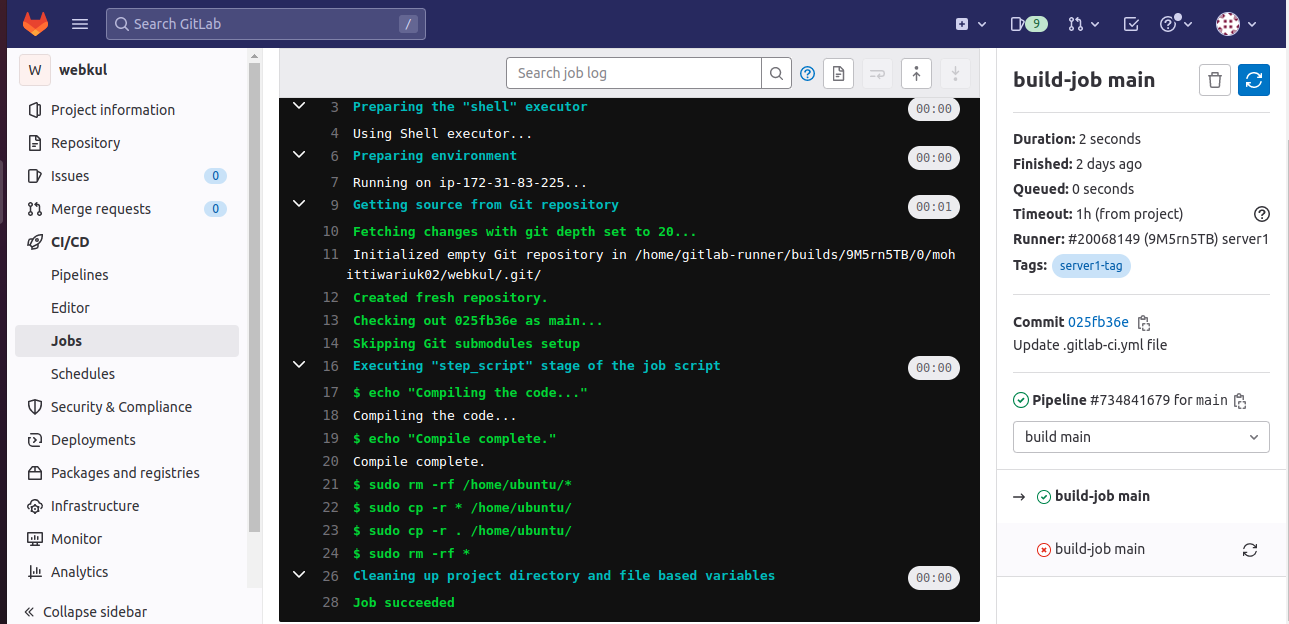

As you can see from the above screenshot file1 and file2 have been deployed on the server through GitLab ( CI/CD)
You may also visit our Magento development services and quality Magento 2 Extensions.
For further help or queries, please contact us or raise a ticket.

Be the first to comment.