What is SSL?
SSL stands for Secure Sockets Layer. The primary purpose of SSL is to provide a secure connection and protect the confidentiality and integrity of data transmitted between a user’s browser and a website.
- How It Works
When a user visits a website that uses SSL, their browser and the web server establish an encrypted connection. This encryption ensures that if someone intercepts the data being transmitted, they won’t be able to read or understand it.
What is certbot?
Certbot is a free and open-source tool that helps you obtain and manage SSL/TLS certificates for your website’s domain.
These certificates are used to enable the HTTPS protocol, providing a secure and encrypted connection between a user’s browser and your web server.
What is certbot-dns-cloudflare?
certbot-dns-cloudflare is a plugin for Certbot, the popular tool for obtaining and managing SSL/TLS certificates. This plugin allows you to use DNS challenges provided by Cloudflare’s API to prove your domain ownership and obtain SSL certificates.
- How It Works
The certbot-dns-cloudflare plugin automates this DNS challenge process specifically for domains managed by Cloudflare’s DNS service. It communicates with the Cloudflare API to create the necessary DNS records during the challenge process and then cleans up after the challenge is complete.
By using certbot-dns-cloudflare, you can obtain SSL certificates for your Cloudflare-managed domains without needing to manually create and manage DNS records. This makes the process of obtaining and renewing certificates smoother and more automated.
Prerequisites
To follow this article, you need to have the following:
- You should have an account on Cloudflare.
- Your site should be running on a Linux machine using Apache or Nginx.
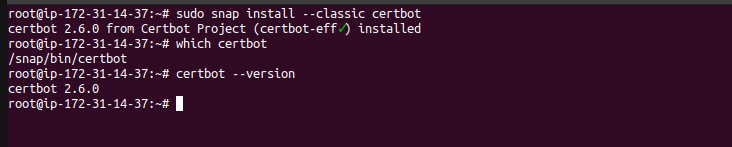
Step: 1 Install Certbot packages and DNS plugin
If you don’t have the Snap package manager installed, you can install it on any Linux distribution using package managers like apt (for Debian/Ubuntu-based systems) or dnf (for Fedora-based systems).
|
1 |
sudo snap install --classic certbot |
Here’s how you can install Snap using these commands:
- For Debian/Ubuntu-based systems:
|
1 2 |
sudo apt update sudo apt install snapd |
- For Fedora-based systems:
|
1 2 |
sudo dnf install snapd sudo systemctl enable --now snapd.socket |
Execute the following command to ensure that the certbot is running –
|
1 |
sudo ln -s /snap/bin/certbot /usr/bin/certbot |

Confirm plugin containment level
|
1 |
sudo snap set certbot trust-plugin-with-root=ok |

Install the Cloudflare DNS plugin
|
1 |
sudo snap install certbot-dns-cloudflare |
Use of this plugin requires a configuration file containing Cloudflare API credentials.
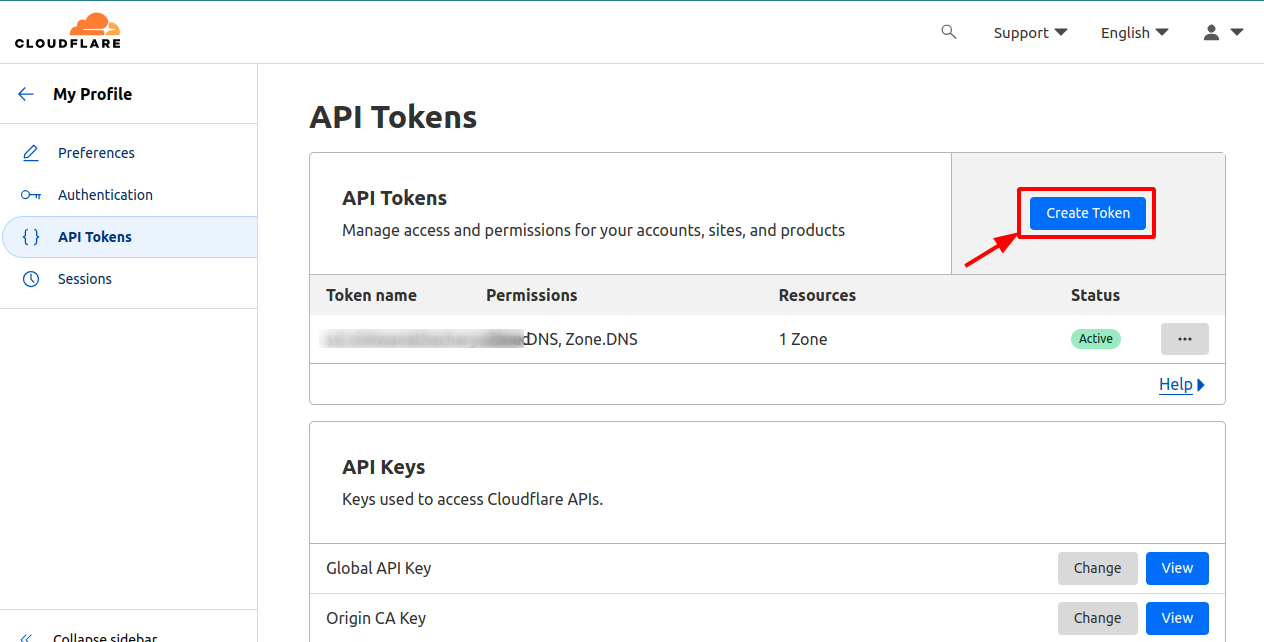
Step: 2 Create A Cloudflare API Key Or Token
First, you need to create an API key that has ‘Read‘ access to the zone of your domain and permission to ‘Edit‘ DNS in Cloudflare. API Tokens use the standard Authorization.
To create your API Token go to the ‘API Tokens’ section of your user profile.
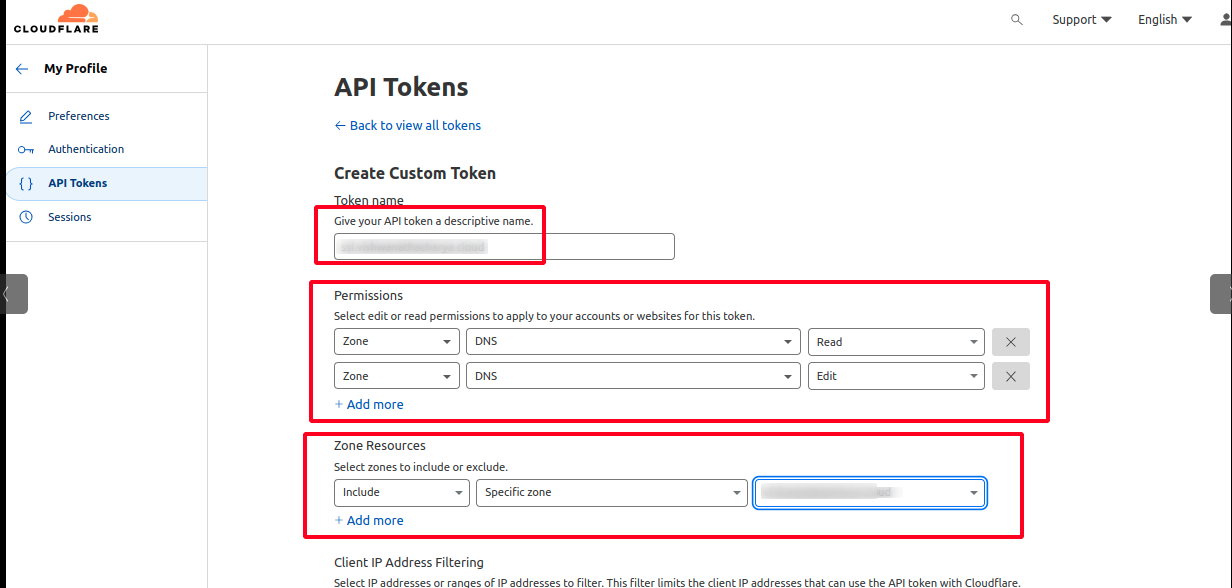
create your token – You can create it through the “Create Custom Token” that can edit a single zone’s DNS records.
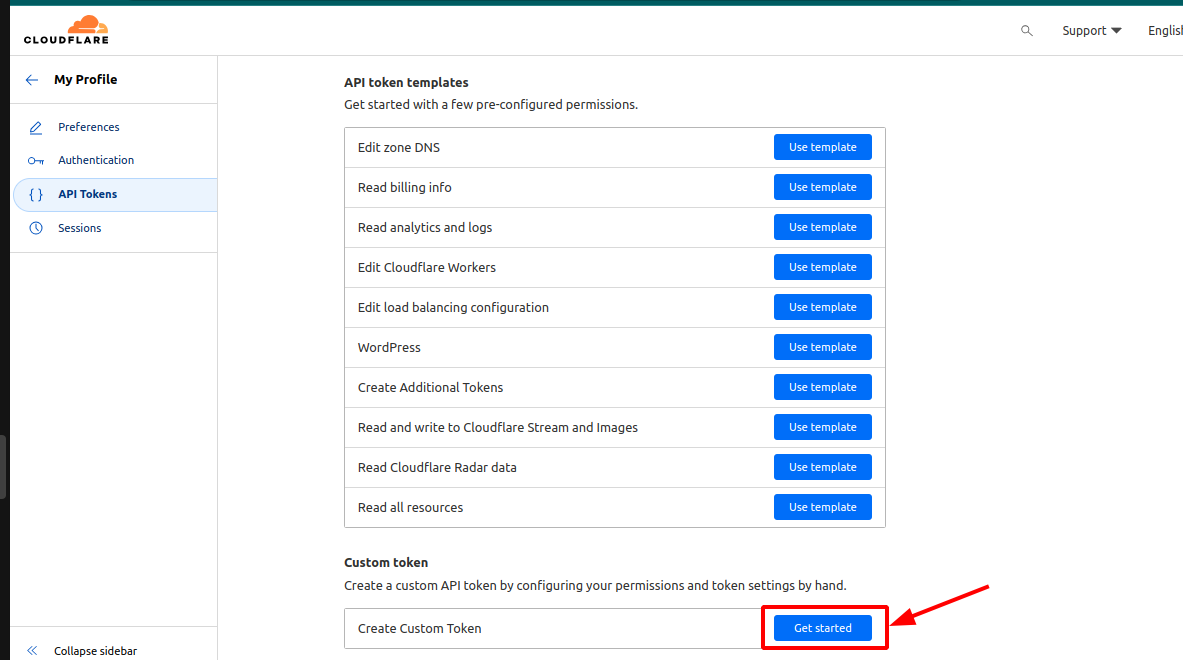
Once the Custom token is selected, you need to pick a zone for the API token.
Make sure that the DNS Edit permission must be selected.
Enter a token descriptive name, then add one more permission-giving zone Read access as shown in the figure below
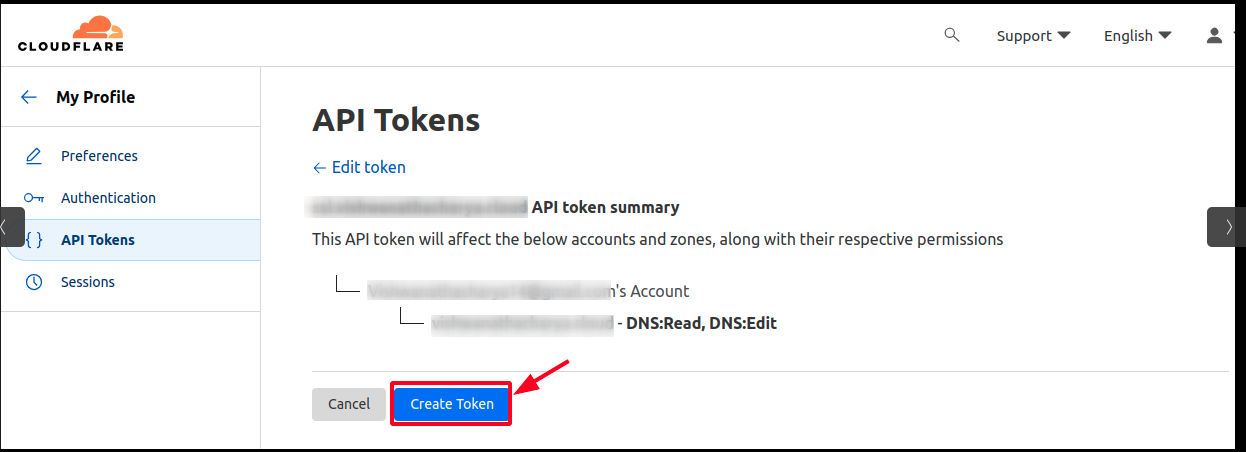
Once you select “Continue to the summary”, you are given a chance to review the selection.
Once created, you are presented with the API Token.
This screen is the only time when you will be presented with the secret API Token so make sure to save the API!
You should protect these API credentials the same as you save the password of your Cloudflare account.
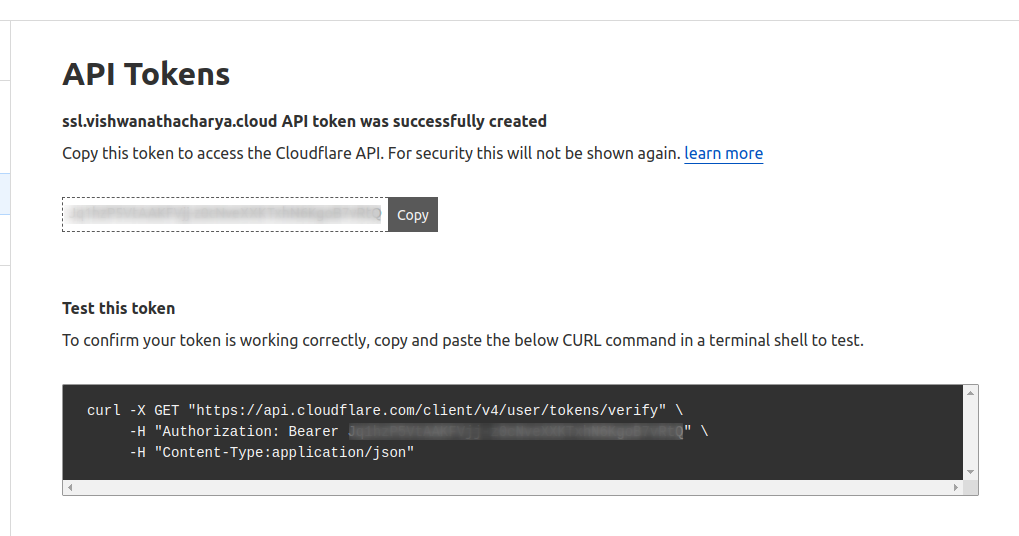
In addition to the secret itself, this page provides an example curl request that can be used to verify that the token has been successfully created.
Step 3 – Generate a Let’s Encrypt Certificate
Now we need a cloudflare.ini file for using certbot-dns-cloudflare plugin. As recommended, create a hidden directory as mentioned below.
|
1 2 |
mkdir -p .certbot/cloudflare touch .certbot/cloudflare/cloudflare.ini |
using a command – chmod 600 we can restrict access to the file –
|
1 |
chmod 600 .certbot/cloudflare/cloudflare.ini |

add your API within the cloudflare.ini file
|
1 |
nano .certbot/cloudflare/cloudflare.ini |
# Cloudflare API token used by Certbot
dns_cloudflare_api_token = add_here_your_cloudflare_API

Configure free SSL for a single domain
Once the Cloudflare API token has been added to the cloudflare.ini file then we need to run the below command to configure free SSL on the domain
Please add your domain as mentioned below –
|
1 2 3 4 5 |
certbot certonly \ --dns-cloudflare \ --dns-cloudflare-credentials ~/.certbot/cloudflare/cloudflare.ini \ --dns-cloudflare-propagation-seconds 60 \ -d example.com |
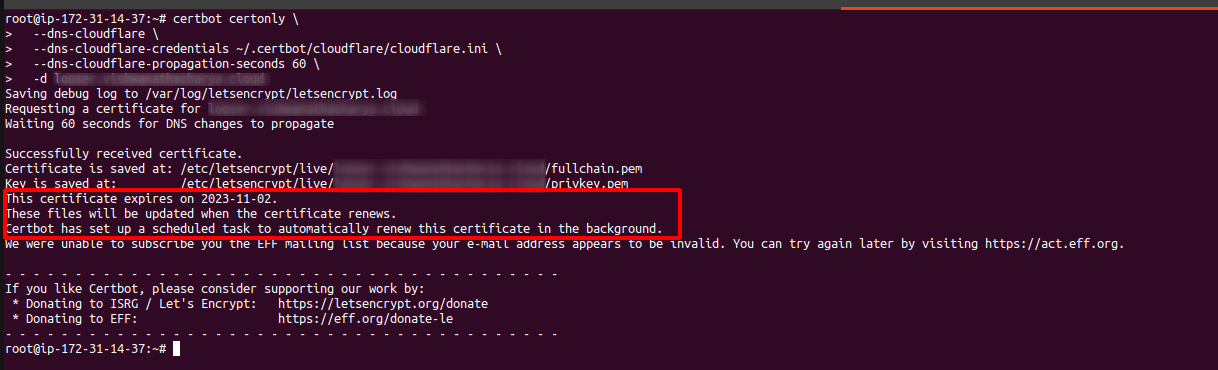
After executing the command if you receive this message as shown, then it means that the SSL certificate has been configured as well as the Certbot Cloudflare plugin will automatically renew certificates once the certificate will get expired.
For wildcard domain
To generate free SSL for your wildcard domain – *.example.com, you need to execute this command –
|
1 2 3 4 5 6 |
certbot certonly \ --dns-cloudflare \ --dns-cloudflare-credentials ~/.secrets/certbot/cloudflare.ini \ --dns-cloudflare-propagation-seconds 60 \ -d example.com \ -d *.example.com |
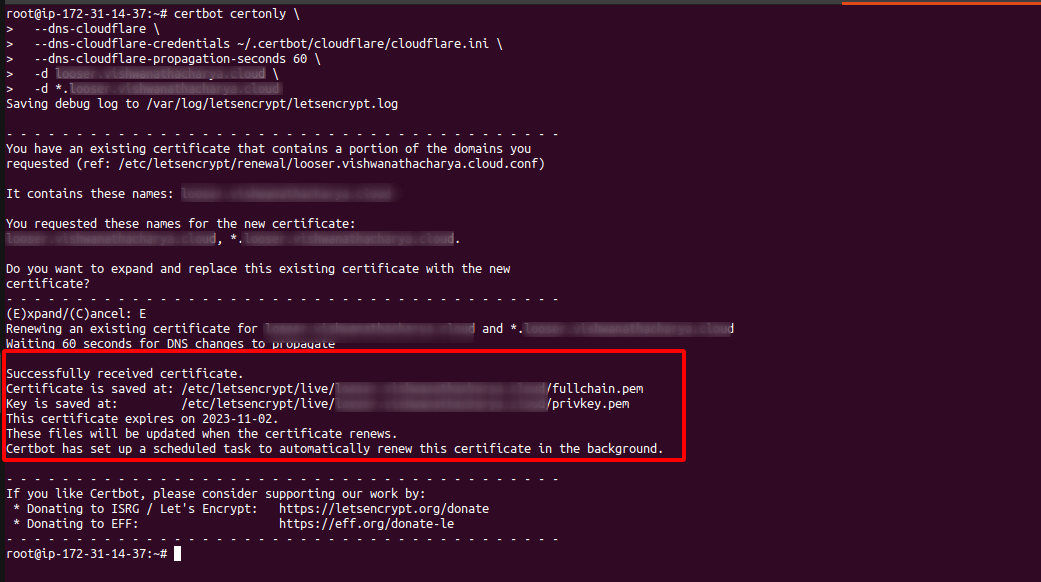
After executing the command if you receive this message as shown, then it means that the SSL certificate has been configured for your wildcard domain as well as the Certbot Cloudflare plugin will automatically renew certificates once this certificate will get expired.
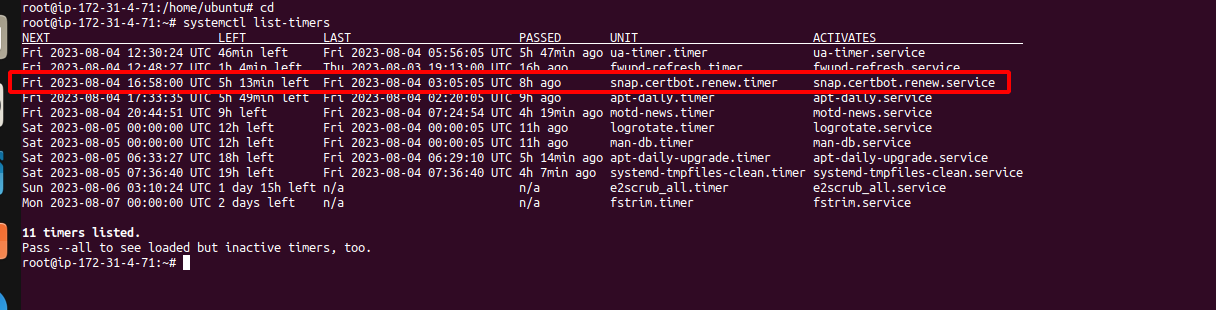
You can verify whether the Certbot renewal process is running in the background or not by using the command provided below –
|
1 |
systemctl list-timers |
This is the whole process to generate your SSL certificate as well as auto-renew your SSL certificate Automatically without using Lego.
To know how to Generate and auto-renew your SSL certificates using Lego, you can refer to the Blog.
Conclusion
The Certbot DNS Cloudflare plugin is a vital tool for seamless SSL/TLS certificate acquisition and renewal.
By integrating with Cloudflare’s DNS infrastructure, it automates certificate management, eliminating manual configurations and interruptions to web server operations.
This enhances security, reduces downtime, and simplifies the process, ensuring secure and reliable online communication.
Need Support?
Thank You for reading this Blog!
For further more interesting blogs, keep in touch with us. If you need any kind of support, simply raise a ticket at https://webkul.uvdesk.com/en/.
You may also visit our Odoo development services and quality Odoo Extensions.
For further help or query, please contact us or raise a ticket.

Be the first to comment.