In the previous blog on Introduction to Elastic Beanstalk, we discussed about what is Elastic Beanstalk and how it is useful in reducing deployment complexity. Let us go a step further and learn about how we can deploy our Application code using Elastic Beanstalk.
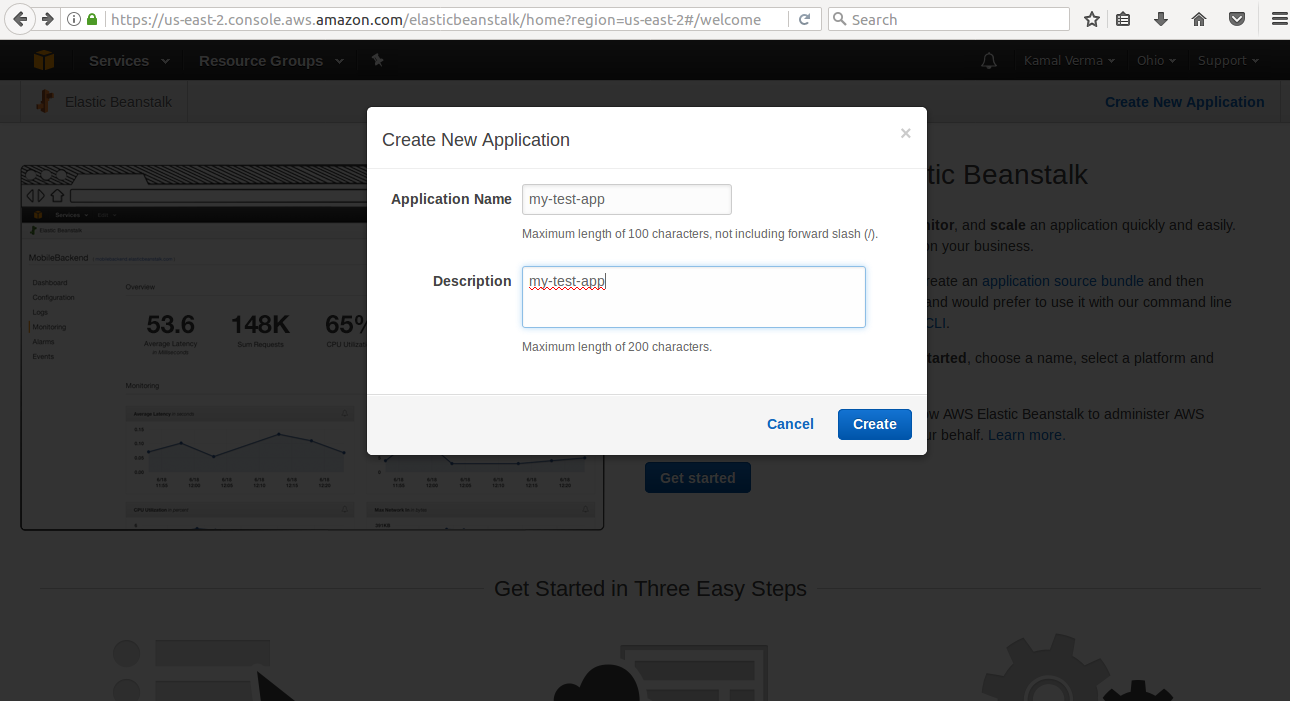
To begin, first login to your AWS account and go to services and select Elastic Beanstalk present in the compute section. After clicking on Elastic Beanstalk service, you will be able to see the welcome page of Elastic Beanstalk. To deploy our application code, click on “Create New Application” on the right top corner of the console. Give your application a name and brief description of your application as shown below.
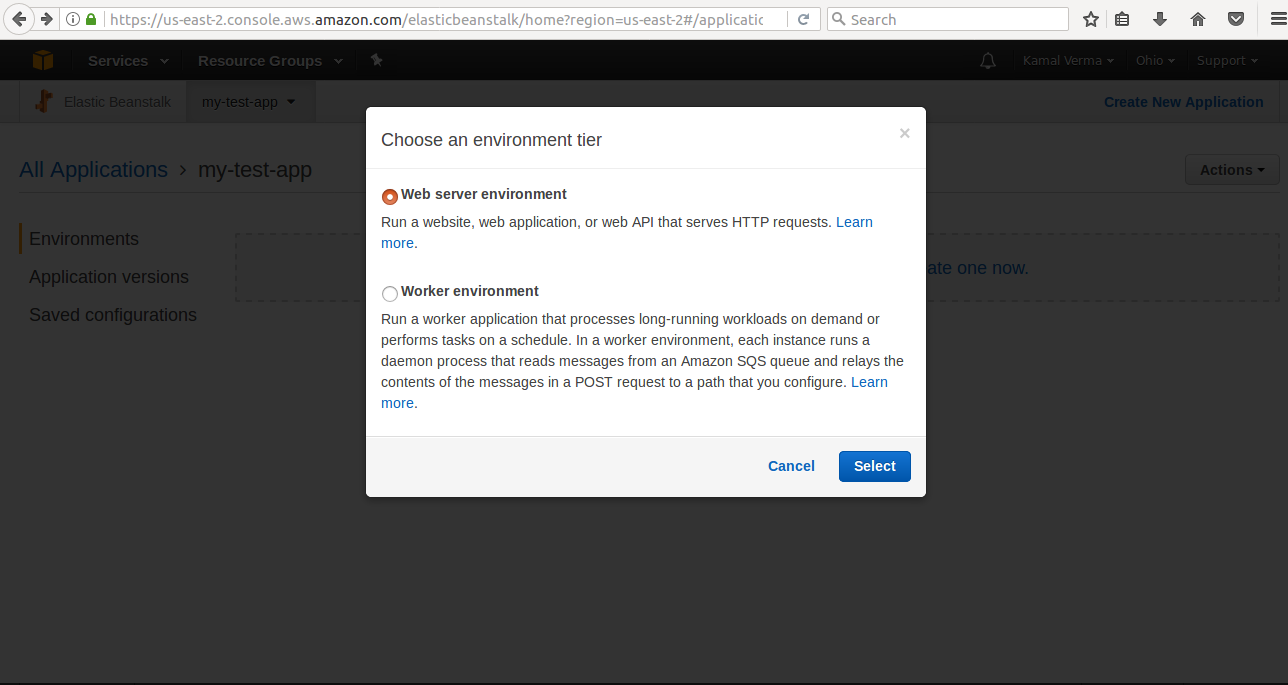
Next you have to create an environment for your application. To create an environment, click on “Actions” and select “Create Environment”. As discussed in previous blog, Elastic Beanstalk provides two types of environment i.e. Web server Environment for running web applications that serves HTTP requests and Worker Environment to run background jobs. Here we will choose a Web Server Environment for the demo and host a web application.
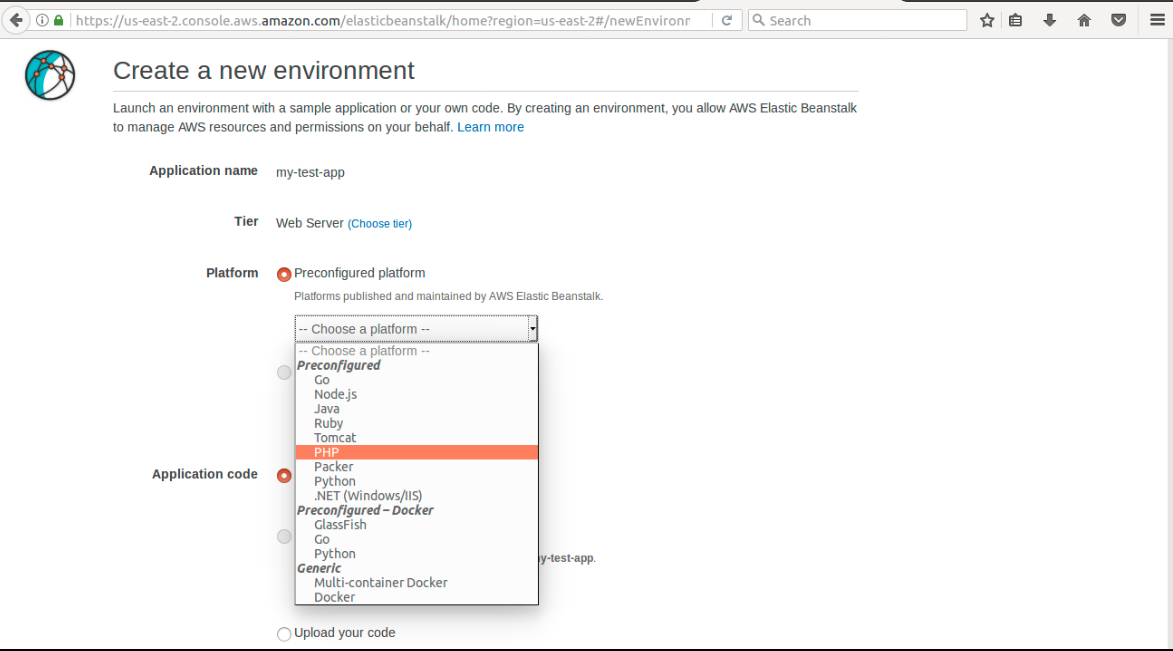
In the next page, you will be asked to select a platform for your application and to upload your application code in ZIP or WAR format. Different types of preconfigured platforms are available like PHP, Java, Python, .NET, Packer, Node.js, Ruby, Docker, etc. For the demo let us choose PHP as a Platform and the sample application provided by Beanstalk. For more configuration options, you can click on “Configure More Options” at the bottom of the page or else click on “Create Environment”.
Click on “Configure More Options” and you will see a a number of configuration options. You can click on modify in any section to change the default configurations. For example, you can modify “capacity” section to set up auto scaling or Load balancer section to modify the configurations. You can also change some of the option later after creating the environment like autoscaling, Instances, Notifications, etc.

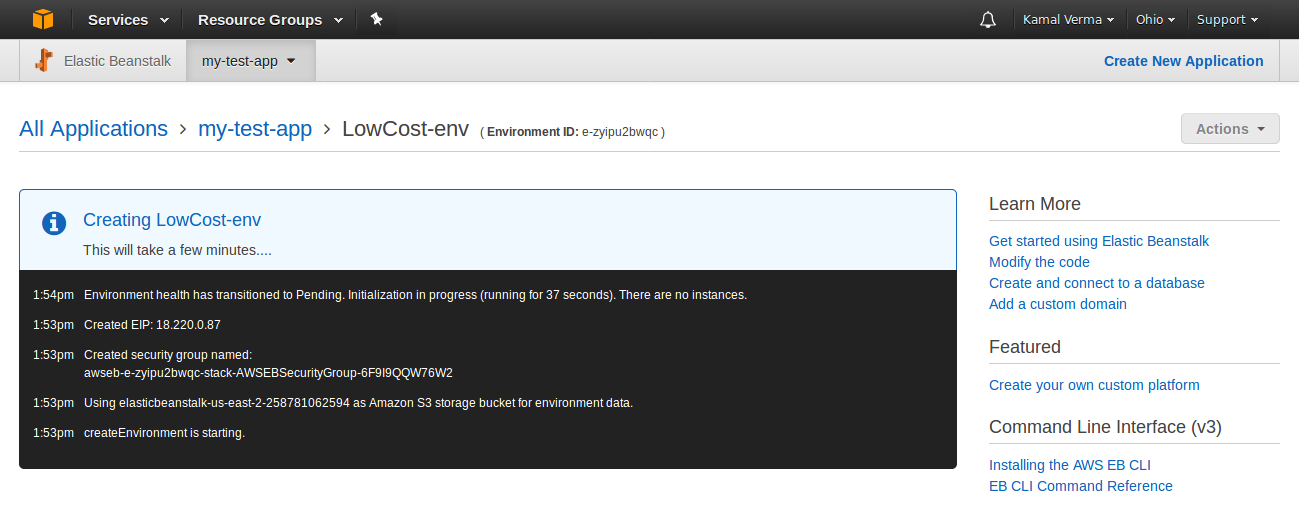
After doing the necessary modifications in configurations, we will click on create environment. For this demo, we will use the default configurations. After clicking on Create Environment, Environment creation starts and a page will appear showing the creation logs as shown in the below.
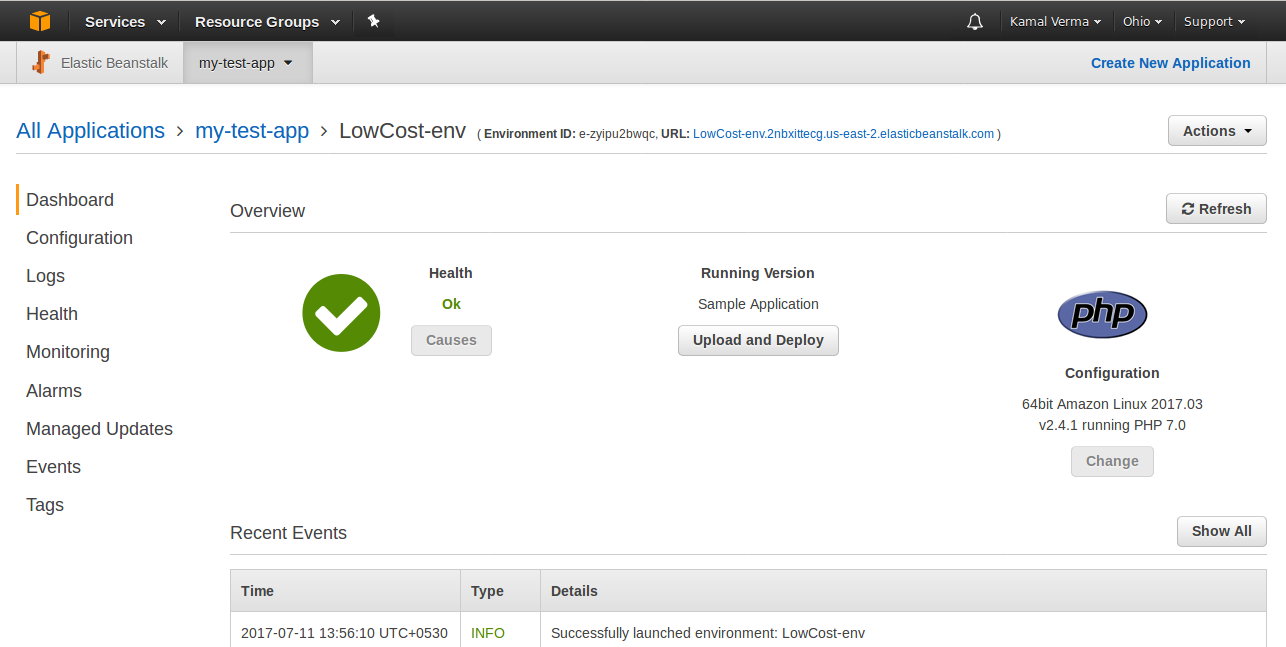
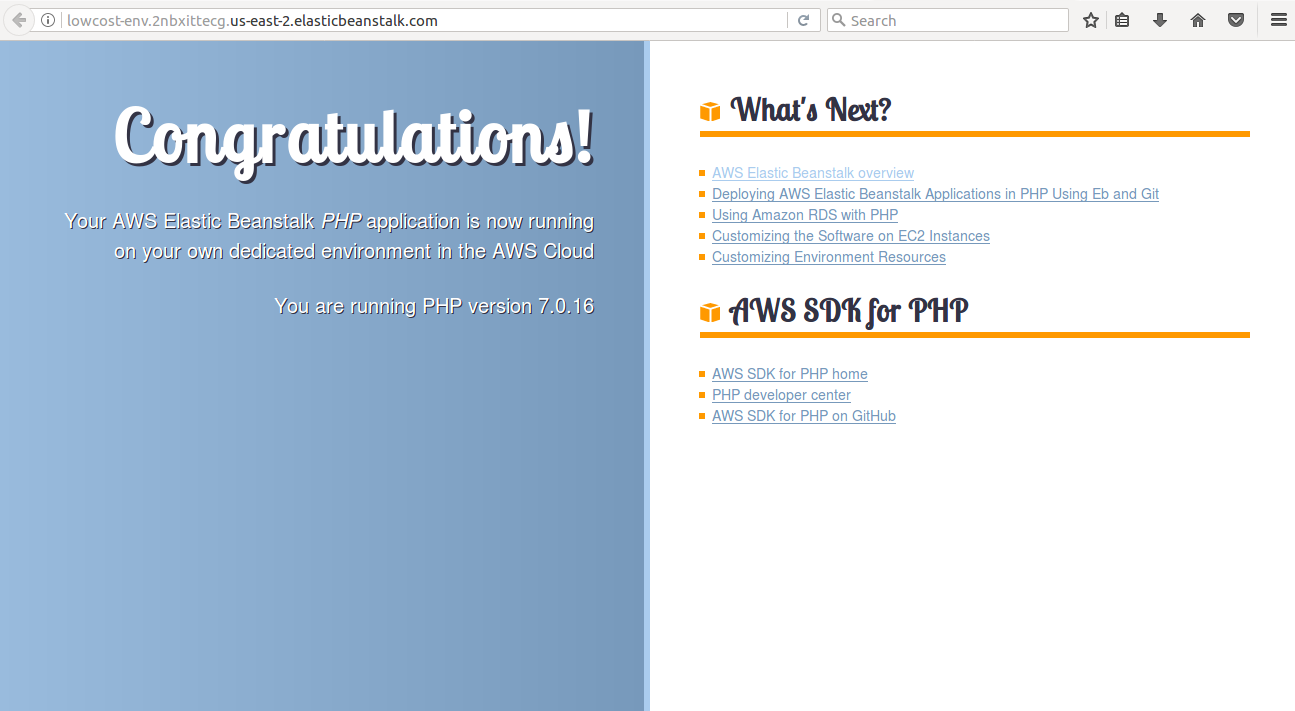
After the Environment creation is created, your environment dashboard is displayed showing various information such as health status, running application version of uploaded code, configurations, etc. You can further manage your environment from the various options available in left hand side of the console like configuration, log, health, monitoring, etc. The application URL is also displayed on the top which can be used to access the web interface and serve the HTTP request. You can access you application from your browser using the URL. By default, port 80 is open for all IPs but you can later modify the settings if required in the security group.
At this point of time, you have successfully deployed an application on AWS Elastic Beanstalk. If you have launched multiple environments and applications, you can explore all you environments and applications by clicking on your application name or “All Applications” on the console. You can always access the underlying architecture of the deployed application by accessing the services like EC2, VPC, Cloudwatch, etc. All the instances on which the application is deployed is accessible from the EC2 console.
There are also a number of options to manage the various environments of your application. You can see some of the options on clicking on “Actions” in the top right of the console on the environment dashboard page. Lets discuss them in brief.
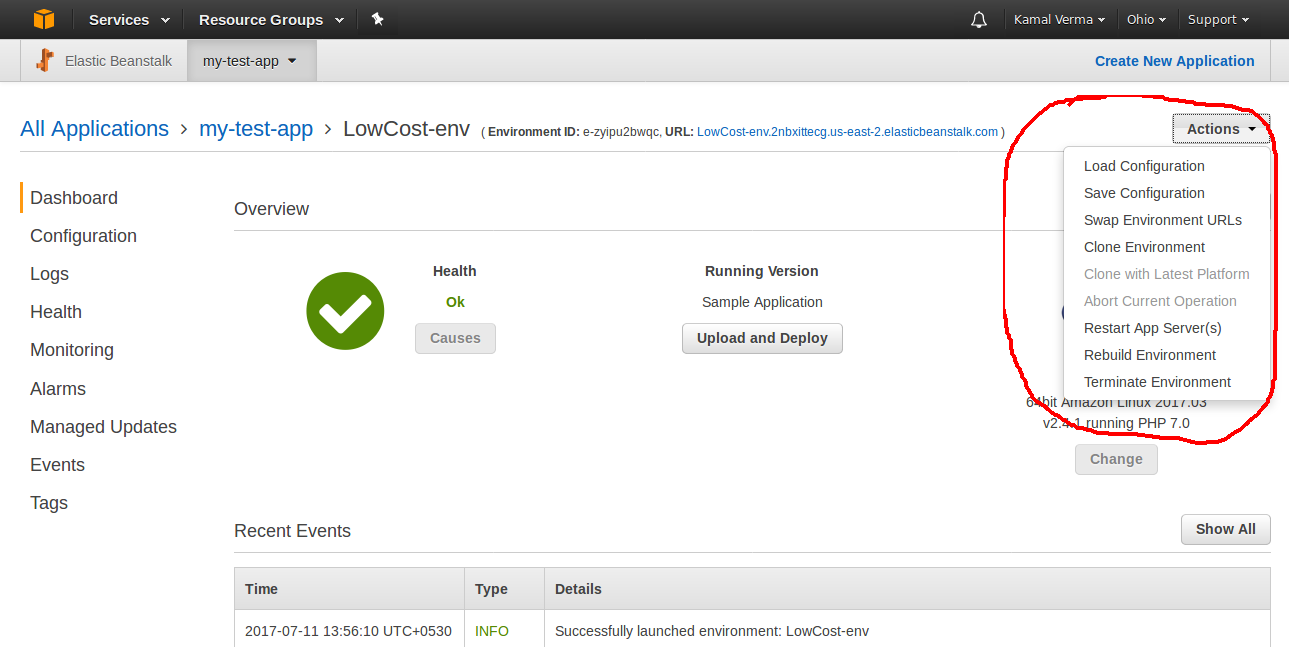
Load Configuration : To load another configuration for the current environment from previous saved configurations.
Save Configuration : To save the current configuration of the application which may be reused for some other applications.
Swap Environment URLs : Interchange the URLs of any two environments.
Clone Environment : Create and launch a copy of a particular environment.
Restart App Server(s) : Restart all the servers running the application.
Rebuild Environment : To terminate the current environment and create the new environment with same configuration.
Terminate Environment : To terminate an existing environment including all the underlying resources.
You can use these options to manage your applications efficiently and effectively. However there are a lot of other options and configurations which can be used for better management of the applications as per requirements. There are also lots of enhancements and updates provided by AWS from time to time which provides more features and greater flexibility to manage your applications. Finally, its upto you how best you can utilize the Elastic Beanstalk service to deploy and manage your applications.
Thanks for your time…
In case of any help or query, please contact us.

Be the first to comment.