In the previous blog, we learnt about CodeDeploy service of AWS and how it is useful in simplifying the Code deployment process. It is used to automate application deployments to the Amazon EC2 instances or on-premises instances in our data-centers. AWS CodeDeploy can deploy application content stored in Amazon S3 buckets, GitHub repositories, or Bitbucket repositories. So let’s learn how to setup the environment and deploy our code using the CodeDeploy service.
The various steps involved to configure and use the CodeDeploy service can be summarized in the following steps.
- Creating IAM roles.
- Configuring the servers/Instances where code is to be deployed.
- Uploading files or codes in either github or S3.
- Creating Deployment Configurations in AWS CodeDeploy.
- Deploying the Code.
Step-1: Creating IAM roles :
The first step to setup an environment for CodeDeploy is to create an IAM role. Here, we will be creating two types of roles –
- IAM role for Instance Profile.
- IAM role for Service Profile.
Instance Profile :- Instance Profile is a container for IAM roles and can provide the role’s credentials to an application running on that instance. Those credentials can then be used in the application’s API calls to access resources and to limit access to only those resources that the role specifies. These role credentials are temporary and rotated automatically improving the security. Only one Instance Profile can be attached to a particular Instance. The “Instance Profile” has the same name as the “IAM Instance Role” by default when you create it from the AWS console. However, when you create it from aws-cli, Instance role and Instance Profile role can be different.
Service Profile :- Service Profile consist of roles containing permission that allows ClodeDeploy to use other AWS services.
Creating Instance Profile :
So, lets create both Instance role and Service role one by one. First login to your AWS console and open the IAM service.
On left side of the IAM console page, click on the roles. Now click on “create new role” option on top. Now select the role type as “Amazon EC2” from the options list. Next, select the following policies:
a). AmazonEC2RoleforAWSCodeDeploy ->> This allows EC2 instance under CodeDeploy To Access S3 service.
b). AutoScalingNotificationAccessRole ->> This allows EC2 instance under CodeDeploy to access SNS and SQS.
And finally give the Instance Role a name. I will use the name “CodeDeployInstanceRole” as Instance Role for this demo. This role will be attached to the instance on which deployment is to be done.
Creating Service Profile :
Similarly, create a new Service role for CodeDeploy. Click on “create new role” option on top. Now select the role type as ” AWS CodeDeploy ” from the options list. Next, select the following policies:
a). AWSCodeDeployRole ->> This allows CodeDeploy to access other AWS services like Autoscaling/ec2/SNS.
And finally give the Service Role a name. I will use the name “CodeDeployServiceRole” for this demo. This role will be used while creating Deployment configurations in CodeDeploy .
By now, you have successfully created the two required IAM roles.
Step-2:- Configuring the servers/Instances :
The second step is to configure the instances on which we want to deploy code using the CodeDeploy service. Configuring the instances involve two major steps:
- Attaching the IAM role.
- Installing “Code Deploy Agent” on the instance.
However, if you want to launch a new instance in AWS, the Instance IAM role can be attached at the time of launching the instance. During the launching of the instance, in the third step which is “Configure Instance”, find the section “IAM role” and select the created IAM role “CodeDeployInstanceRole” from the drop-down list. For an already running instance, you can attach the role using AWS CLI.
Now let us configure our instance. You can configure instances either present on AWS or on-Premises. In this demo, we will be using AWS instances using apache web-server.
First login to your server, and run the following commands as a root user.
For Ubuntu Or Debian:-
Update your server and install apache web-server.
|
1 2 |
apt-get update apt-get install apache2 -y |
Download and install the “code deploy agent”. First install ruby and wget packages as the agent is ruby based.
|
1 |
apt-get install ruby wget -y |
Now download and install the agent. Replace “$REGION” with your present AWS Region name for example “us-east-2”.
|
1 2 3 |
wget https://aws-codedeploy-$REGION.s3.amazonaws.com/latest/install chmod +x ./install ./install auto |
Check if the code deploy agent is installed and running on your instance.
|
1 |
ps -aux | grep agent |
Next step is to install “AWS CLI” on the instance. AWS CLI is python based API. Use pip package manager to install aws-cli package. To install pip and aws-cli, use the following commands.
|
1 2 3 4 5 |
apt-get install python-pip pip install --upgrade pip pip install awscli pip install --upgrade awscli aws --version |
For RHEL Distibutions like Centos, Amazon AMI, etc :-
Update your server and install apache web-server.
|
1 2 3 |
yum update yum install httpd -y |
Download and install epel repository.
|
1 2 3 4 5 |
yum install wget -y wget http://dl.fedoraproject.org/pub/epel/7/x86_64/e/epel-release-7-10.noarch rpm -ivh epel-release-7-10.noarch.rpm #Install epel repository yum repolist #To check if the repo is installed |
Install code-deploy-agent in your instance. Replace “$REGION” with your present AWS Region name for example “us-east-2”.
|
1 2 3 4 5 |
yum install ruby -y wget https://aws-codedeploy-$REGION.s3.amazonaws.com/latest/install chmod +x ./install ./install auto |
Install “AWS CLI” on the instance. AWS CLI is python based API. Use pip package manager to install aws-cli package. To install pip and aws-cli, use the following commands.
|
1 2 3 4 5 |
yum install python-pip –y pip install --upgrade pip pip install awscli pip install --upgrade awscli aws --version |
[COMMON COMMANDS FOR DEBIAN AND RHEL DISTRIBUTIONS]
Configure aws-cli with appropriate credentials to enable it to access the AWS resources.
|
1 |
aws configure |
Enter your Access Key or Secret Key and you can skip the default region and output format options by pressing enter. If you don’t have previous Access key, you can generate new key pairs. To Get Your AWS Access Key And Secret Keys, click on drop-down arrow, near the AWS Account Name displayed on top of the AWS console. From the options select My security credientials. If asked Select Continue to security credientials. On the “Your Security Credentials” page that appears, Select “Access Keys (Access Key ID and Secret Access Key)” and then Click on “Create New Access Key”. Download the Access key that is created. You can also view the access key and secret key on the console.
|
1 2 3 4 |
AWS Access Key ID [None] : Enter_Your_Access_Key AWS Secret Access Key [None] : Enter_your_Secret_key Default region name [None] : Specify_your_region or Press_Enter_to_Skip Default output format [None] : json or Press_Enter_to_Skip |
Once your aws-cli is properly configured, you can attach the instance profile with the following command. Specify your instance ID and instance profile name “CodeDeployInstanceRole” which we previously created.
|
1 |
aws ec2 associate-iam-instance-profile --instance-id <Your_Instance_ID> --iam-instance-profile Name=CodeDeployInstanceRole |
You can check the all the Instance Profiles attached to various instances using the below commands.
|
1 |
aws ec2 describe-iam-instance-profile-associations |
If you can see your instance attached with your Instance Profile, then your instance is attached with Instance Profile containing IAM role.
Remember to reboot your server after configuration if you have attached your “IAM Instance role” to an existing instance. Reboot is not required if you have attached the “Instance role” at the time of launching the instance.
Step-3 : Uploading files or codes in either github or S3 :
The Third step is to prepare your code for deployment. You can either deploy your code from github or S3 bucket.
However to use CodeDeploy, you need to include two things along with your code.
- appspec.yml file
- deployment scripts
The application specification file (AppSpec file) is a YAML-formatted file used by AWS CodeDeploy to determine:
- what it should install onto your instances from your application revision in Amazon S3 or GitHub.
- which lifecycle event hooks should run before and after deployment events.
An AppSpec file must be named appspec.yml and it must be placed in the root of an application’s source code’s directory structure. Otherwise, deployments will fail.
After you have a completed AppSpec file, you can bundle it, along with the content to deploy, into an archive file (zip, tar, or compressed tar).
Create a new “appspec.yml" file and copy and paste the below contents in the file.
|
1 2 3 4 5 6 7 8 9 10 11 12 13 14 15 16 17 18 19 20 21 22 23 |
version: 0.0 os: linux files: - source: / destination: /var/www/html permissions: - object: /var/www/html pattern: "**" owner: www-data group: www-data mode: 755 type: - file hooks: BeforeInstall: - location: scripts/installapache.sh runas: root - location: scripts/startapache.sh runas: root AfterInstall: - location: scripts/restartapache.sh runas: root |
For RHEL distributions, replace “www-data” with “apache”.
Next make a folder and create the deployment scripts.
1. installapache.sh
|
1 |
apt-get install apache2 -y |
For rhel,
|
1 |
yum install httpd -y |
2. startapache.sh
|
1 |
systemctl start apache2 |
For rhel,
|
1 |
systemctl start httpd |
3. restartapache.sh
|
1 |
systemctl restart apache2 |
For rhel,
|
1 |
systemctl restart httpd |
Place the three scripts in a folder named “scripts” as per the “appspec.yml" file. Both the deployment script folder and the appspec.yml file should be kept in the root of an application’s source code’s directory structure. Place the code either in github or S3 bucket.

Step-4 : Creating Deployment Configurations in AWS CodeDeploy :
The next step is to create a deployment configuration in CodeDeploy. First login to your aws account and open the CloudDeploy Service. Now the first step to do is to create an Application which will contain informations like Deployment type, instance details, deployment configurations, service role, etc.
To Create an application, click on “create application”. In the application page, provide the application name and application group name. For this demo, we will select the following:
-> The application name as “sampledeploy” and application group name as “sampledeploy-gp”.
-> Deployment Type : In-place deployment.
-> In Add Instance section, we will select Amazon EC2 and specify the instance using the name key-value pair.
-> We will not select load balancer as we will be deploying on a single instance.
-> In Deployment configuration, we will select “CodeDeployDefault.OneAtATime” which deploys to one instance at a time.
-> We will select Service role ARN as ” CodeDeployServiceRole “ which we have previously created.
-> Finally Click on “Create application”.
You will be displayed an Acknowledgement page showing the successful application creation along with the Details of your Application. Under the Deployment group section, the created deployment group name is displayed. Now your configuration is complete ready for deploying code to the server using AWS CodeDeploy.
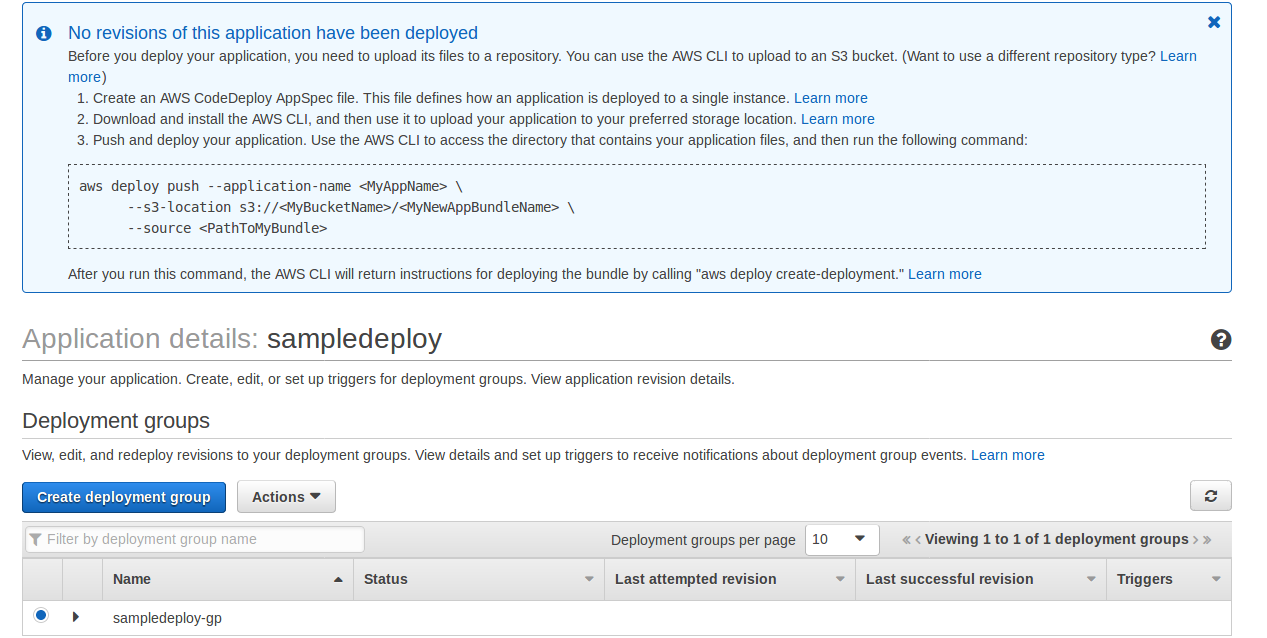
Step-5 : Deploying the Code :
To deploy the code, click on the application name, and select the deployment group. Now click on “Actions” button and select “Deploy new revision”. This will open up a page where the deployment information needs to be provided. For this demo, we will do the following.
-> The application name and application group name is already preselected.
-> Select the repository type as “github” repository for this demo.
-> You can add a small deployment description.
-> We will choose the default deployment configuration as “CodeDeployDefault.OneAtATime”.
-> Next we will provide github account username and click on “Connect to GitHub”.
-> Provide the Repository name of github where you have kept the code.
-> Also provide the commit Id of the code which should be deployed on the servers.
-> In the content options, choose “Overwrite the content”.
-> Leave the rest configurations as default and click on “Deploy”.
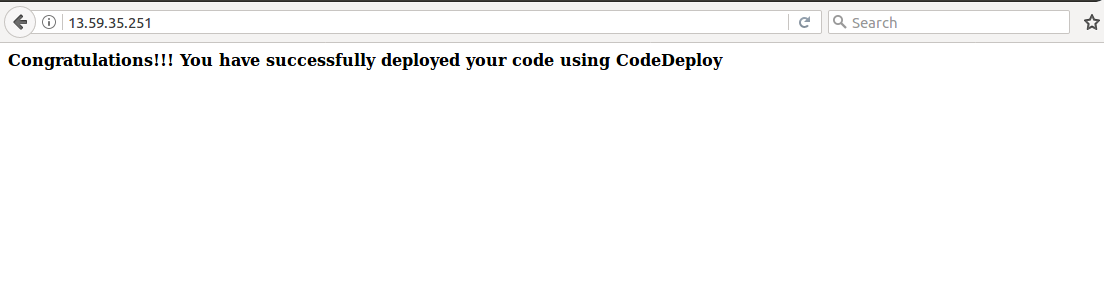
If you have properly followed the steps, your deployment will be successful and you will get a similar successful deployment result displayed on the screen. You will get a unique deployment ID for each deployment.

Hit the public IP of the server on your browser to verify if the codes are updated successfully.
You can view the logs on your instance in -> /var/log/aws/codedeploy-agent/codedeploy-agent.log
So, finally you have successfully configured CodeDeploy environment and deployed your code on your servers. You can use CodeDeploy in various ways to deploy code to one or multiple instances which may be under a load balancer and autoscaling. You can also deploy code from either github or from S3 bucket. In short, CodeDeploy can simplify your code deployment process and provide higher reliability as compared to error-prone manual deployments.
Thanks for the time… Happy Computing!!!
In case of any help or query, please contact us.

Be the first to comment.