In this tutorial, we will learn how to deploy Bagisto version 2.2.X on Hostinger.
Recently, we discussed how to deploy bagisto on the Heroku cloud which is managed and allows developers to focus on their core product without worrying about servers
What is Hostinger?
Hostinger is a web hosting company that offers various hosting services including shared hosting, cloud hosting, VPS hosting, and more. It’s known for providing affordable hosting solutions with robust features and excellent customer support.
For applications like Bagisto, which is an open-source e-commerce platform, hosting on Hostinger can be beneficial for several reasons:
- Affordability: Hostinger offers cost-effective hosting plans suitable for startups and small businesses.
- Performance: Fast loading times and reliable uptime support are critical for e-commerce functionality.
- Scalability: Easy to upgrade resources as your platform grows without downtime.
- Security: Includes free SSL, daily backups, and robust firewall protection for secure transactions.
- Ease of Use: User-friendly control panel (hPanel) simplifies server management tasks.
- Support: 24/7 customer support ensures quick resolution of any hosting issues.
Overall, Hostinger provides a solid hosting environment that can support the performance, security, and scalability needs of applications like Bagisto, making it a suitable choice for hosting such e-commerce platforms.
What is Bagisto?
Bagisto is an eCommerce ecosystem designed for all to build and scale your business.
It’s a free and open-source eCommerce framework that offers you a wide range of functionality and lets you have total control of your store.
Built on top of the Laravel stack, it is coupled with easy product information management and fast time to market the product. Besides, the framework is very flexible and easy to use even for non-tech savvies.
We will learn how to set up Bagisto on Hostinger.
Setup Bagisto on Hostinger :
Step -1: Signup on Hostinger
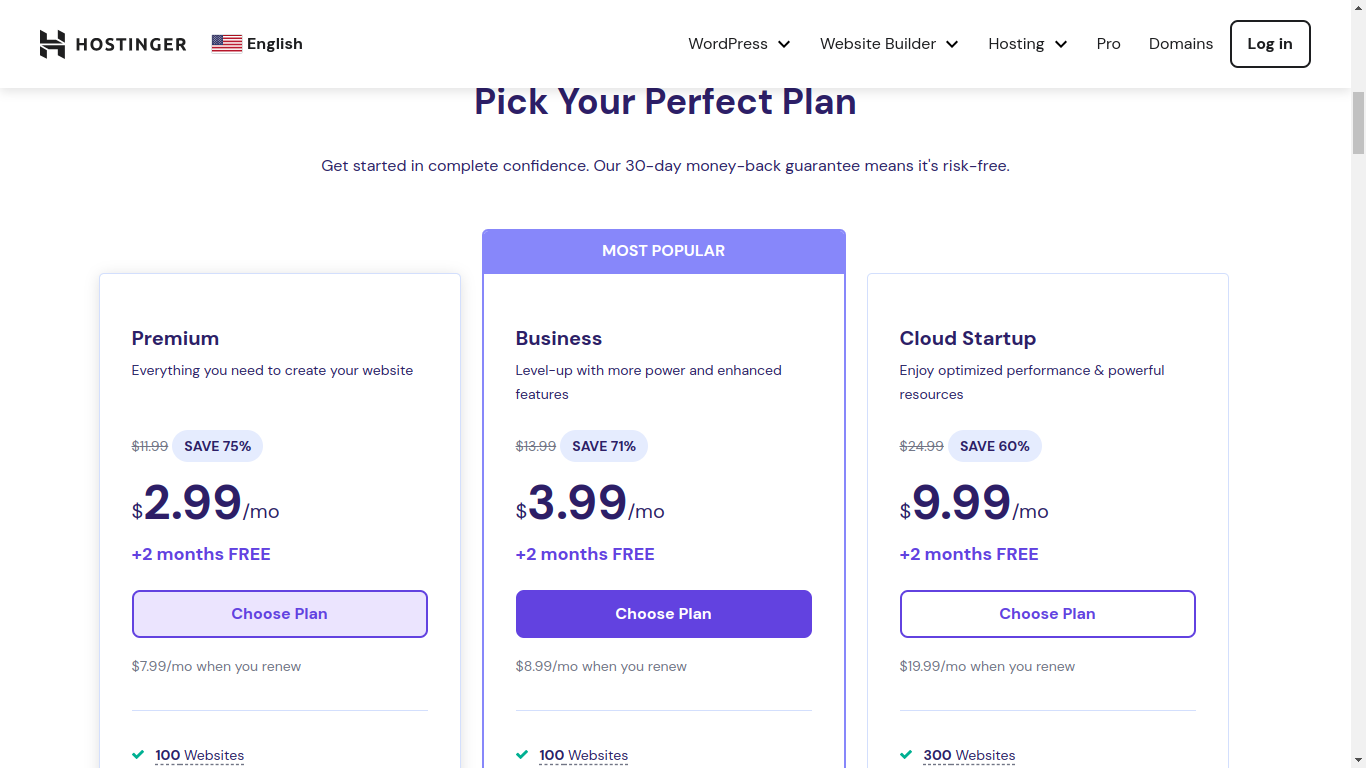
Go to Hostinger’s homepage website https://www.hostinger.in. Choose the plan that suits your hosting needs among premium, business, and cloud startup options.
We are using the Premium plan on Hostinger.
You will be redirected to the payment and registration page after choosing the desired plan. Fill in the necessary details and complete the registration and payment process.
Step-2: Login and Add the website
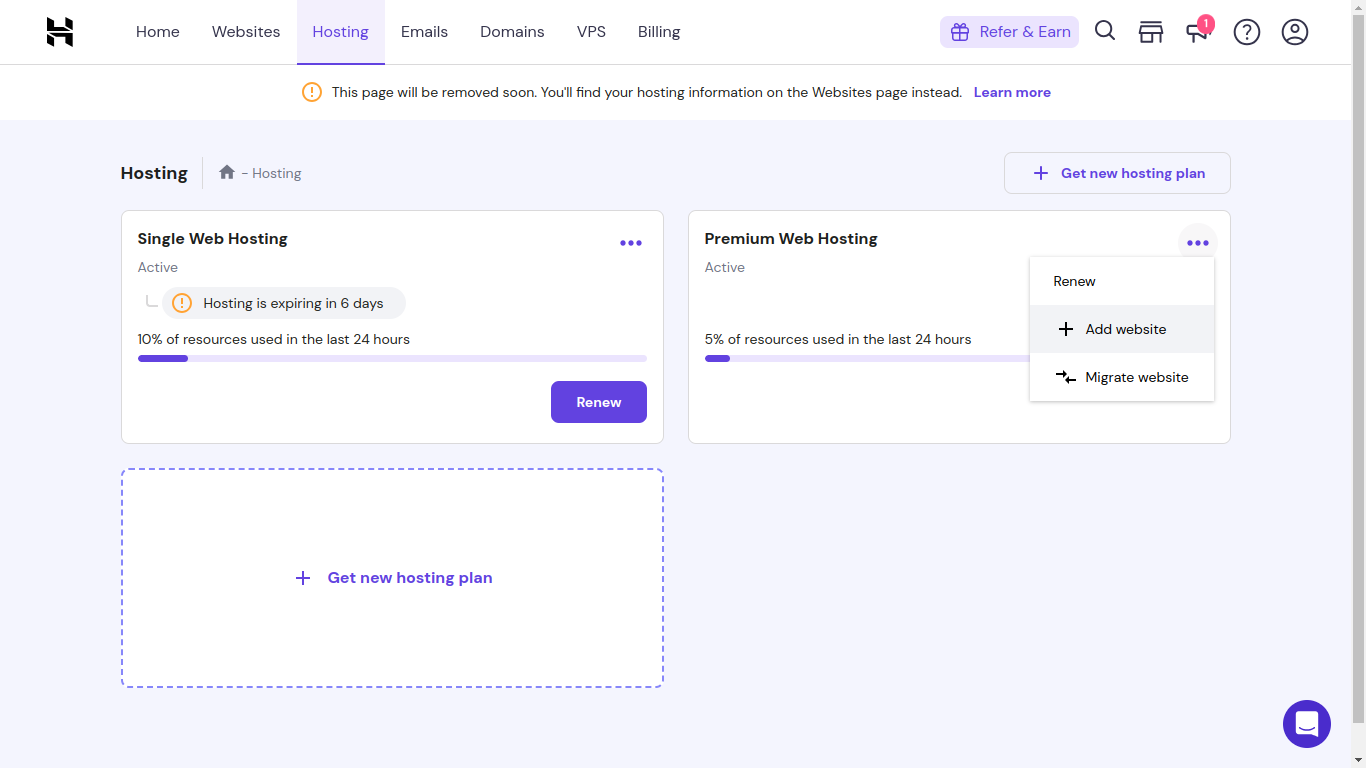
Now, Login to your Hostinger account and go to the Hosting tab. Here you see your purchased plan.
Now click … in your plan and choose “Add website”.
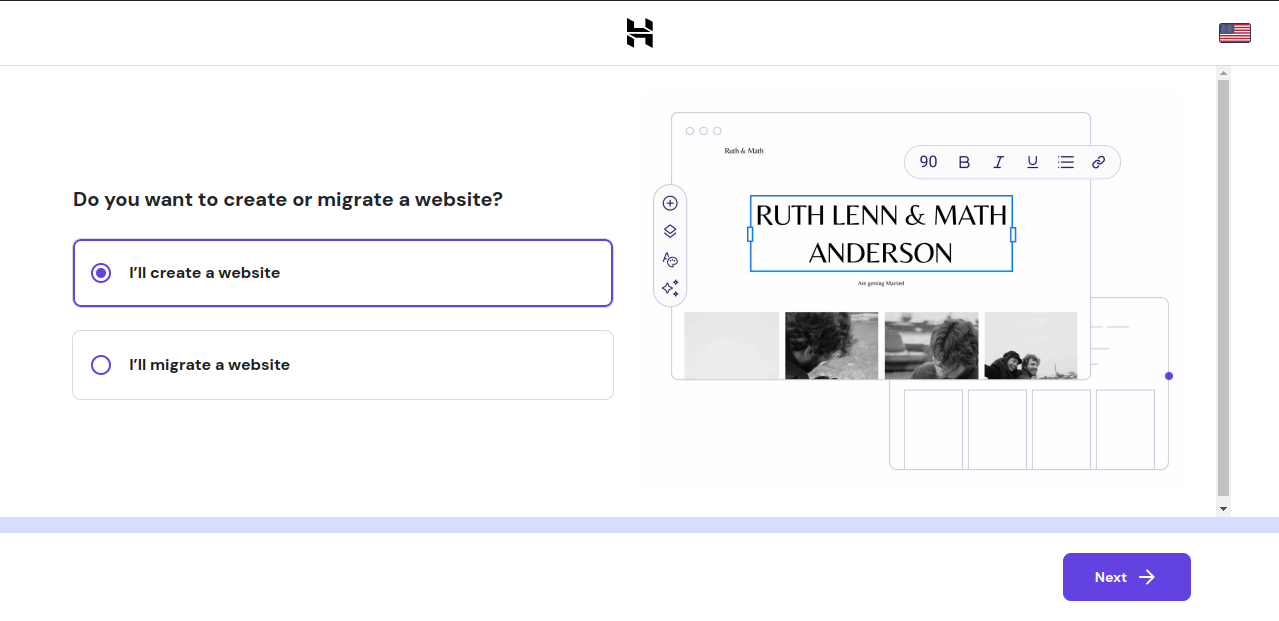
Now choose the option ‘I’ll create a website’.
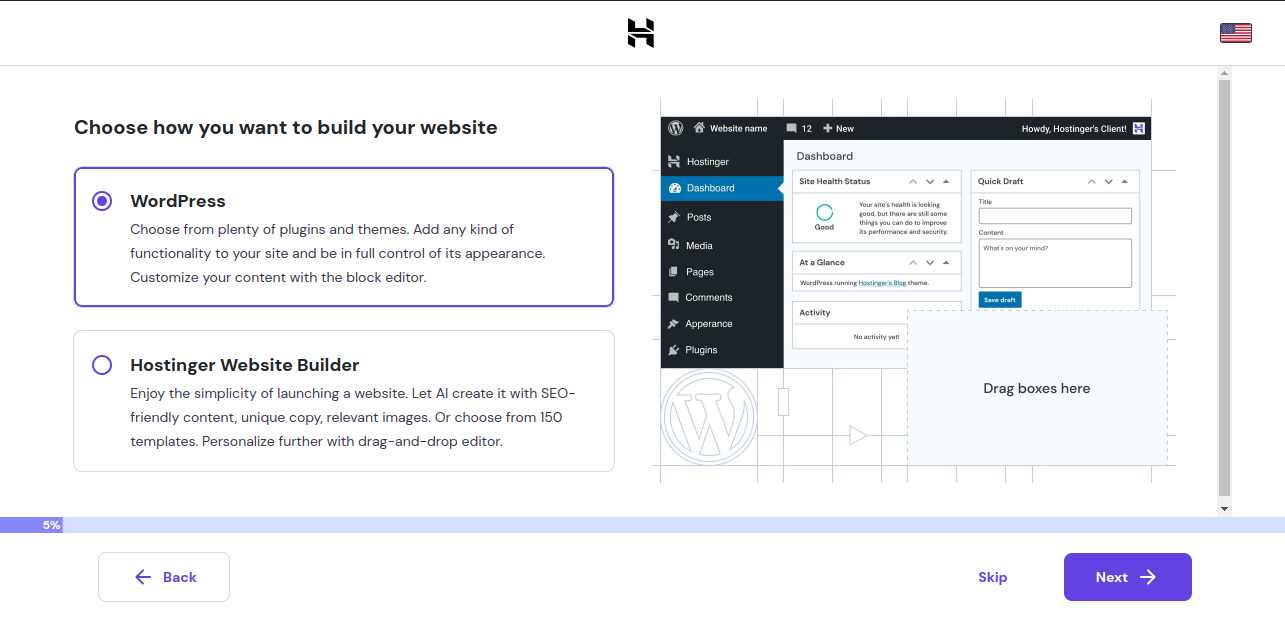
Skip any of the website building services on the next page.
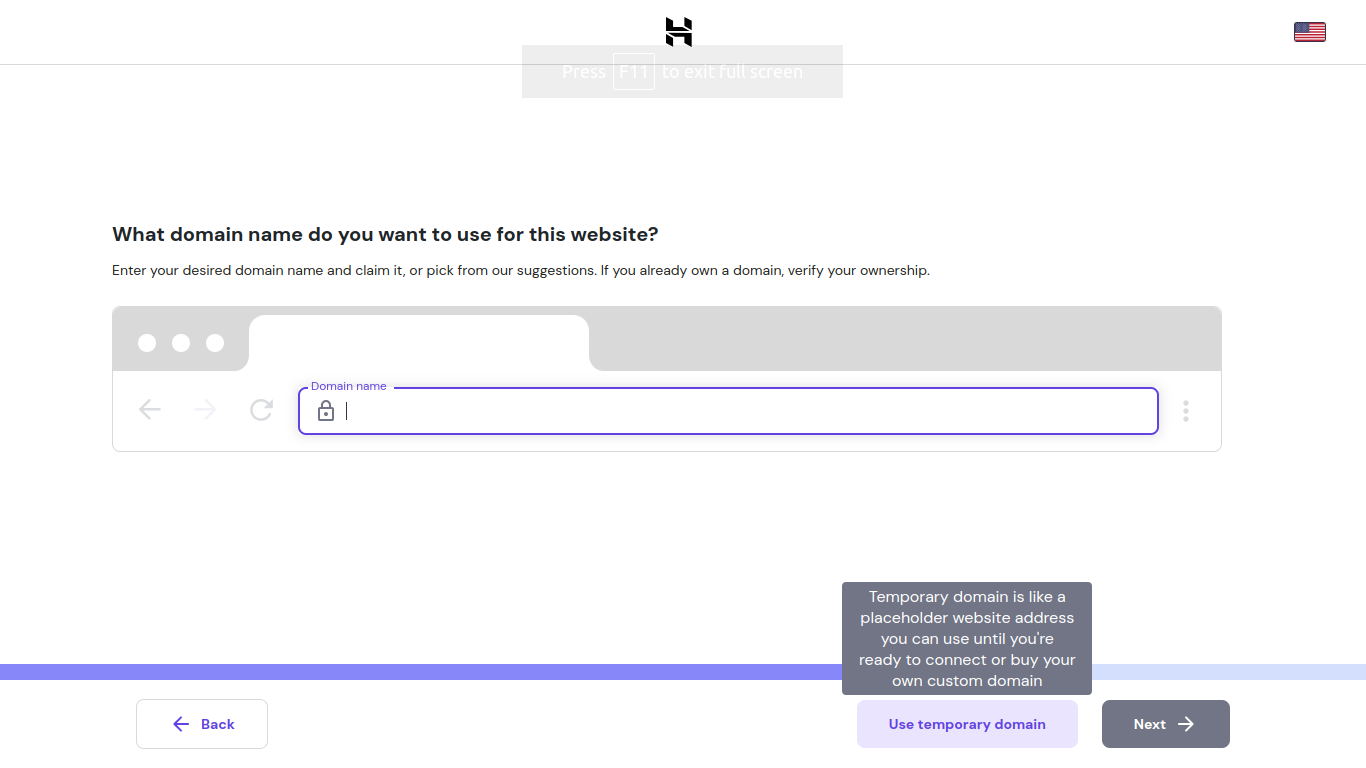
Use a temporary domain or Enter the domain name you want to choose for the website. I am using a temporary domain for now.
You can connect your existing domain from another provider by updating domain nameservers or buying a new domain from Hostinger.
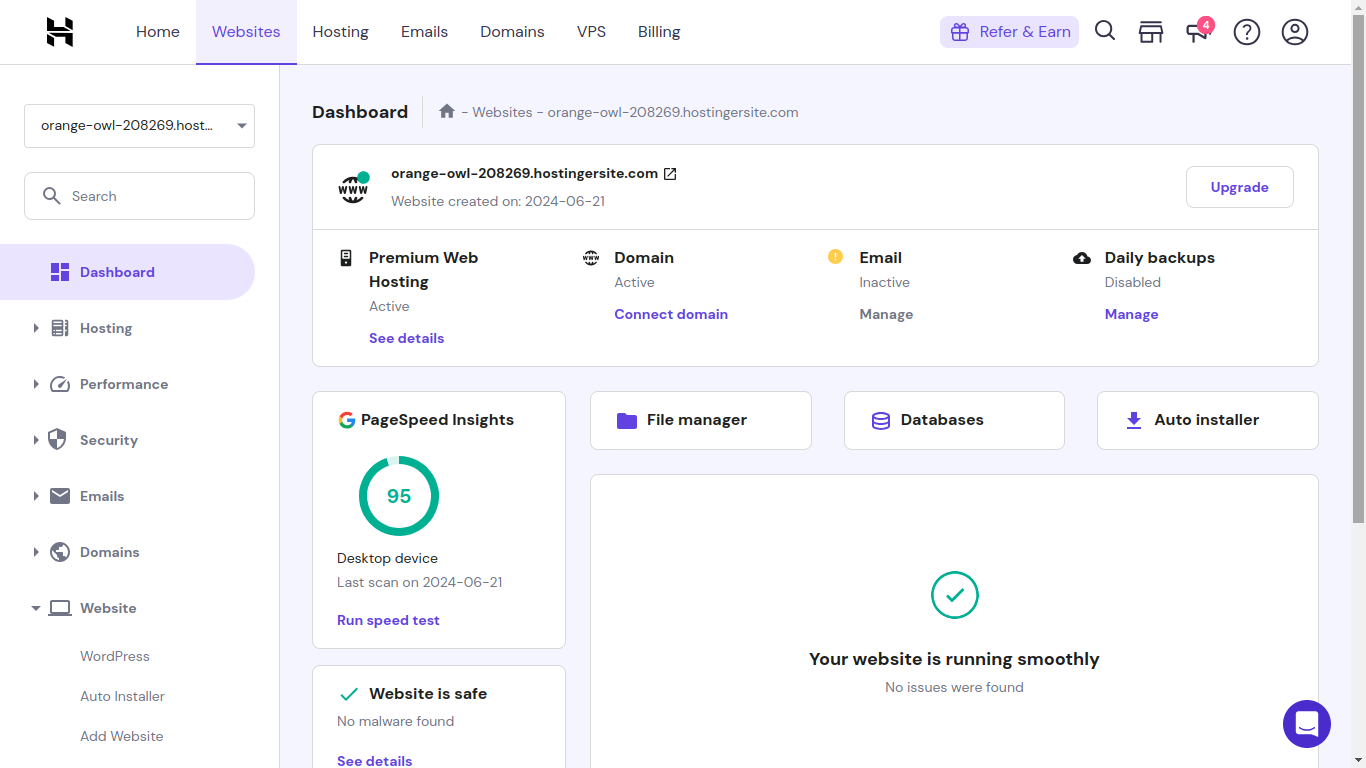
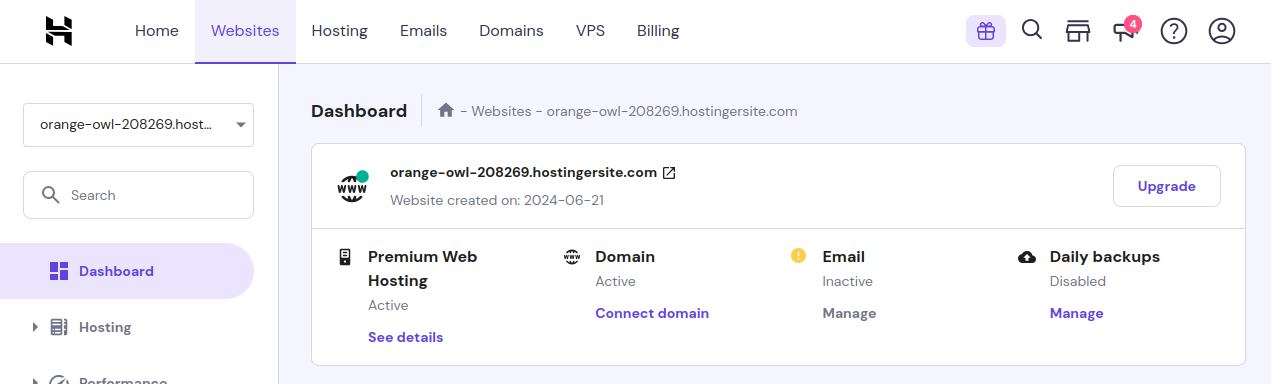
After finishing this process, You can access your website dashboard in the Websites tab.
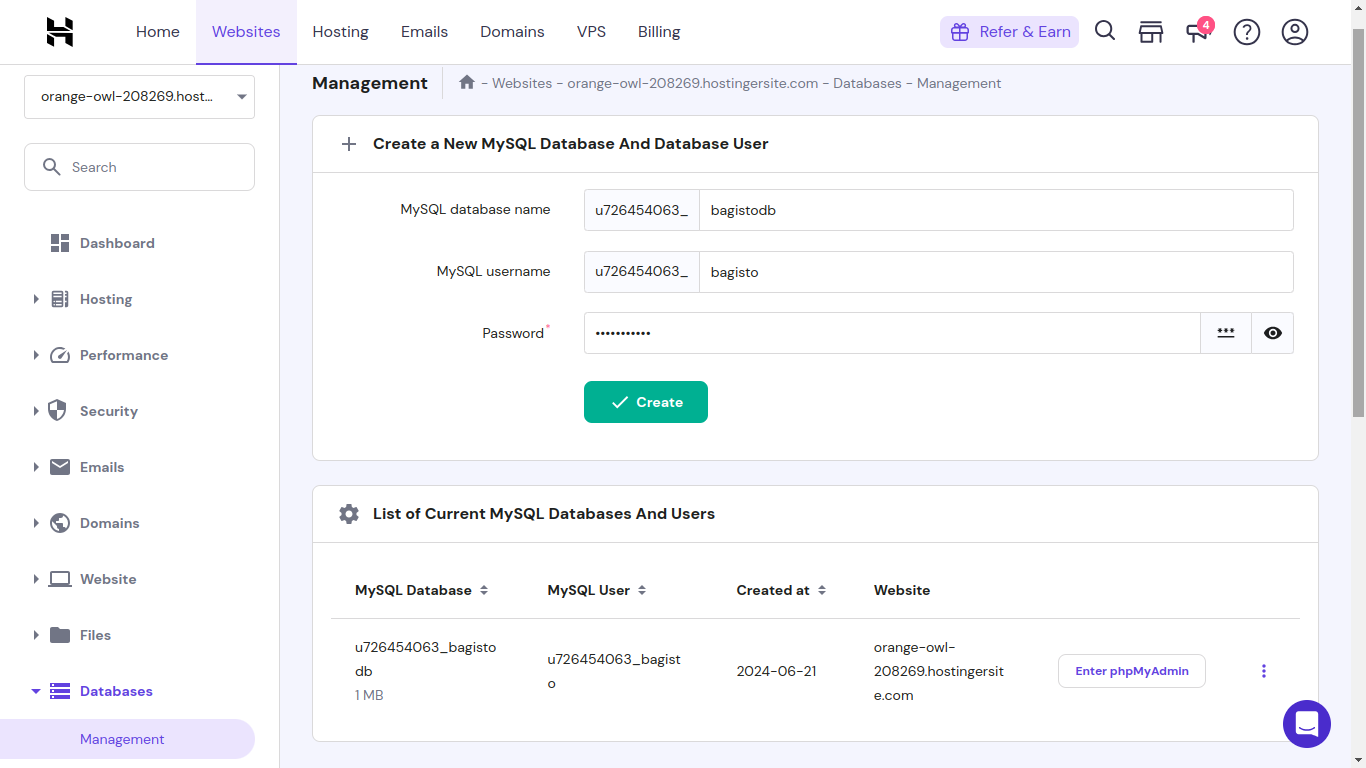
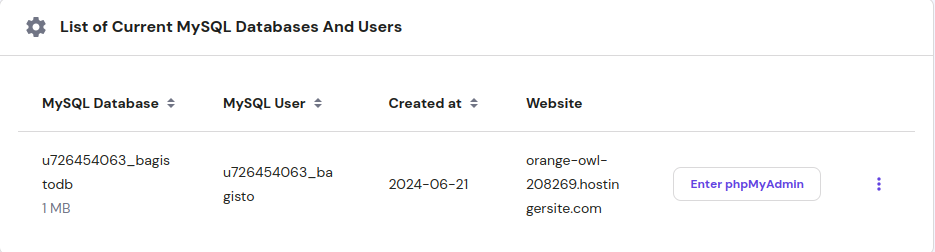
Step-3: Create a Database
Go to the Database Section in the Side menu and choose Management. Now enter all the required details – MySQL Database Name, Username, and Password to create the database.
Step-4: Enable SSH Access
Now go to the Advanced section in the Side menu and choose SSH Access. Then enable the SSH status and change the password.
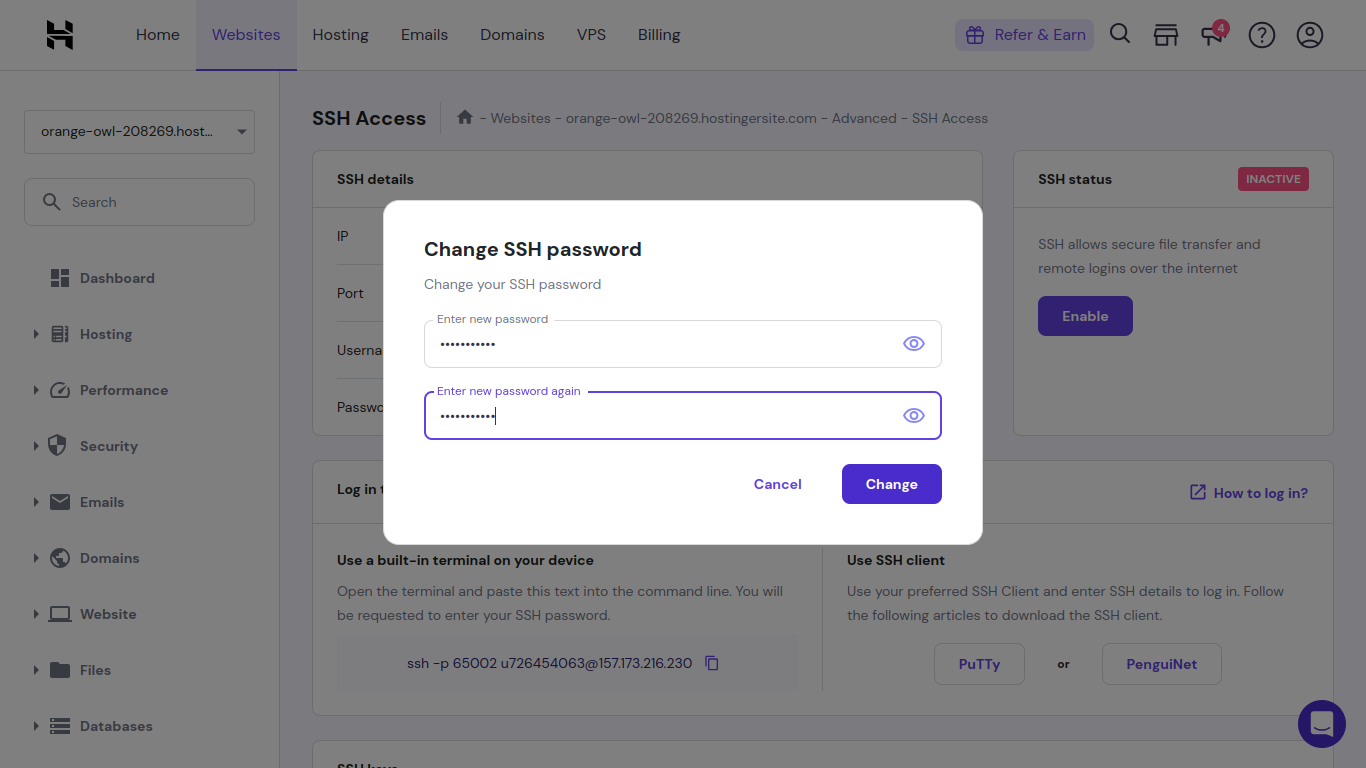
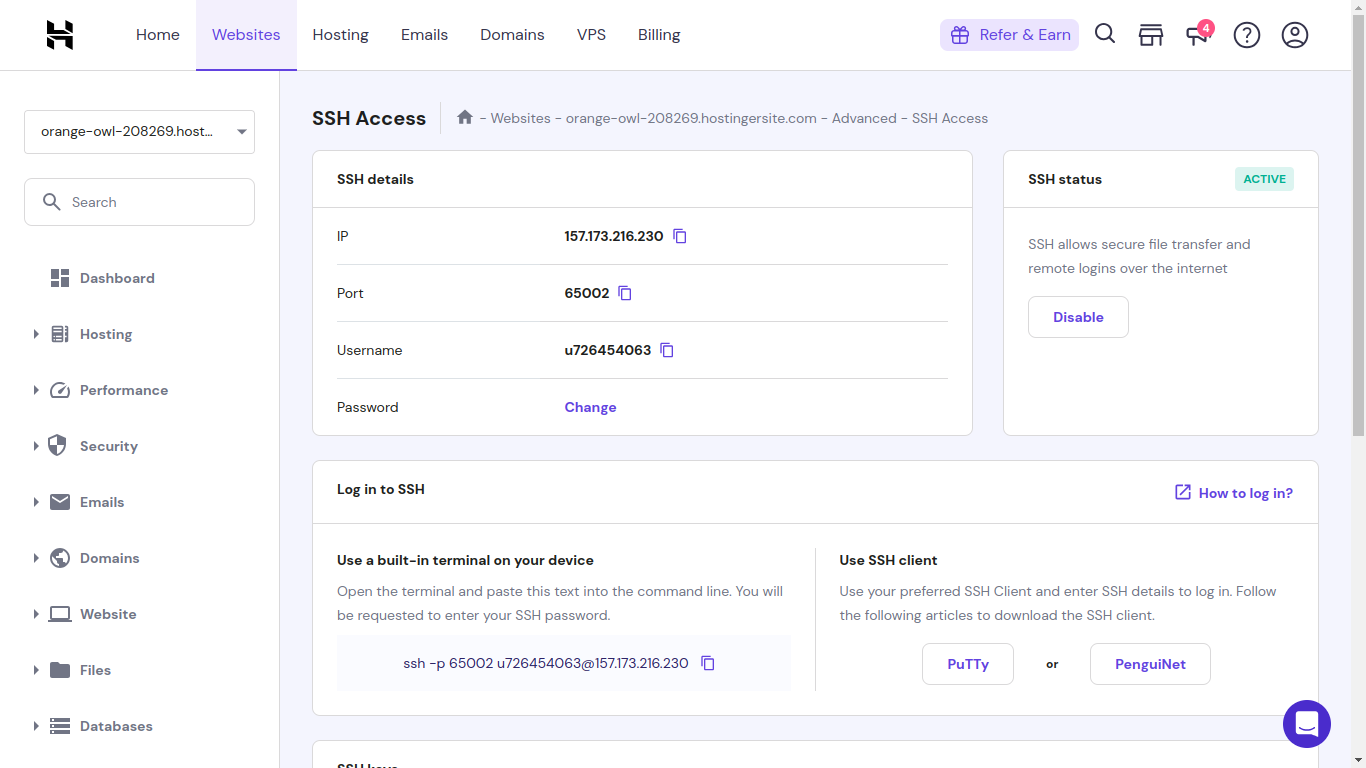
Now copy the SSH command as shown and login to the server via the terminal using the password you created.
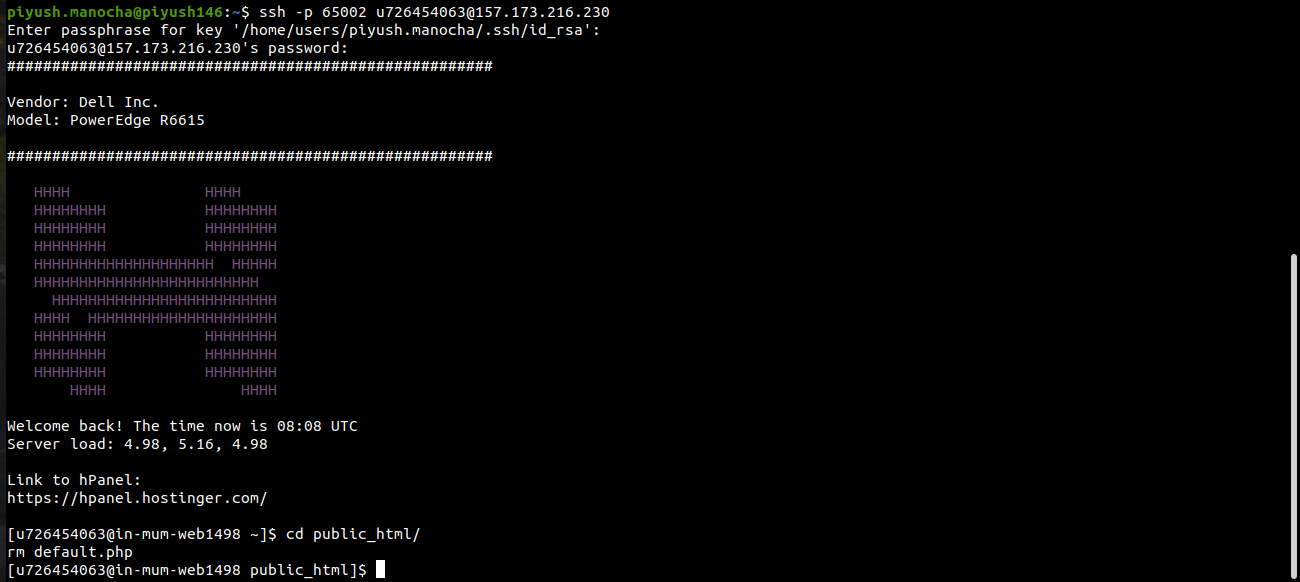
Now remove the default.php from the public_html folder with the following commands :
cd public_html/
rm default.php
Step 5: Setup composer and Bagisto
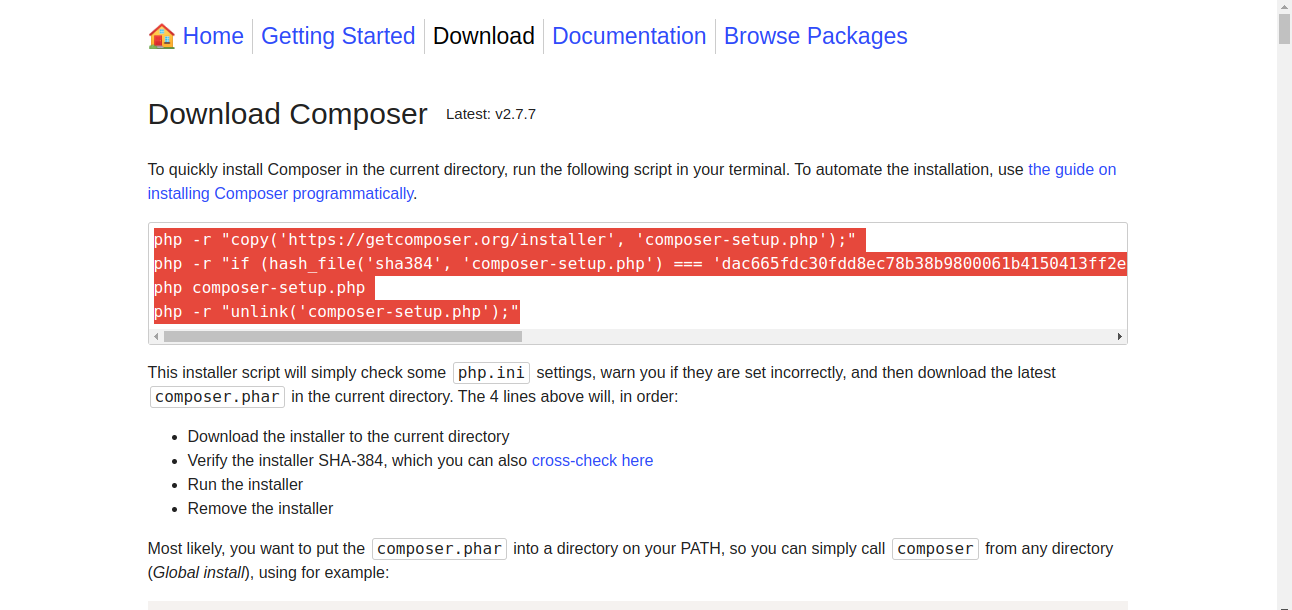
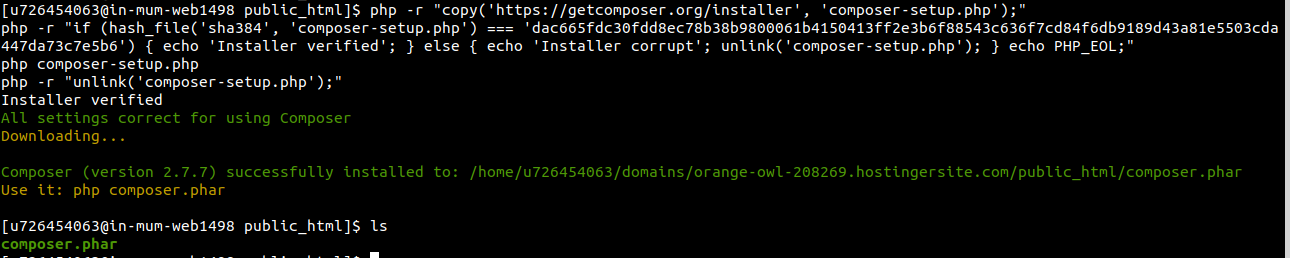
Go to https://getcomposer.org/download/ and copy all commands listed to install composer.
Now paste these commands into the terminal and press Enter.
Now run this command: php composer.phar create-project bagisto/bagisto
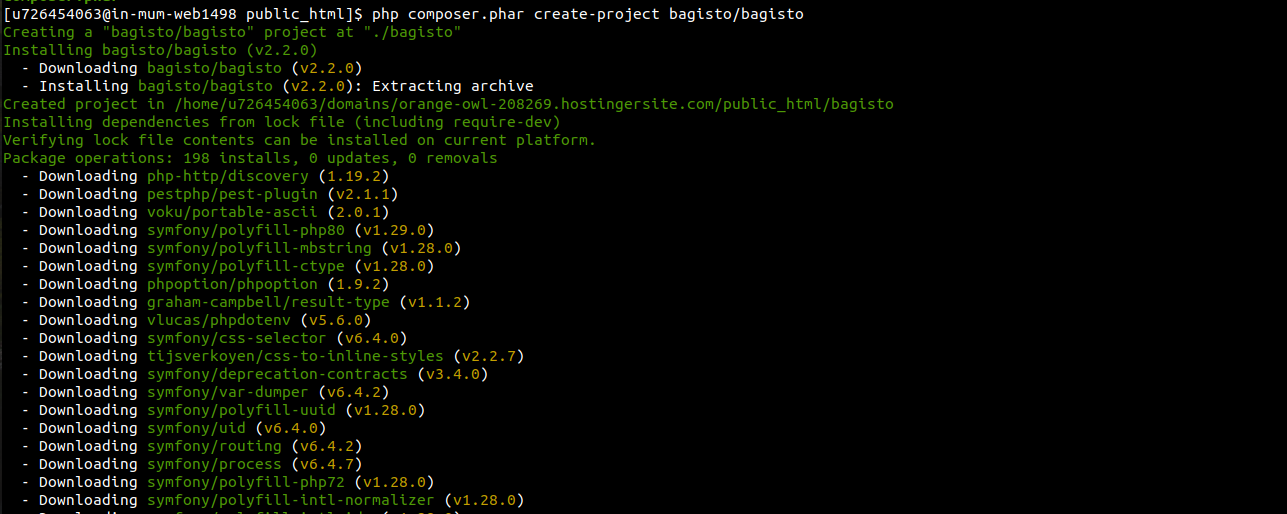
This will create a bagisto folder inside the public_html directory. After completion, run the following commands: mv bagisto/* bagisto/.* . You can access all files in the public_html folder now.

Now open .env file using
nano .env
and do the following changes:
APP_URL = <domain-used-by-hostinger-(displayed-on-dashboard or database-management-section)>
DB_DATABASE = <Mysql database name (database-management-section as shown in step-3)>
DB_USERNAME = <Mysql user name (database-management-section as shown in step-3)>
DB_PASSWORD = <Mysql password created in Step-3>
Ctrl+X to save and exit

Step-6: Install Bagisto
Run the following command to install bagisto
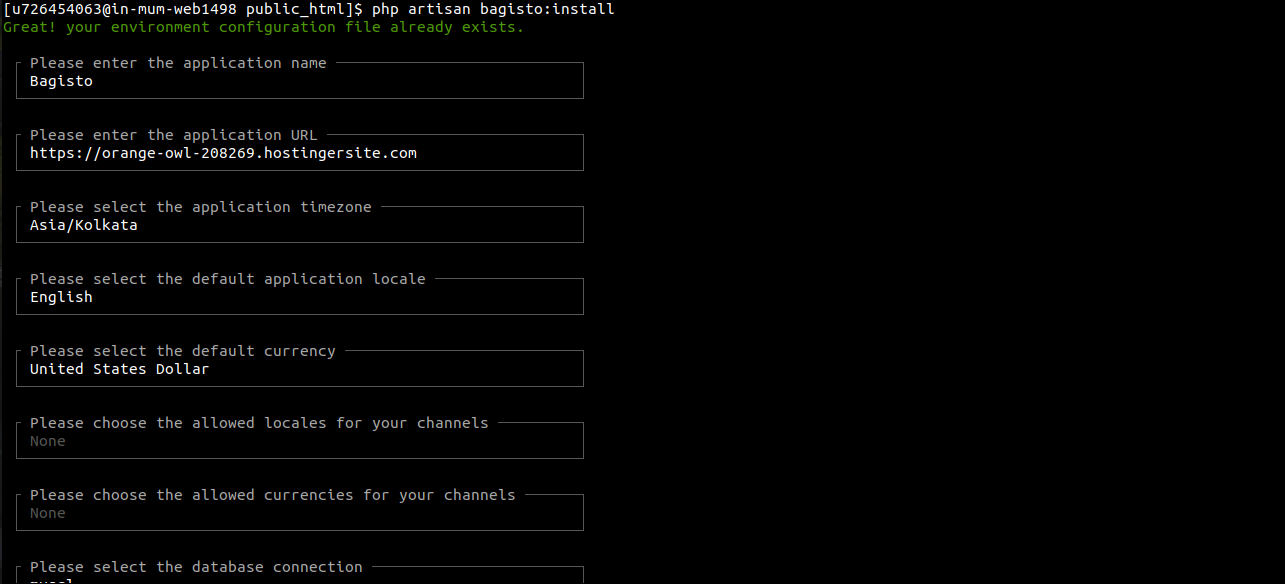
php artisan bagisto:install
Fill in all necessary details to configure your Bagisto application
After Completion, create one .htaccess file
nano .htaccess
with the following content:
RewriteEngine on
RewriteRule (.*) /public/$1 [L]
Step-7: Access your website
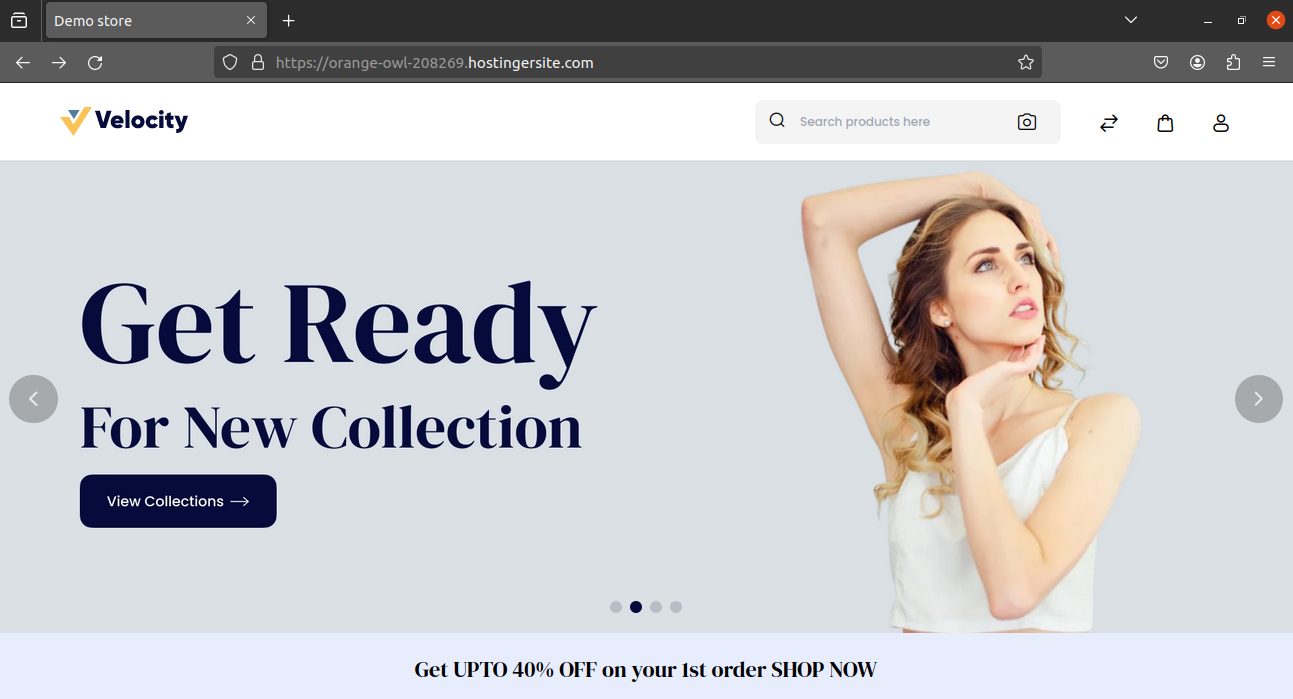
Enter the Application URL on the browser or click the dashboard website link to see that the Bagsito has been installed successfully.
To disable debug mode use the following command :
sed -i ‘s/APP_DEBUG=true/APP_DEBUG=false/’ .env
NEED HELP?
Was this guide helpful? Please share your feedback in the comments below.
In case you have any issues/queries regarding the module please raise a ticket at
https://webkul.uvdesk.com/en/customer/create-ticket/
For any further information or query contact us at [email protected].

1 comments