What Bagisto really is?
Bagisto is an eCommerce ecosystem designed for all to build and scale your business.
It’s a free and open source eCommerce framework which offers you a wide range of functionality and lets you have total control of your store.
Built on top of Laravel stack, it is coupled with easy product information management and fast time to market the product. Besides, the framework is very flexible and easy to use even for non-tech savvies.
We will learn how to setup Bagisto on DigitalOcean. Now the question arises what is DigitalOcean, don’t worry you will get the answer below:
What is DigitalOcean?
DigitalOcean is one of the leading Cloud Service Provider which mainly deals in Infrastructure as a Service (IaaS).
It allows you to setup a Virtual Server very quickly due to easy-to-use interface and SSD based storage.
Some of the services provided by DigitalOcean areVirtual Servers, Block and Object-based Storage , Kubernetes-based container service (latest devops service) etc.
Here , we are going to use 2 of the most common DigitalOcean services:
i) Droplet
ii) Managed Database
Droplet
Droplets are DigitalOcean Virtual Machines or Virtual Servers which are all Linux backed. There are several Linux flavours droplets which we can use as our Virtual Server with various plans which we can opt according to the need of our resource consumption i.e ( memory , storage, processor) .
Managed Database
Managed Database is the database service in which DigitalOcean takes care of many database administration tasks . The user only pays for the service and the company takes care of database creation, management, maintenance and it becomes providers responsibility to take care of the database infrastructure.
Some of the feature of DigitalOcean Managed Database are:
- Automated failover support
- Security through data encryption on disk and network
- Multi-node database clustering
- Daily backups with Point in Time Recovery
- Connection pooling
- Seamless switching of plans & regions
Setup Bagisto on DigitalOcean:
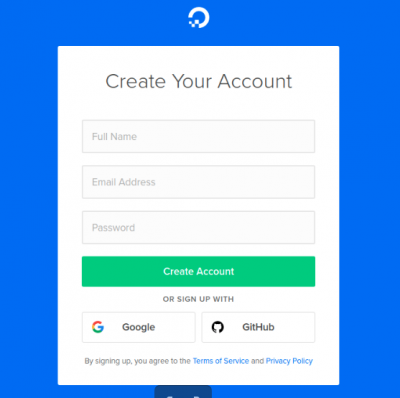
Step-1: Sign up and Login in DigitalOcean
You can go to signup page of DigitalOcean by clicking this link: https://cloud.digitalocean.com/registrations/new
A page will open which looks like this, enter the details and complete your account creation.
After this, you can login by clicking this link: https://cloud.digitalocean.com/login
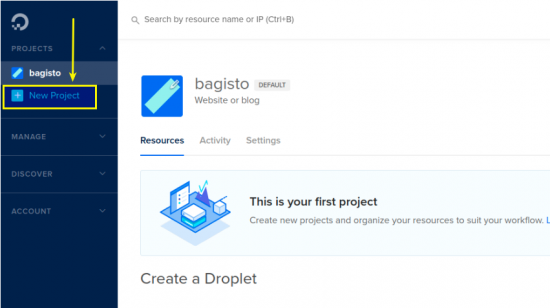
Step-2: Create Project
Click on New Project and enter the details and then click on Create Project button.
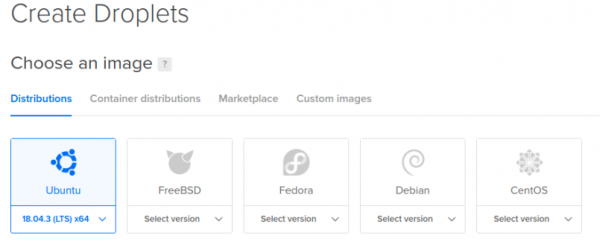
Step-3: Create Droplet
Create the Virtual Server i.e Droplet for your Bagisto App.
i) Choose an image. Here I am choosing Ubuntu 18.04.3 .
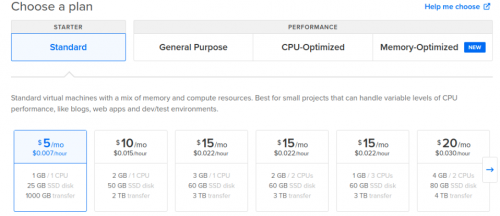
ii) Then choose the plan. I am going for the cheapest one for demo purpose.
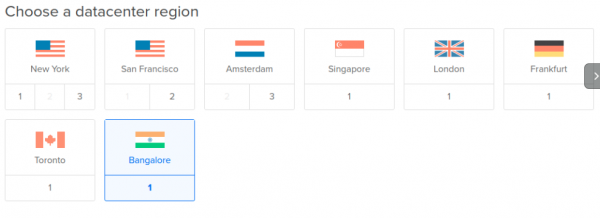
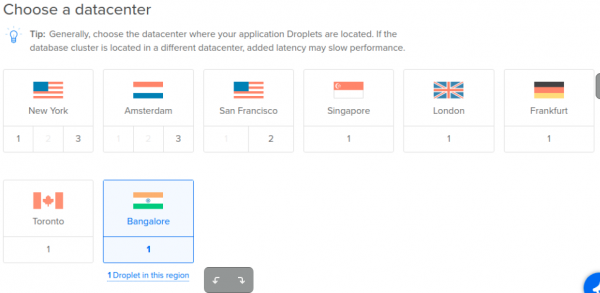
iii) Choose the DataCenter region for your application. I am choosing Bangalore which is nearest to me.
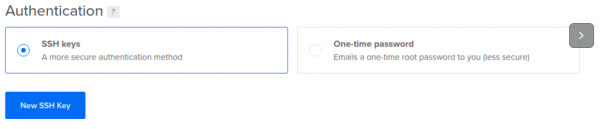
iv) Select authentication method for accessing the server. There are two methods available:
First is by using SSH keys which is more secure.
Other is by using password to access the server.
I am choosing the SSH keys option.
If you have selected the same option then you can follow this procedure.
- Click on “New SSH Key” button. A prompt will appear like this below:
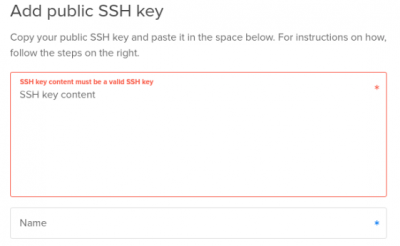
- Go to your local linux machine and find your local machine’s public key and paste it here in the empty box. You can find you public key by typing this command in your users home directory.
-
1cat .ssh/id_rsa.pub

- After pasting the key, give name to the key in name box and then click on “Add SSH Key” button.
v) In Finalize and Create, choose the number of droplets, i am choosing only one droplet. You will see a default droplet name. You can change this name according to you. I changed the name to bagisto-droplet.
Add tag name.
Select project to which you want to assign your droplet and click on “Create Droplet” button.

Step-4: Create Database
Now, create a database for application through DigitalOcean’s managed database sservice.
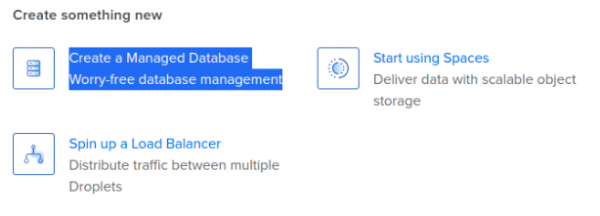
i) Click on “Create a Managed Database” option.
ii) Choose MySql database engine.

iii) Choose pricing plan and then choose datacenter location.Choosing the same location of database as of droplet would be a good practice as it reduces the latency. So i am choosing Bangalore region again.
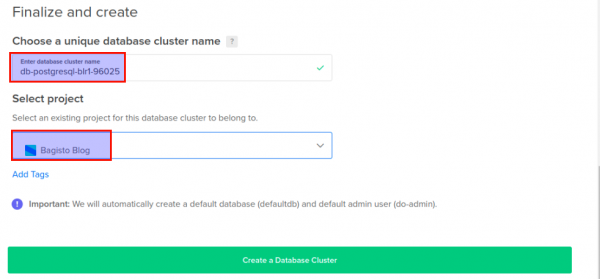
iv) In “Finalize and Create”, give a unique database cluster name or you can go with a default one provided.
Select project and then click on “Create a Database Cluster” button. Then click on “Get Started” button.
v) Secure your database cluster. By default your database can be accessed from any public IP but you can restrict access and make your database only accessible through your public IP and your droplet IP.

After entering your public IP addresses, click on “Allow these inbound sources only” button.
vi) After database creation , you will get your database credentials. Save these credentials to access your database and then click on “Continue” button.
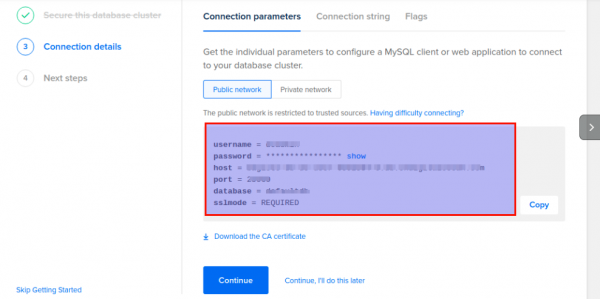
Then, click on “Great, I’m done” button.
Step-5: Login to your Ubuntu Server (droplet)
You can login to your Ubuntu server by typing this command.
|
1 |
ssh root@your-server-ip-address |
After logging in , install the required software for your application.
i) Install apache2, php7.2 and its modules.
Run these commands one by one.
|
1 2 3 4 5 6 7 |
sudo apt-get update sudo apt-get install -y apache2 sudo apt-get install -y software-properties-common sudo add-apt-repository ppa:ondrej/php sudo apt-get update sudo apt-get install -y php7.2 php7.2-{zip,curl,gd,mbstring,dom,intl,mysql} libapache2-mod-php7.2 sudo apt-get install mysql-client |
If any of the php module remain left ,you can install it by simply this command.
|
1 |
sudo apt-get install php7.2-<module_name> |
Check php version, it should be php7.2.x . If it is same, then enable apache php-module and apache rewrite-module.
|
1 2 3 |
php -v a2enmod php7.2 a2enmod rewrite |
ii) Install Curl and Node.js version 10.x
|
1 2 3 |
sudo apt-get install curl curl -sL https://deb.nodesource.com/setup_10.x | sudo -E bash - sudo apt-get install -y nodejs |
iii) Install Composer
|
1 2 3 4 5 6 |
php -r "copy('https://getcomposer.org/installer', 'composer-setup.php');" php -r "if (hash_file('sha384', 'composer-setup.php') === 'a5c698ffe4b8e849a443b120cd5ba38043260d5c4023dbf93e1558871f1f07f58274fc6f4c93bcfd858c6bd0775cd8d1') { echo 'Installer verified'; } else { echo 'Installer corrupt'; unlink('composer-setup.php'); } echo PHP_EOL;" php composer-setup.php php composer.phar cp composer.phar /usr/local/bin/composer |
Step-6: Create User
Till now, we were in the root user of our server but we do not keep our application code in the root user’s directories due to security concerns. For this we have to create another user.
Create a user which will be the owner of application code. I am creating a user named “bagisto”. You can choose any name.
|
1 |
adduser bagisto |
It will prompt for password and re-enter password, give the password. You can leave the remaining fields empty just by pressing enter key.
After creating user, we will switch to the new created user.
|
1 |
su - bagisto |
Create a new directory and switch to that directory.
|
1 |
mkdir public_html && cd public_html |
Step-7: Download Bagisto
Now we will download Bagisto through composer by using this command.
|
1 |
composer create-project bagisto/bagisto |
After downloading , a directory named “bagisto” will be created inside public_html directory, go to the bagisto/public directory. This is the directory from where index.php will be loaded.
|
1 |
cd bagisto/public |
Now, check your DocumentRoot by using command “pwd” .
![]()
My DocumentRoot is “/home/bagisto/public_html/bagisto/public” .
Step-8: Configure apache
We need to configure apache to serve the web pages. For this we have to switch again to the root user for apache configuration.
|
1 2 |
exit nano /etc/apache2/sites-enabled/000-default.conf |
You will find this line below:
![]()
Change it to this:
![]()
Save file and exit.
Now configure envvars file.
|
1 |
nano /etc/apache2/envvars |
Find these 2 lines:
![]()
Modify the user of apache like this below:
![]()
Configure apache2.conf file
|
1 |
nano /etc/apache2/apache2.conf |
You will find this block of code:
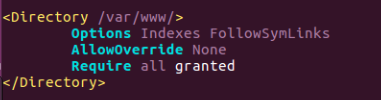
Modify it to this code below:
|
1 2 3 4 5 6 |
<Directory /home/bagisto/public_html/bagisto/public> Options FollowSymLinks AllowOverride All Require all granted </Directory> |
Save the file and exit.
Restart apache now.
|
1 |
sudo service apache2 restart |
Step-9: Configure Bagisto
Go to your browser and enter the IP address of your droplet or domain name if you have configured domain for your server. A page will open similar to this below:

Click on “Continue” button.
A new Environment Configuration page will open . Enter the details and enter the same database credentials you got during database creation.
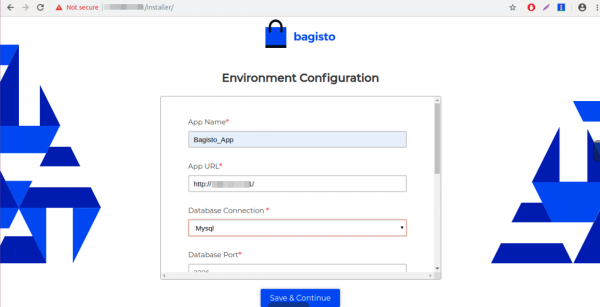
Like this, multiple prompts will appear. Enter the details accordingly.
After complete installation the admin page will look like this:
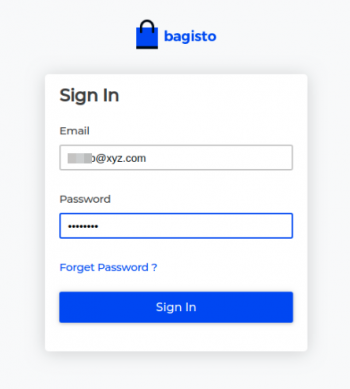
Your default admin dashboard will look like this.

And your default application homepage will be similar to this:

Now, your E-Commerce site is ready, congrats.
In case of any help or query, please contact us or raise a ticket at [email protected].

Be the first to comment.