In this tutorial, we will learn how to install OpenCart on Ubuntu 20.04 LTS.
OpenCart is a popular shopping cart software that Polish developer Jakub Kucharski created in 2004. It allows you to create a store from scratch or improve an existing website.
It has a user-friendly interface and supports a variety of languages. OpenCart is free, open-source software available to download and use without charge.
Requirements to install OpenCart :
- Ubuntu 20.04
- System Requirements 2GB of RAM, 2 CPU Cores, 1 GB of Disk space
- Webserver: Apache2
- PHP7.3 or higher
- MySQL 8.0
Step1:Install Apache WebServer
Start by updating the package manager cache. The sudo apt update command is used to download package information from all configured sources.
|
1 |
sudo apt update |

Apache2 is an open-source popular, powerful, reliable, and highly extensible web/HTTP server software used by numerous websites on the internet.
|
1 |
sudo apt install apache2 -y |

You can confirm that the Apache2 service is up and enabled on boot using the following systemctl command
|
1 |
sudo systemctl status apache2 |

Step 2:Install PHP
A general-purpose open-source scripting language, PHP is one of the most popular programming languages for web development.
It powers some of the most popular websites and web applications in the world.
|
1 |
sudo apt install software-properties-common |

|
1 |
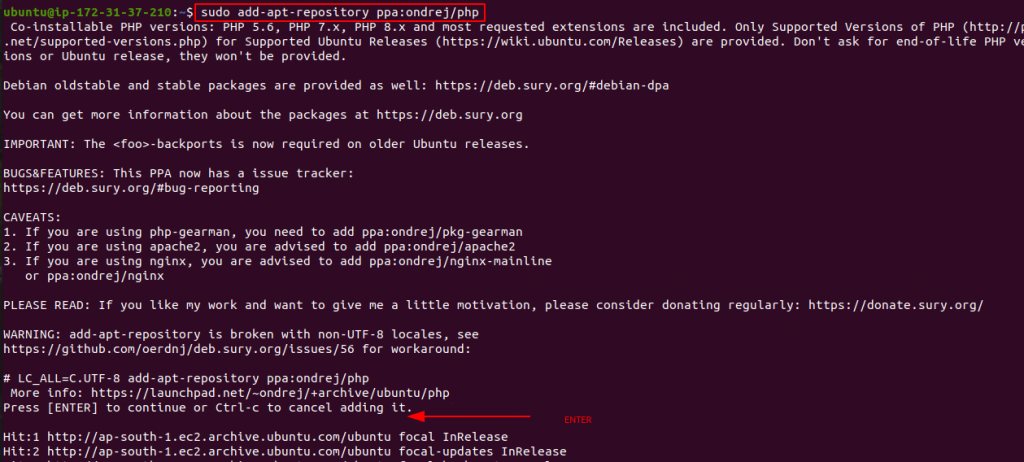
sudo add-apt-repository ppa:ondrej/php |
|
1 |
sudo apt install php8.1 php8.1-cli php8.1-common php8.1-curl php8.1-gd php8.1-intl php8.1-mbstring php8.1-mysql php8.1-opcache php8.1-readline php8.1-xml php8.1-xsl php8.1-zip php8.1-bz2 libapache2-mod-php8.1 php8.1-bcmath php8.1-soap php8.1-fpm -y |

Step 3:Install MySQL and Create a Database
Case 1: If you are using a Local Database Server
Now that you have a web server up and running, you need to install the database system to be able to store and manage data for your site.
MySQL is a popular database management system used within PHP environments.
|
1 |
sudo apt install mysql-server -y |

To access the MySQL shell, run the mysql command with the -u option with sudo.
If you do not use the sudo command, you are bound to encounter the error indicated in the following screenshot.
|
1 2 3 4 |
sudo mysql -u root -p alter user 'root'@'localhost' identified with mysql_native_password by "password"; create database db; exit; |

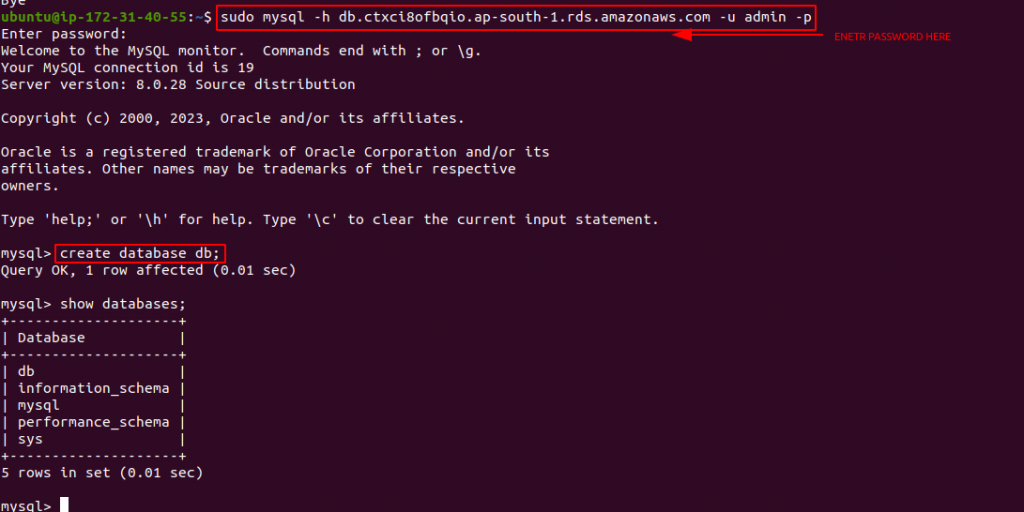
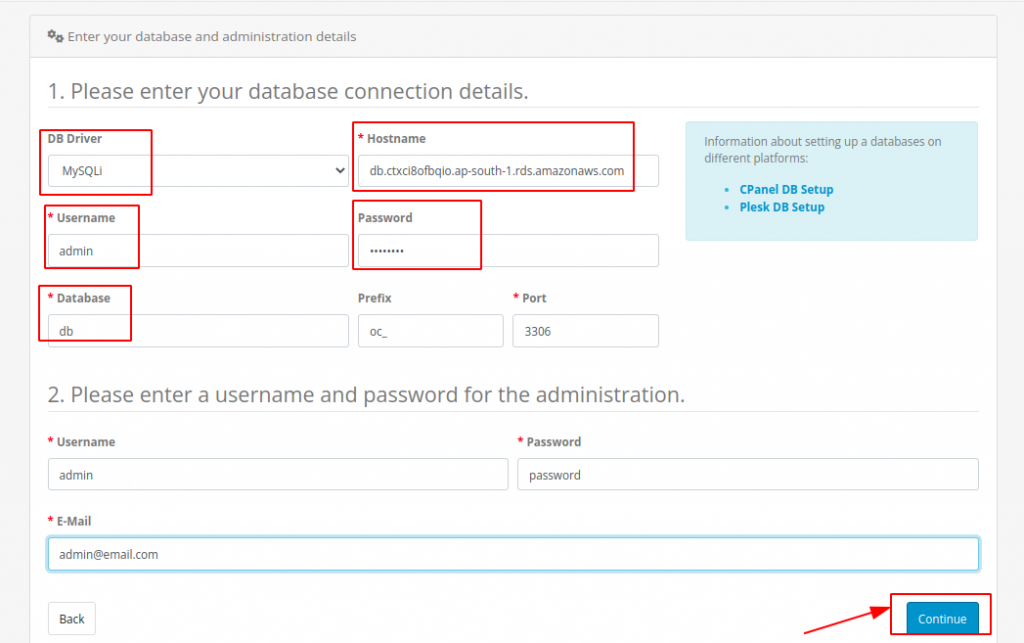
Case 2: If you are using AWS RDS
|
1 |
sudo apt install mysql-client |

|
1 2 3 |
sudo mysql -h db.ctxci8ofbqio.ap-south-1.rds.amazonaws.com -u admin -p create database db; show databases; |
Step 4:Download Opencart Latest Version 4.0.1.1
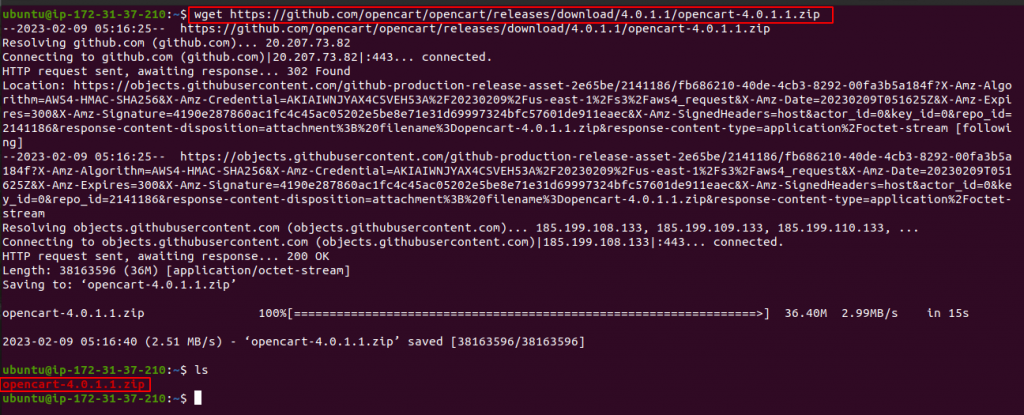
|
1 2 |
wget https://github.com/opencart/opencart/releases/download/4.0.1.1/opencart-4.0.1.1.zip ls |
Then unzip the downloaded file.
|
1 |
sudo apt install unzip |

|
1 |
unzip opencart-4.0.1.1.zip |

After unzipping the downloaded file, you will get the upload directory, and move them to/var/www/html
|
1 2 3 4 |
ls sudo mv upload/* /var/www/html/ cd /var/www/html/ ls |

After Moving the upload directory Files in /var/www/html rename the config.dist.php file in config.php then go to the admin directory and change here also config.dist.php name to config.php.
|
1 2 3 4 5 |
sudo mv config-dist.php config.php ls cd admin sudo mv config-dist.php config.php ls |

Let’s set the directory permissions accordingly:
|
1 2 |
sudo chmod -R 755 /var/www/html/ sudo chown -R www-data:www-data /var/www/html/ |

|
1 2 3 |
cd .. sudo rm -rf index.html sudo systemctl restart apache2.service |

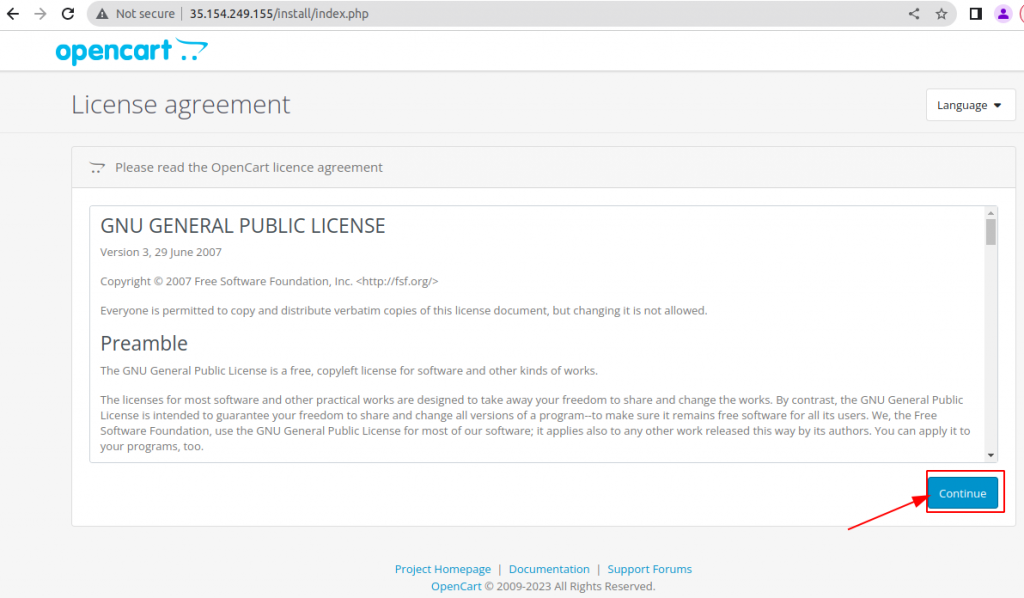
Next, go to http://yourdomain.com or your IP address to complete the installation
Please read the OpenCart license agreement then Click Next
Pre-Installation

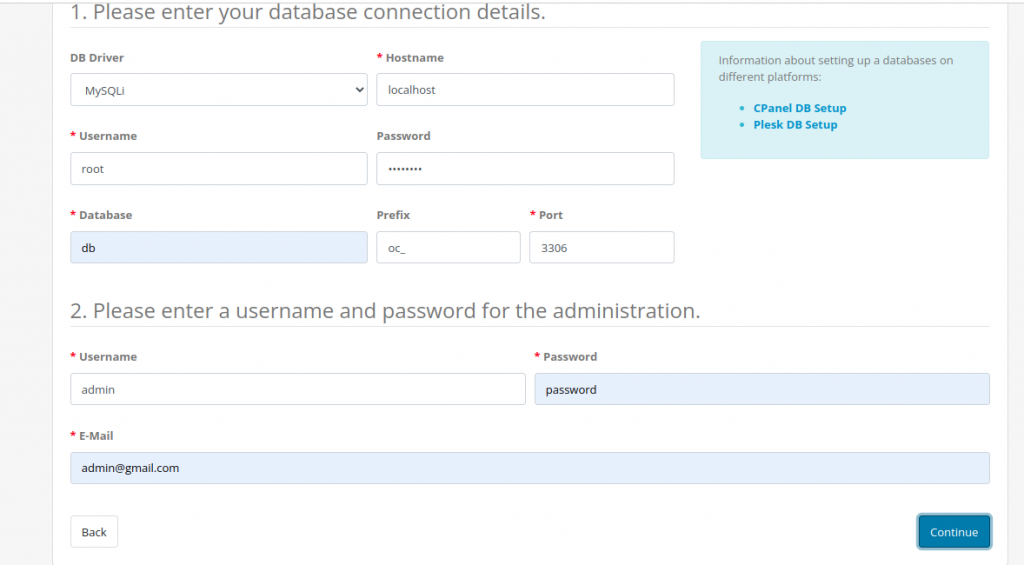
Configuration for Database Connection Details then Click Continue.
Case 1: If you are using a Local Database Server
Case 2: If you are using AWS RDS
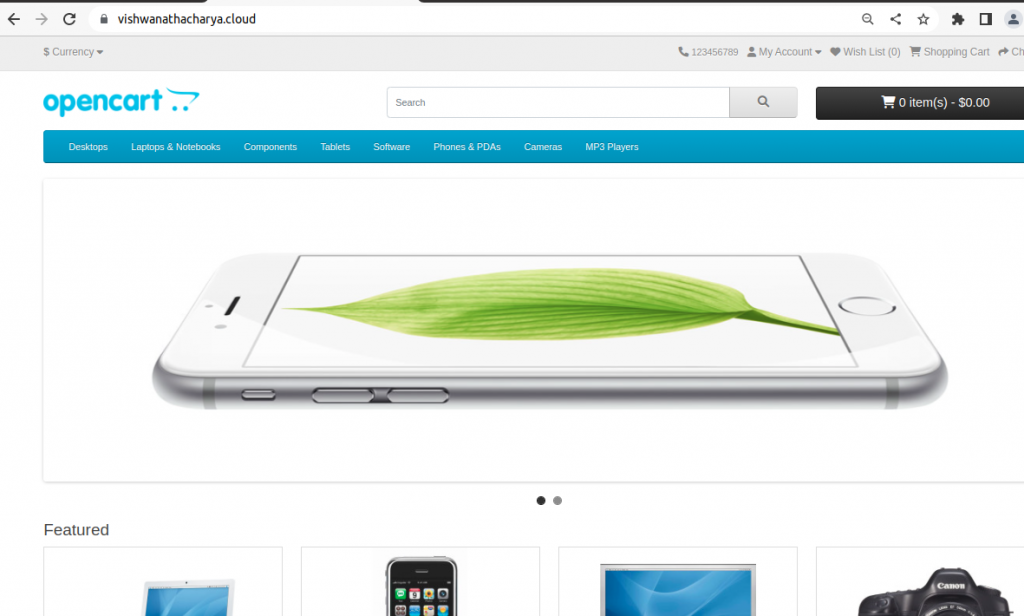
Once the installation is completed, you will see this window.

You can learn how to configure the Free Self-signed certificates from Let’s Encrypt.
Conclusion
In this tutorial, you have learned to install OpenCart on Ubuntu Server. we’ve covered the most essential aspects you need to know about installing and setting up an OpenCart site.
Need Support?
Thank You for reading this Blog!
For further more interesting blogs, keep in touch with us. If you need any kind of support, simply raise a ticket at https://webkul.uvdesk.com/en/.
For further help or queries, please contact us or raise a ticket.


Be the first to comment.