This blog will guide you through the process of installing the WordPress application on an AWS EC2 instance using the WooCommerce AMI, which comes pre-installed with the WooCommerce plugin.
WooCommerce is an open-source WordPress plugin that turns your site into a user-friendly, flexible online store for selling products.
Prerequisites For WooCommerce AMI Installer
Complete the prerequisites to ensure a smooth and secure AWS EC2 deployment
- Allow port 22 (SSH) from your IP in your EC2 Security Group. Ensure 80/443 are open for SSL and the WooCommerce app.
- Use a t3.medium or higher EC2 instance to ensure your server runs smoothly with sufficient CPU and memory for optimal performance.
- Assign an Elastic IP to your EC2 instance to maintain a static public IP address, ensuring consistent DNS configuration and uninterrupted access to your server.
- In your domain registrar’s DNS settings, Create an A record pointing to your EC2 Elastic IP. This ensures your domain correctly resolves to your server.
Installation Steps
Step 1: Launch the EC2 Instance
- First, launch the EC2 instance from the WooCommerce AMI.
- Wait for the EC2 instance’s status to become “running”.
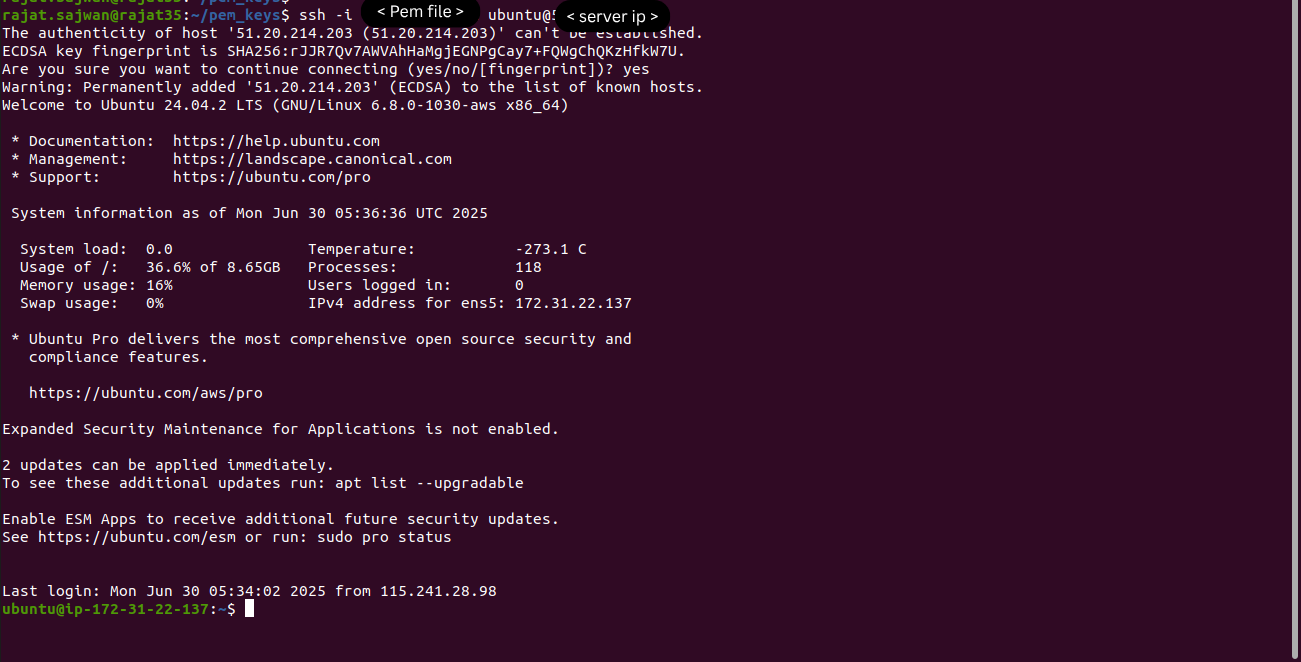
Step 2: Access Your EC2 Instance
SSH into EC2 using your PEM key with proper permissions.
1. Set the PEM File Permission:
The PEM file should be readable only by you. Run the command to set the correct permissions:
|
1 |
chmod 400 your-key-file.pem |
2. Connect to Your EC2 Instance via SSH:
After setting the permission, connect to your instance using:
|
1 |
ssh -i your-key-file.pem ubuntu@your-instance-ip |
Replace your-key-file.pem with your actual key filename, and your-instance-ip with your EC2 instance’s public (Elastic) IP address.
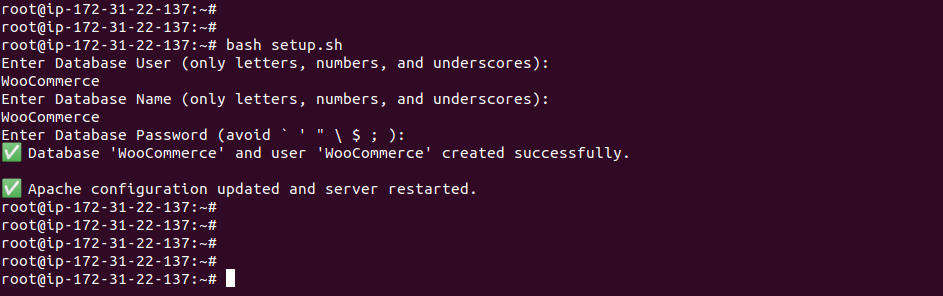
Step 3: Switch to the root user.
Switch to root user by running this command:
|
1 |
sudo -i |

Step 4: Execute the setup.sh script.
Execute the shell script setup.sh to provide the database name, username, and password by running the command:
|
1 |
bash setup.sh |
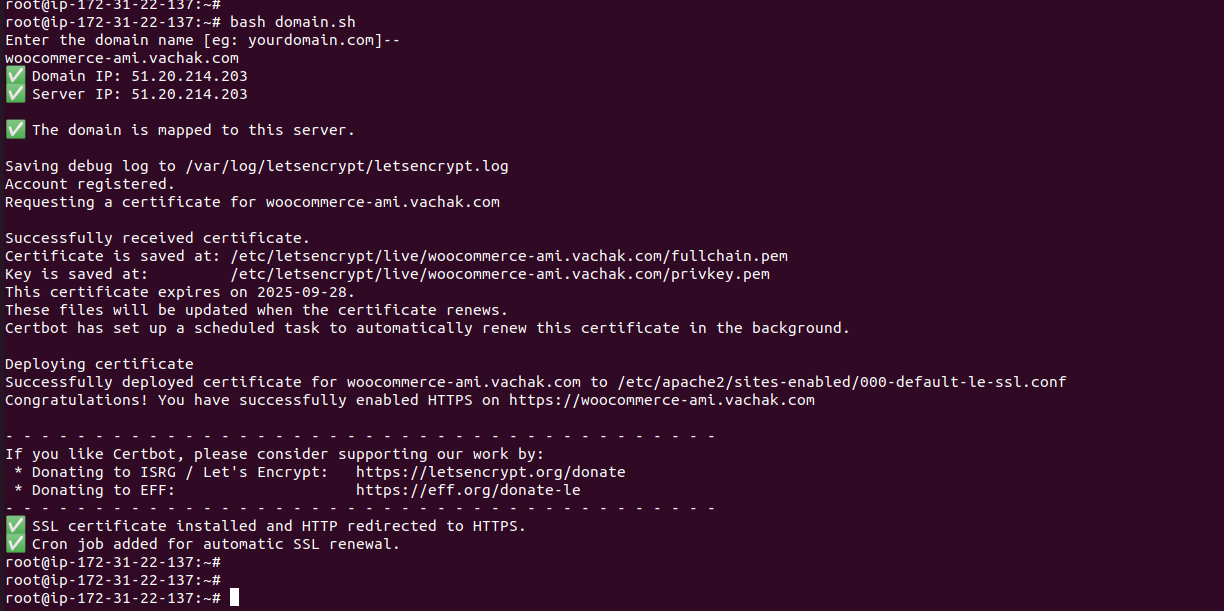
Step 5: Execute the domain.sh script.
Configure your domain’s A record to the EC2 IP first.
This script will:
- Validate your domain’s DNS points to this EC2’s IP.
- Obtain a Let’s Encrypt SSL certificate.
- Configure Apache to serve the WooCommerce site over HTTPS.
|
1 |
bash domain.sh |
Step 6: Complete wordpress Installation Through the Web Interface
- Open your preferred web browser and go to https://yourdomain.com/.
- Complete the WordPress site installation.
- Log in to the WordPress Dashboard.
- Click on Plugins and find WooCommerce plugin.
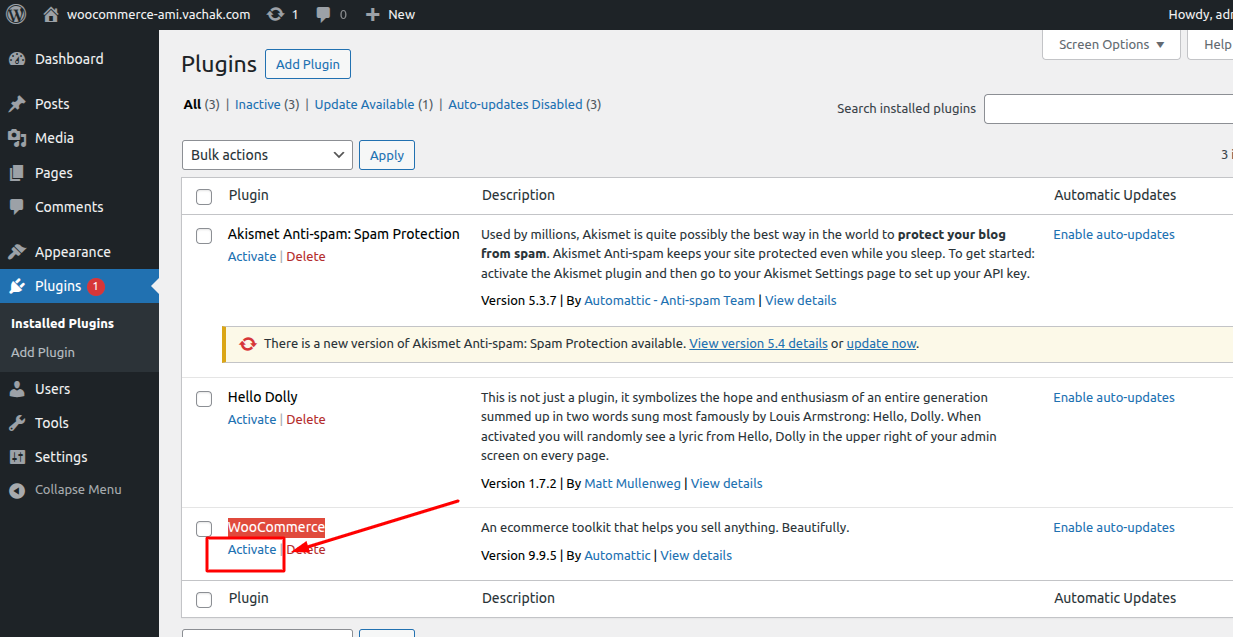
Step 7: Click ‘Activate’ to Start WooCommerce Setup
Fill out the required information and click on the “Continue” Button.

Need Support?
Thank you for reading this Blog!
To stay updated, keep in touch with us for our latest blogs. If you need any kind of support, simply raise a ticket at https://webkul.uvdesk.com/en/.
If you need assistance, you can alternatively raise a ticket Or contact us directly.

Be the first to comment.