This blog will walk you through installing the Unopim application on AWS EC2 using the Unopim AMI, which comes pre-installed with Unopim.
Unopim simplifies online store setup and management as an open-source eCommerce platform. It offers a user-friendly admin panel, secure architecture, and seamless deployment on AWS.
Prerequisites For Unopim AMI Installer
Before you begin installing Unopim, complete the following prerequisites to ensure a smooth, secure, and error-free deployment on your AWS EC2 instance.
- Allow port 22 (SSH) from your IP in your EC2 Security Group. Also, ensure ports 80 (HTTP) and 443 (HTTPS) are open for public access to your Unopim app and SSL readiness.
- Use a t3.large or higher EC2 instance to ensure your Unopim server runs smoothly with sufficient CPU and memory for optimal performance.
- Assign an Elastic IP to your EC2 instance to maintain a static public IP address, ensuring consistent DNS configuration and uninterrupted access to your Unopim server.
- In your domain registrar’s DNS settings, create an A record that points your domain (e.g., yourstore.com) to your EC2 instance’s Elastic IP. This ensures your domain correctly resolves to your server.
Installation Steps
Step 1: Launch the EC2 Instance
- First, launch the EC2 instance from the Unopim AMI.
- Wait for the EC2 instance’s status to become “running”.
Step 2: Access Your EC2 Instance
Once your EC2 instance is up and running, you’ll need to connect to it using SSH and your PEM key file. But first, make sure the PEM file has the correct permissions.
- Set the PEM File Permission:
The PEM file should be readable only by you. Run the following command to set the correct permissions:
|
1 |
chmod 400 your-key-file.pem |
- Connect to Your EC2 Instance via SSH:
After setting the permission, connect to your instance using:
|
1 |
ssh -i your-key-file.pem ubuntu@your-instance-ip |
Replace your-key-file.pem with your actual key filename, and your-instance-ip with your EC2 instance’s public (Elastic) IP address.
Step 3: Run Script & Configure Unopim
Run the script to configure Unopim. You’ll be prompted to enter the database name, username, password, domain and email to complete the setup.
|
1 |
sudo bash /home/ubuntu/setup.sh |
- Point your domain to the EC2 instance’s Elastic IP and configure the A record correctly before running the script.
- If you’re using Cloudflare or another DNS provider with proxying, disable the proxy before running the script. This ensures Let’s Encrypt can verify your domain. Re-enable the proxy after the SSL installation completes successfully.
Step 4: Complete Unopim Installation Through the Web Interface
- Open your preferred web browser and go to https://yourdomain.com/.
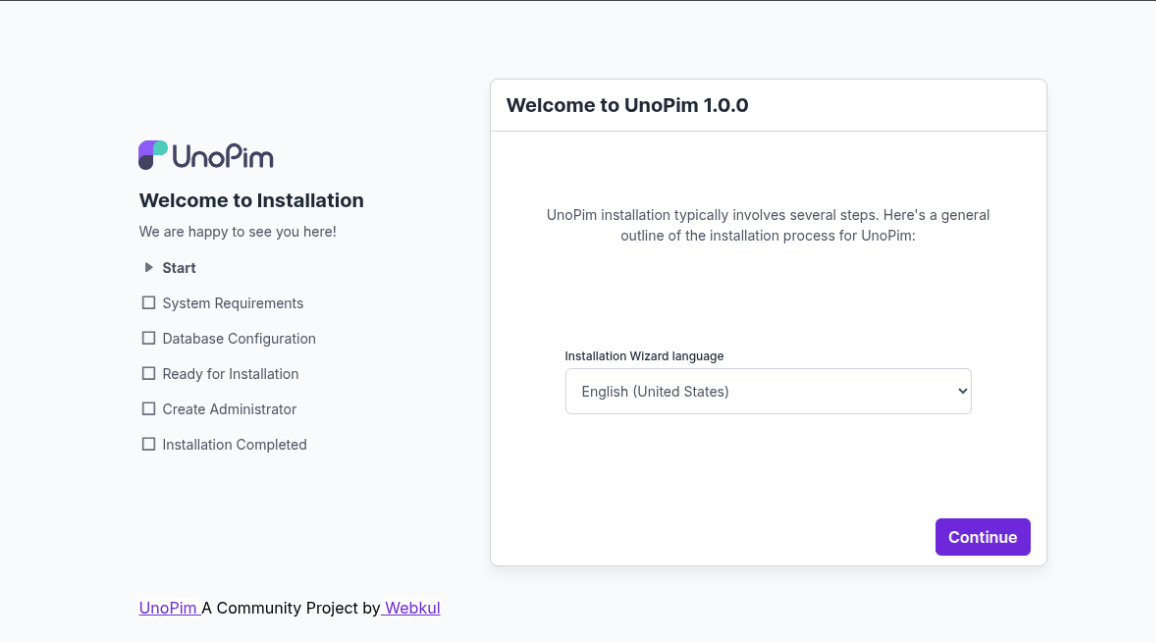
- Once the Unopim setup screen appears, click on the “Continue” button to begin the installation process.
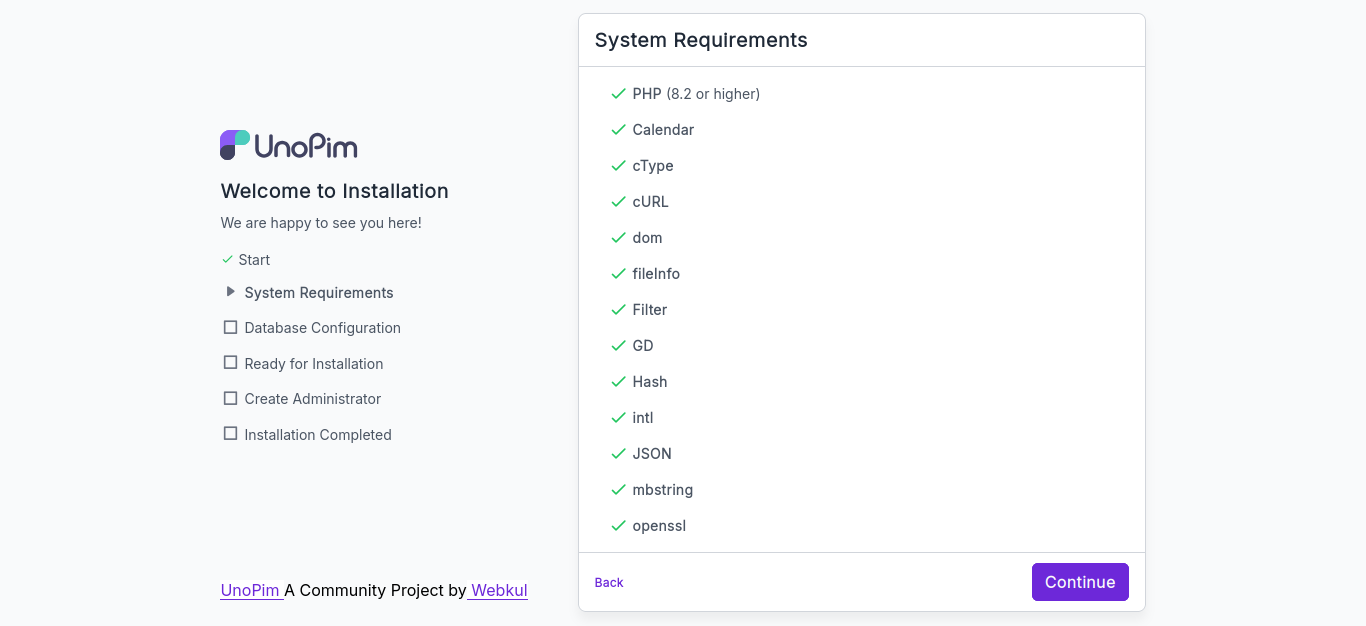
Next, proceed to the System Requirements page. Review the details, then click the “Continue” button to proceed with the installation.
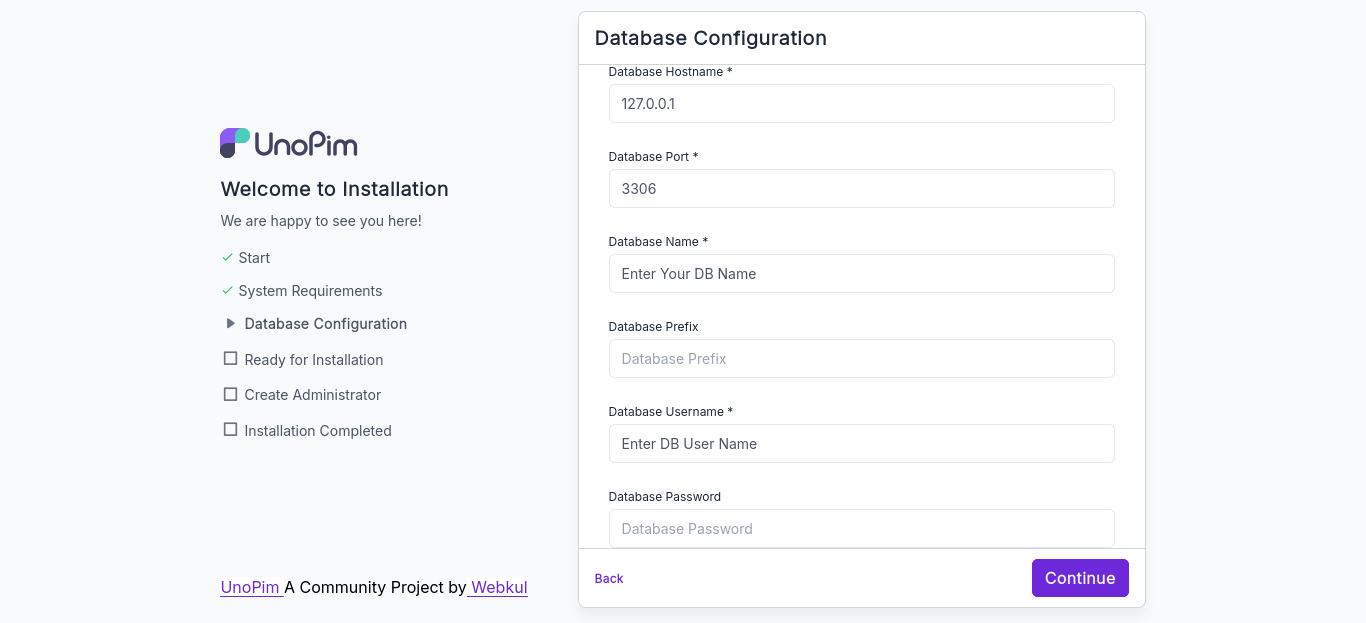
Next, proceed to the database setup page. Keep host and port default. Use the database name, username, and password provided in the credentials file on your server.
Once you’ve entered the necessary database details, click on the“Continue” button to proceed.
Once all configurations are complete, click on the “Start Installation” button to begin setting up Unopim on your server.

Now update the Domain URL with your own website address:
Enter your domain in the following format:
|
1 |
https://yourdomain.com |
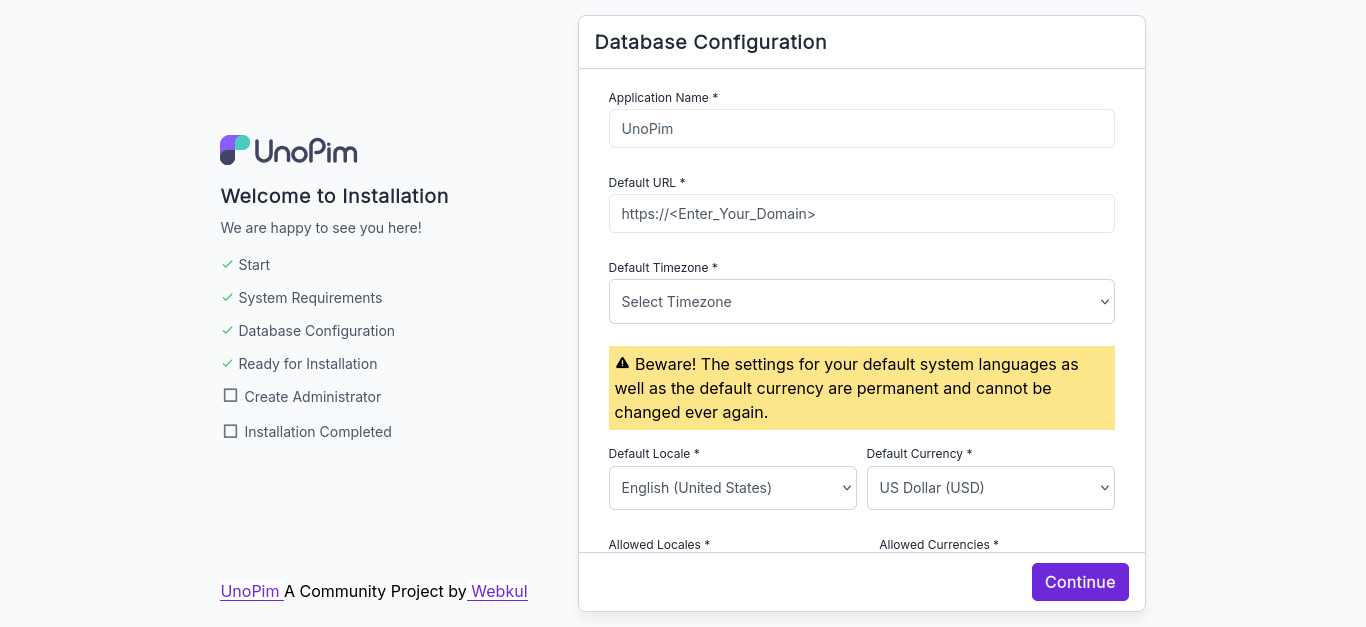
Next, Set the default timezone, locale, currency, and allowed options to match your target audience. This ensures Unopim works with your preferred language and region. Then click on “Continue” button.
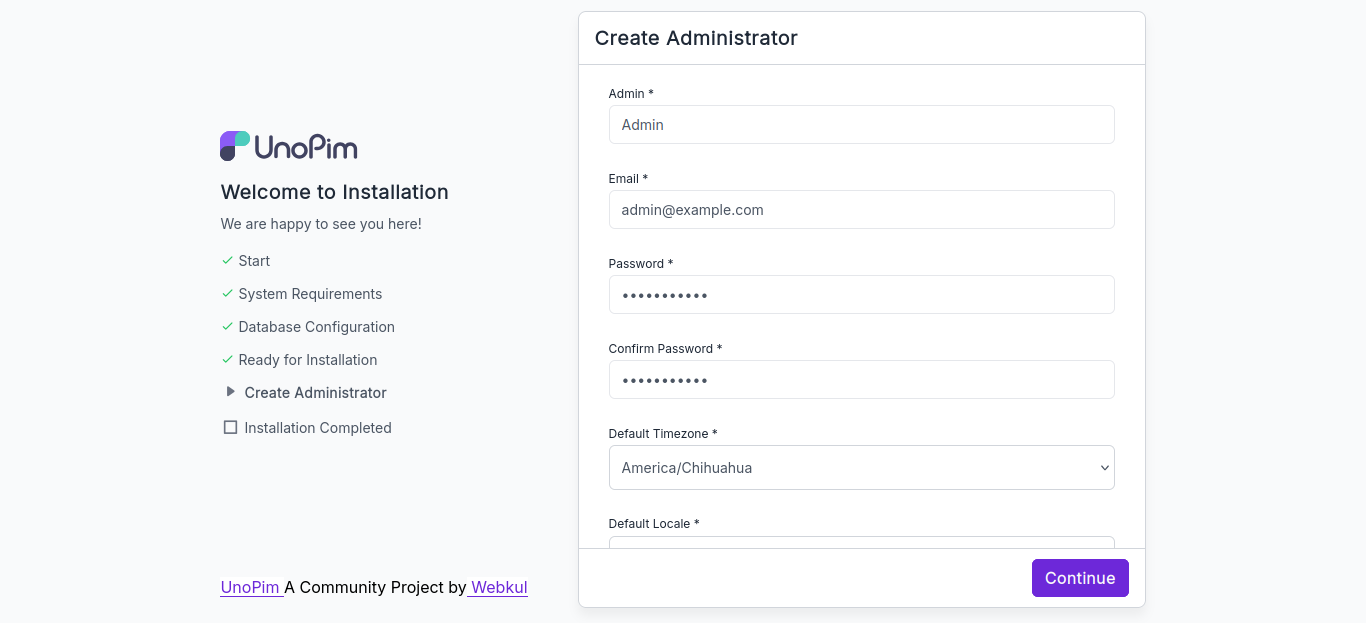
Now, you’ll redirect to admin setup page to create your credentials. Enter your name, email, and a strong password. Choose the default timezone and locale based on your preference.
Fill in all the required fields, then click the “Continue” button to proceed.
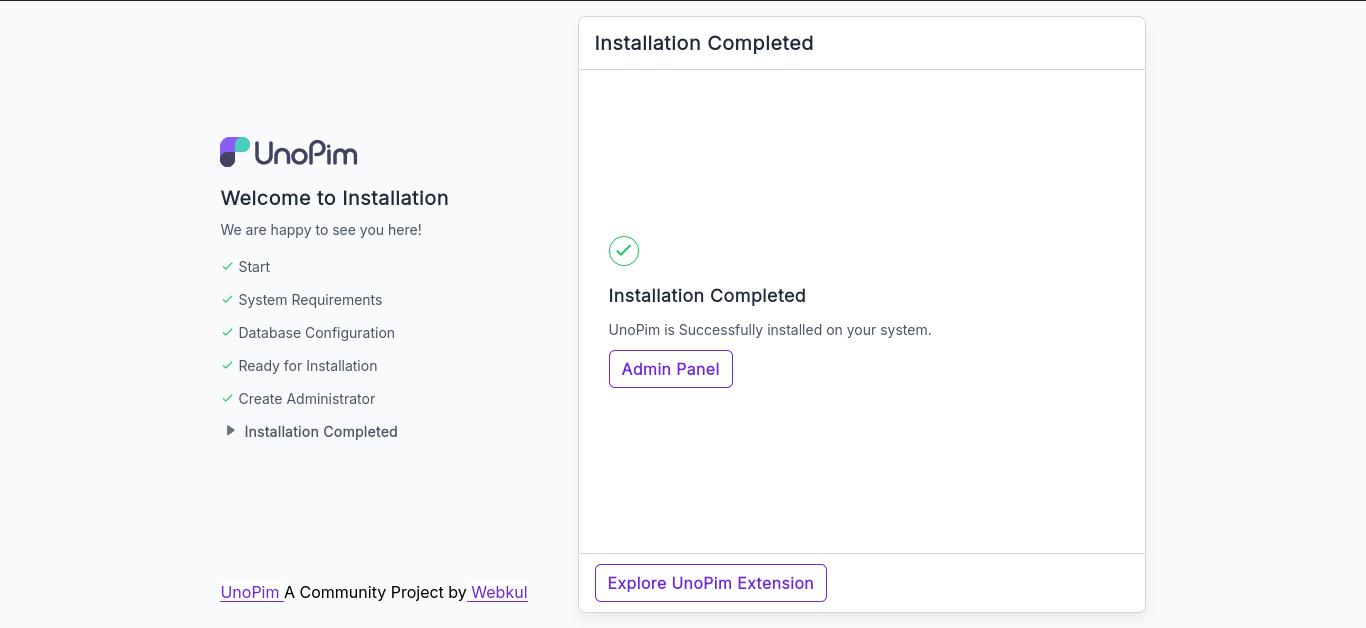
Congratulations! You’ve successfully installed the Unopim application. You can now log in to the Unopim Admin Panel by clicking the “Admin Panel” button and start managing your store with ease.
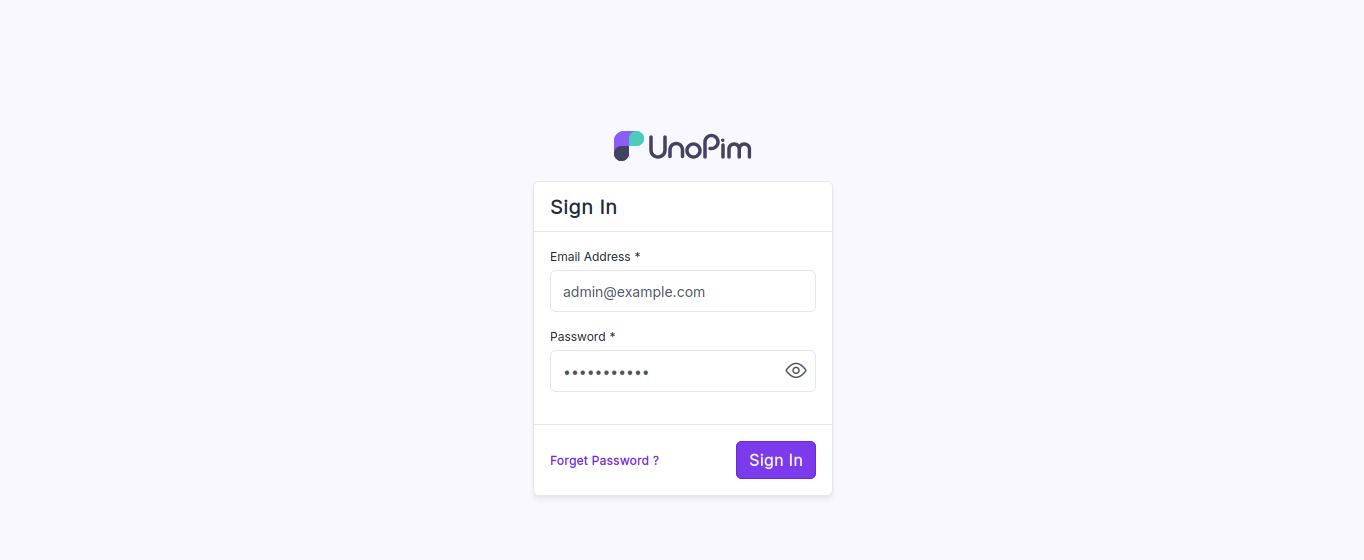
Now, enter the email address and password you created during the setup process, then click the “Sign In” button to access your Unopim admin dashboard.
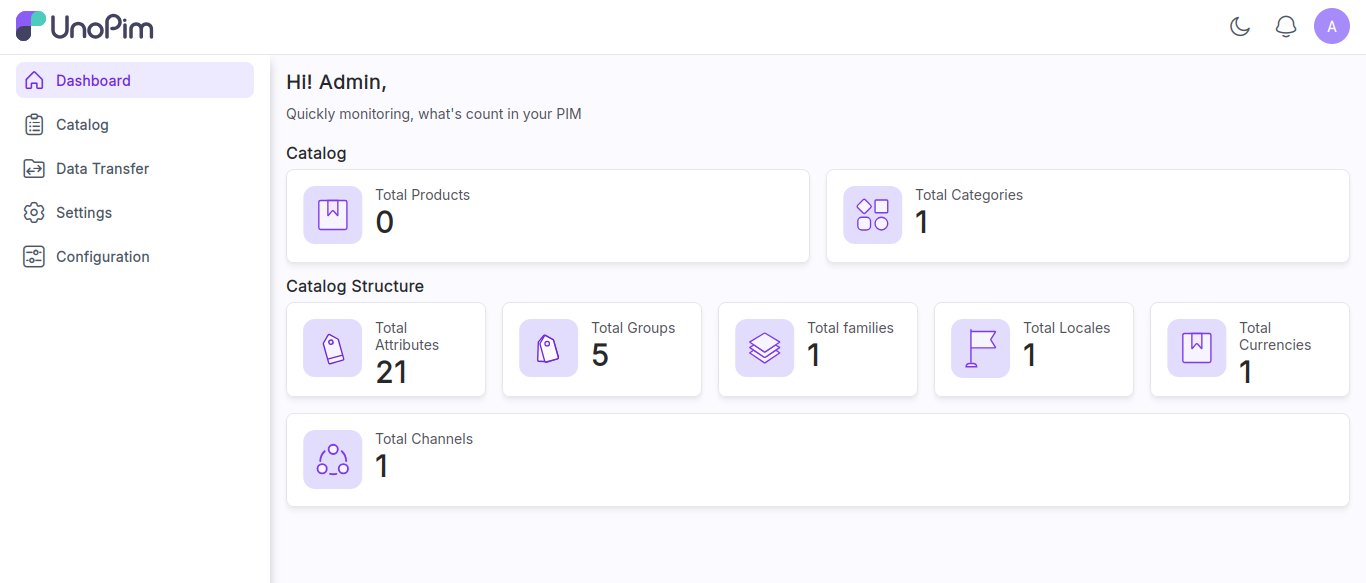
Now, access the Unopim Admin Panel to manage your store and use all admin features.
After setup, save your MySQL credentials securely. Then delete the credentials file from the server to prevent unauthorized access and protect your Unopim application.
Run the following command to safely delete the MySQL credentials file:
|
1 |
sudo rm /var/www/html/unopim/mysql_password.txt |
Need Help? Contact Unopim Support
If you need assistance, please refer to the official Unopim documentation or reach out to the AMI provider’s support team for expert guidance and troubleshooting.

Be the first to comment.