UnoPim is a user-friendly, Open-source product information management (PIM) solution designed to streamline both, the management and distribution of product data.
Built on the Laravel framework, it helps businesses organize, update, and share product information across various platforms, enhancing operational efficiency and also customer satisfaction.
In the previous blog, we discussed UnoPim Installation on Ubuntu 24.04 using the Apache server.
Prerequisites:
Before proceeding with the installation, ensure your system meets the following requirements:
- Ubuntu(Linux) Version ≥ 20.04
- Minimum System Requirements:
- RAM: 8 GB or higher
- CPU: 4 Cores
- Disk Space: 10 GB
Required Software:
- Web-server: NGINX
- Database: MySQL 5.7 or higher, MariaDB 10.10 or higher,
- PHP: 8.2 or higher
- Composer: 2.2.0 or higher
UnoPim Installation Steps –
Step 1: Install the Nginx Web Server
Start by updating your local package repository and also installing Nginx:
|
1 2 3 4 5 |
sudo apt update sudo apt-get install nginx -y sudo systemctl start nginx |
Verify that Nginx is running:
|
1 |
sudo systemctl status nginx |
Step 2: Install MySQL and Create Database
For Local Database Server:
1. Install MySQL:
|
1 |
sudo apt-get install mysql-server -y |
2. Configure the MySQL root user and create the database:
|
1 2 3 4 5 6 7 8 9 10 11 12 13 |
sudo mysql ALTER USER 'root'@'localhost' IDENTIFIED WITH mysql_native_password BY 'password'; CREATE DATABASE unopim_db; CREATE USER 'unopim_user'@'localhost' IDENTIFIED WITH mysql_native_password BY 'unopim_password'; GRANT ALL PRIVILEGES ON unopim_db.* TO 'unopim_user'@'localhost'; FLUSH PRIVILEGES; exit |
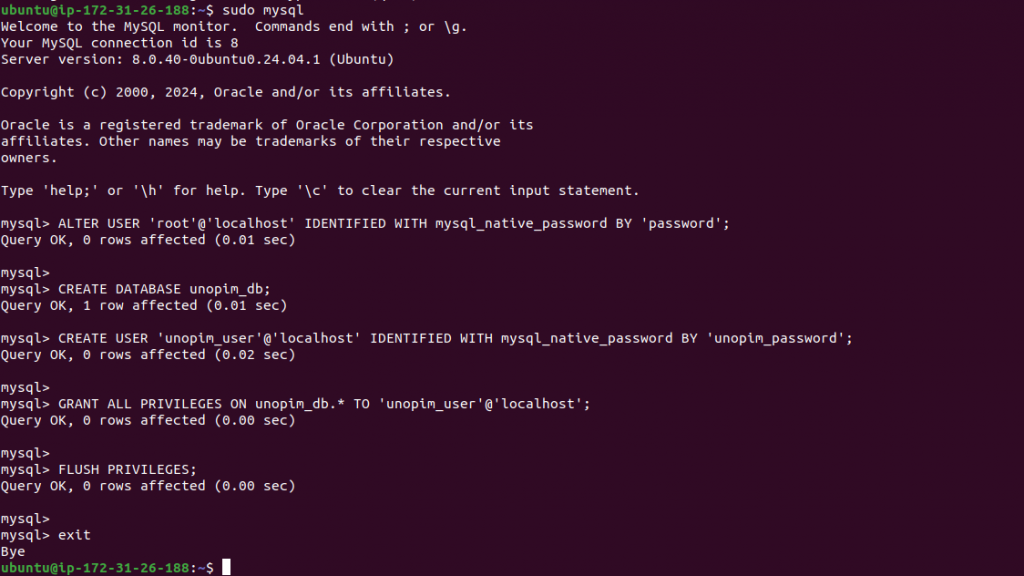
For AWS RDS (if using a remote database):
There is a need to enable log_bin_trust_creator and set its value to 1 to allow database creation and dropping during the setup process.
To enable log_bin_trust_creator on AWS RDS, modify the associated DB parameter group by setting the value to 1.
Then, apply the parameter group to your RDS instance and reboot it. This allows CREATE and DROP operations when binary logging is enabled, useful for replication.

Connect to your RDS instance:
|
1 |
mysql -u admin -p -h [RDS_endpoint] |
Create the database and user for UnoPim:
|
1 2 3 4 5 6 7 8 9 |
CREATE USER 'unopim_user'@'%' IDENTIFIED BY 'unopim_password'; CREATE DATABASE unopim_db; GRANT ALL PRIVILEGES ON unopim_db.* TO 'unopim_user'@'%'; FLUSH PRIVILEGES; exit |
Step 3: Install PHP and Required Extensions
1. Install PHP 8.2 and the necessary extensions
php8.2-cli php8.2-apcu php8.2-bcmath php8.2-curl php8.2-opcache php8.2-fpm php8.2-gd php8.2-intl php8.2-mysql php8.2-xml php8.2-zip php8.2-mbstring php8.2-imagick
Also, Install Software Properties Common Package:
|
1 |
sudo apt install software-properties-common -y |
2. Add PHP Repository (PPA: Ondrej PHP)
|
1 2 3 |
sudo add-apt-repository ppa:ondrej/php sudo apt-get update |
3. Install PHP 8.2 and Essential Extensions
|
1 |
sudo apt-get install php8.2-cli php8.2-apcu php8.2-bcmath php8.2-curl php8.2-opcache php8.2-fpm php8.2-gd php8.2-intl php8.2-mysql php8.2-xml php8.2-zip php8.2-mbstring php8.2-imagick |
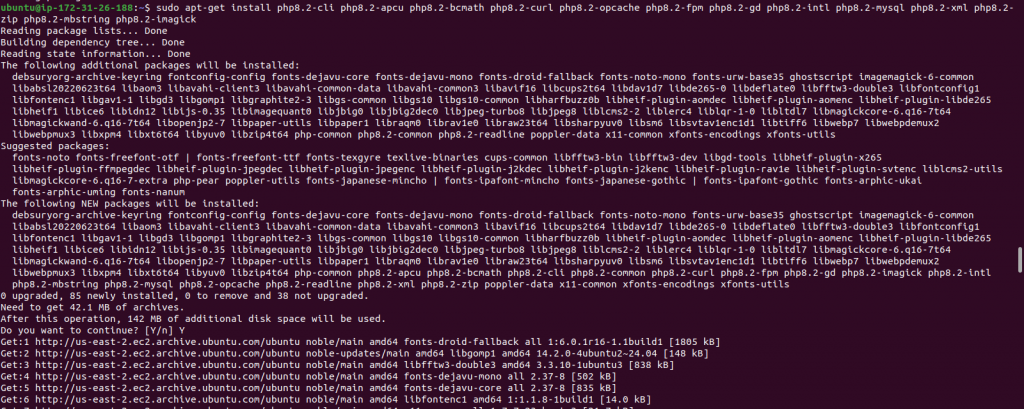
4. Adjust PHP settings in php.ini for PHP CLI and FPM:
The memory_limit is set to 1024M (1GB) to allow more memory usage for PHP scripts run via the terminal, useful for resource-intensive tasks.
The date.timezone is set to UTC to standardize the time zone globally, as a result, in avoiding local time zone issues.
|
1 2 3 4 5 |
#Update CLI PHP configuration. sudo sed -i 's/^memory_limit = .*/memory_limit = 1024M/' /etc/php/8.2/cli/php.ini sudo sed -i 's/^date.timezone = .*/date.timezone = UTC/' /etc/php/8.2/cli/php.ini |
The memory_limit is set to 512M to limit memory usage for PHP scripts executed by the web server, as a result, balancing performance and resource usage.
The date.timezone is also set to UTC to ensure consistency across applications and servers.
|
1 2 3 4 5 |
#Update FPM PHP configuration sudo sed -i 's/^memory_limit = .*/memory_limit = 512M/' /etc/php/8.2/fpm/php.ini sudo sed -i 's/^date.timezone = .*/date.timezone = UTC/' /etc/php/8.2/fpm/php.ini |
Step 4: Install Composer
1. Install curl, wget, and other required utilities:
|
1 |
sudo apt-get install curl wget zip unzip net-tools -y |
2. Install Composer:
|
1 2 3 4 5 6 7 8 9 |
php -r "copy('https://getcomposer.org/installer', 'composer-setup.php');" php -r "if (hash_file('sha384', 'composer-setup.php') === 'dac665fdc30fdd8ec78b38b9800061b4150413ff2e3b6f88543c636f7cd84f6db9189d43a81e5503cda447da73c7e5b6') { echo 'Installer verified'; } else { echo 'Installer corrupt'; unlink('composer-setup.php'); } echo PHP_EOL;" php composer-setup.php --version=2.5.8 php -r "unlink('composer-setup.php');" sudo mv composer.phar /usr/local/bin/composer |

Step 5: Creating User
Create a new user:
|
1 |
sudo adduser unopim |
Step 6: Download and Configure UnoPim
1. Download the UnoPim code:
|
1 2 3 |
su unopim cd /home/unopim/ |
Then, Create a New Project Using Composer (unopim/unopim)
|
1 2 3 |
composer create-project unopim/unopim cd unopim |
2. Copy the .env file:
|
1 |
cp .env.example .env |
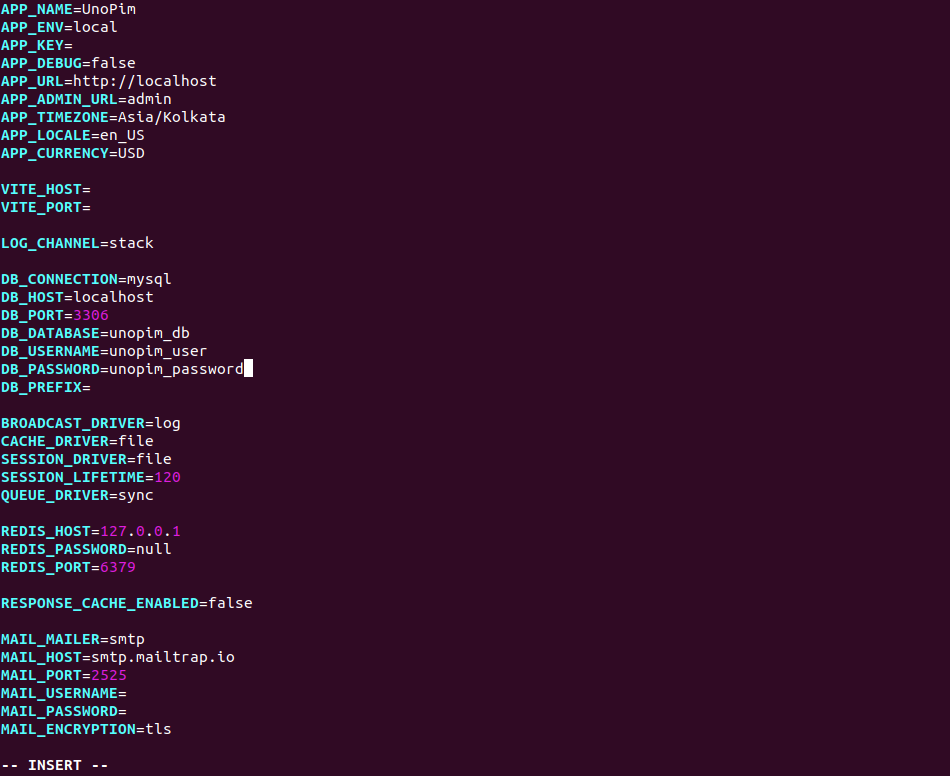
3. Edit .env and update the necessary values based on your database setup
|
1 2 3 4 5 6 7 8 9 |
APP_NAME=UnopimAPP_ DEBUG=false APP_URL=http://localhost/ DB_CONNECTION=mysql DB_HOST=localhost DB_PORT=3306 DB_DATABASE=unopim_db DB_USERNAME=unopim_user DB_PASSWORD=unopim_password |
Then, Save and exit the file.
|
1 |
exit |
Step 7: Set Up Nginx Virtual Hosts and PHP conf
1. Create a virtual host configuration:
|
1 2 3 |
cd /etc/nginx/sites-available/ sudo nano unopim.local.conf |
2. Add the following configuration (adjust paths and domain/IP as needed):
|
1 2 3 4 5 6 7 8 9 10 11 12 13 14 15 16 17 18 19 20 21 22 23 24 |
server { listen 80; server_name unopim.local; # Replace with your domain or IP address root /home/unopim/unopim/public; # Document root for the website index index.php; # Log files (optional but useful for debugging) access_log /var/log/nginx/log.access.log; error_log /var/log/nginx/log.error.log; # Handle PHP requests location ~ \.php$ { include snippets/fastcgi-php.conf; fastcgi_pass unix:/run/php/php8.2-fpm.sock; # PHP 8.2 FPM socket fastcgi_param SCRIPT_FILENAME $document_root$fastcgi_script_name; include fastcgi_params; } # Handle static files (images, CSS, JavaScript) location / { try_files $uri $uri/ /index.php?$query_string; } } |
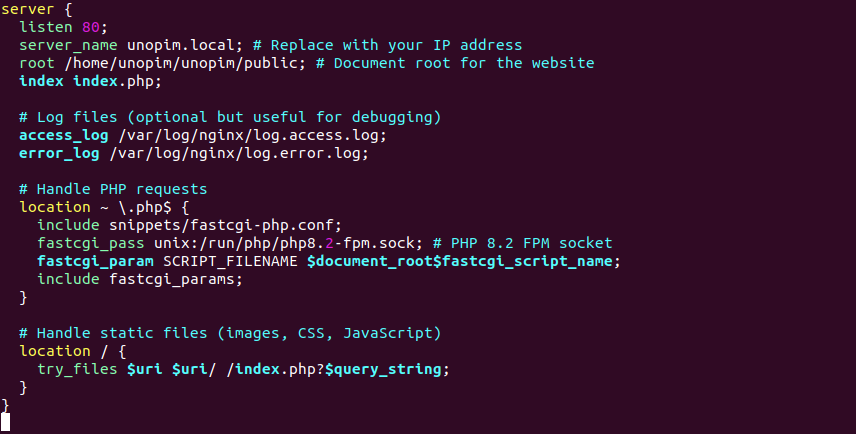
3. Now run these two commands to create a link in sites-enabled and remove the default nginx host file:
To Create a Symbolic Link for Nginx Site Configuration
|
1 |
sudo ln -s /etc/nginx/sites-available/unopim.local.conf /etc/nginx/sites-enabled/ |
Remove the default nginx host file
|
1 |
sudo rm -f /etc/nginx/sites-enabled/default |
4. Now add the unopim user in www-data group
|
1 |
sudo usermod -aG unopim www-data |
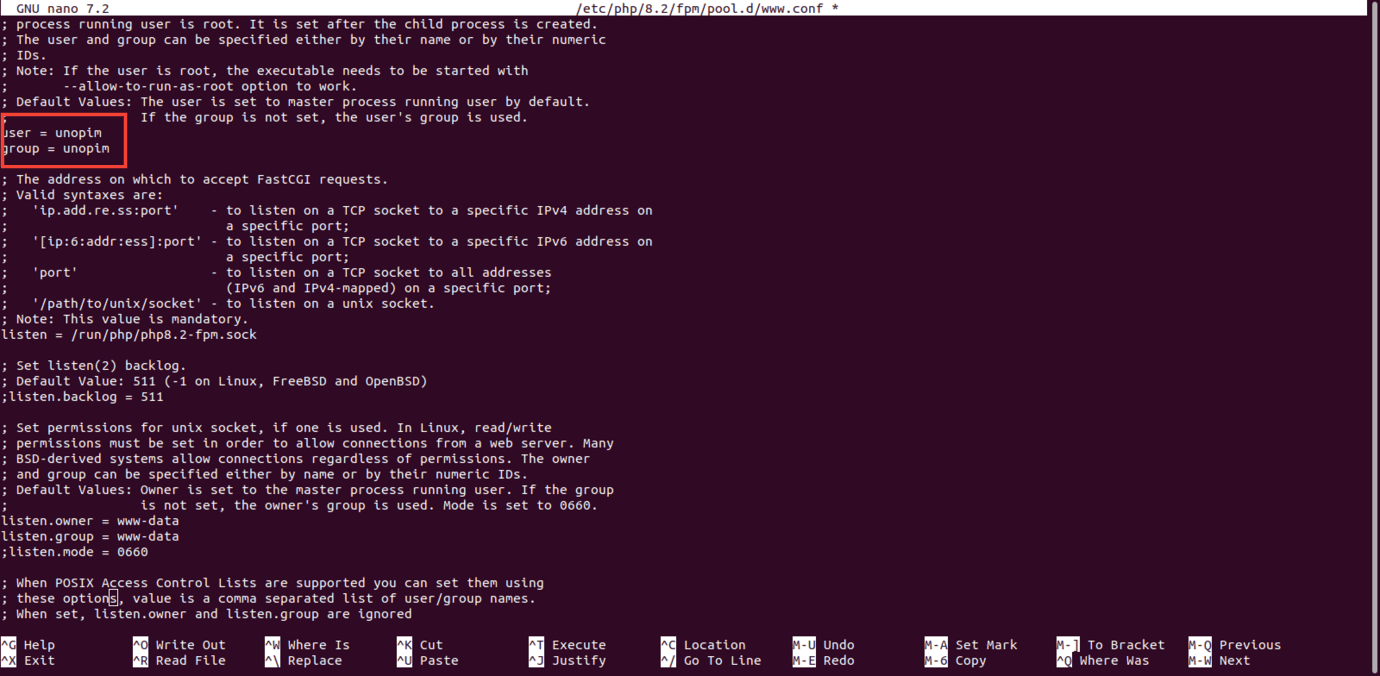
5. Now user needs to define in php fpm as user, group, listen.owner, and listen.group
|
1 |
sudo nano /etc/php/8.2/fpm/pool.d/www.conf |
6. Now restart the server and php-fpm:
|
1 |
sudo systemctl restart php8.2-fpm |
7. Test Nginx Configuration for Syntax Errors and Reload Nginx to Apply Configuration Changes
|
1 2 3 |
sudo nginx -t sudo systemctl restart nginx |
Step 8: Complete UnoPim Installation
1. Run the UnoPim installation:
|
1 2 3 4 5 |
su unopim cd /home/unopim/unopim/ chown -R unopim:unopim /home/unopim/ |
Login MySQL as root and run this query
|
1 2 3 4 5 |
mysql -uroot -p SET GLOBAL log_bin_trust_function_creators = 1; exit |
Note: log_bin_trust_function_creators should only be enabled in development environments.
However, For production systems, avoid using this setting unless necessary. You can set the log_bin_trust_function_creators value to be 0 after installation.
SET GLOBAL log_bin_trust_function_creators = 0;
|
1 |
php artisan unopim:install |
Follow the prompts for configuration, including setting up the application name, URL, currency, and admin credentials.
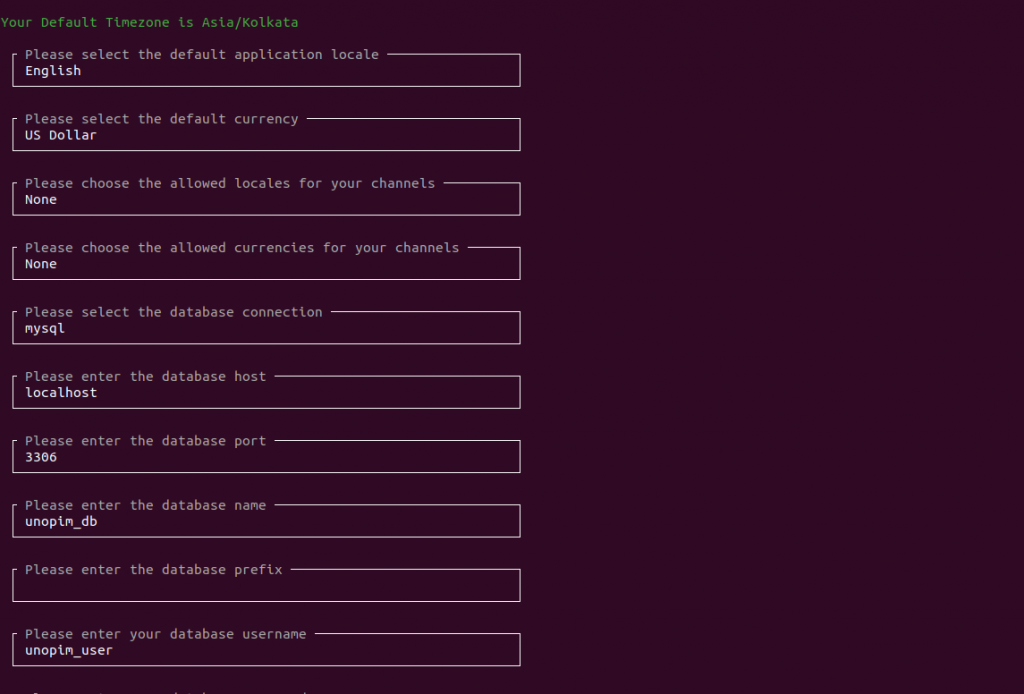
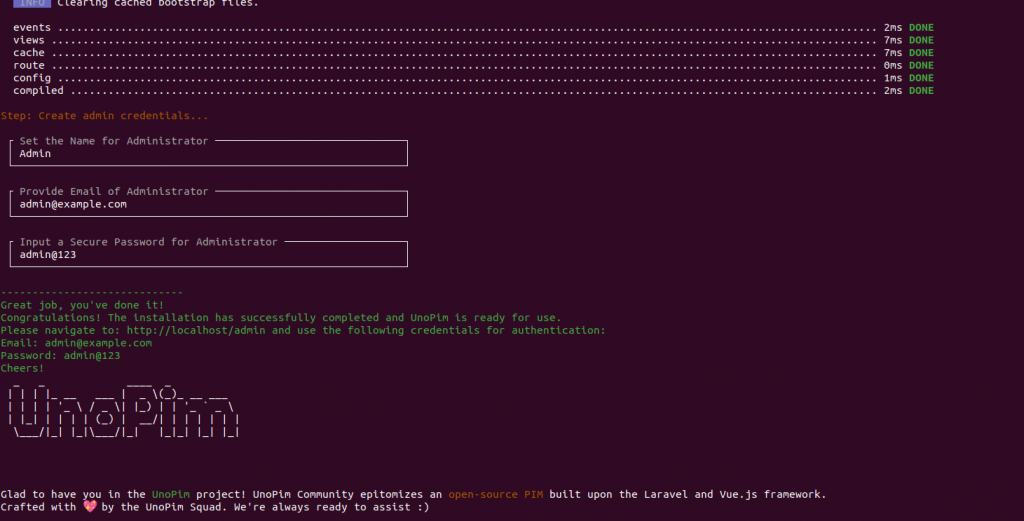
Set your admin Name, email, and password, and finish the installation.
For Example:
Admin credentials are:
ADMINISTRATOR_NAME=admin
[email protected]
ADMINISTRATOR_PASSWORD=admin@123
Now exit the user
|
1 |
exit |
Step 9: Access UnoPim
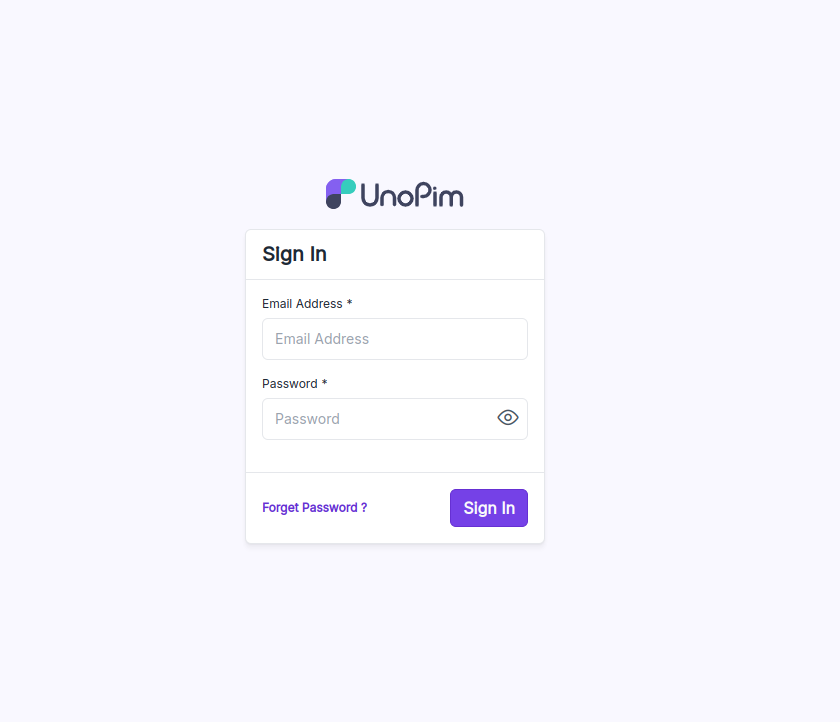
Open a browser and navigate to the following URL:
http://unopim.local/ #Your domain if mapped with the server or IP comes here
Log in with the email and password you set up.
Step 10: Install Supervisor
1. Update your package manager and install supervisor:
|
1 2 3 |
sudo apt update sudo apt install supervisor |
2. Check the status of supervisor:
|
1 |
sudo systemctl status supervisor |
3. Navigate to the Supervisor configuration directory:
|
1 |
cd /etc/supervisor/conf.d |
4. Create a configuration file named unopim_queue_daemon.conf:
|
1 |
sudo nano /etc/supervisor/conf.d/unopim_queue_daemon.conf |
5. Add the following content:
|
1 2 3 4 5 6 7 8 9 10 |
[program:unopim-worker] command=/path/to/php /path/to/your/unopim/artisan queue:work autostart=true autorestart=true user=my_user numprocs=8 process_name=%(program_name)s_%(process_num)02d stderr_logfile=/var/log/unopim_worker.err.log stdout_logfile=/var/log/unopim_worker.out.log stopasgroup=true |
Notes:
- Replace /path/to/php with the path to your PHP binary.
- Replace /path/to/your/unopim with the installation directory of UnoPIM.
- Replace my_user with the user that runs PHP-FPM (e.g., www-data).
6. Apply Changes
Run the following commands to apply the new Supervisor configuration:
|
1 2 3 |
sudo supervisorctl reread sudo supervisorctl update |
7. Start the UnoPIM queue daemon workers:
|
1 |
sudo supervisorctl start all |
8. Check whether it’s running or not using the command
|
1 |
tail -f /var/log/supervisor/supervisord.log |

Need Support?
Thank You for reading this Blog!
For further more interesting blogs, keep in touch with us. If you need any kind of support, simply raise a ticket at https://webkul.uvdesk.com/en/.
For further help or queries, please contact us or raise a ticket.


Be the first to comment.