In my last blog, we learned how to general SSL certificates, here we will learn how to renew those free SSL certificates using the Lego client.
If you’re using a Let’s Encrypt certificate for your website, you’re likely aware it needs renewal every 90 days, and you can automate renewals around 60 days before expiration.
Let’s Encrypt is a global Certificate Authority (CA) that lets people and organizations around the world obtain, renew, and manage SSL/TLS certificates.
Prerequisites
To follow this article, you need to have the following:
- You have an account on Cloudflare.
- Your site is running on a Linux machine using Apache or Nginx.
- Your site is up and running with the Lego client installed. The Lego client simplifies the process of Let’s Encrypt Certificate generation.
You could use the following commands to install the Lego client.
Lego – LetsEncrypt client
Lego is a Let’s Encrypt client and ACME library written in Go – https://go-acme.github.io/lego/
Install Lego
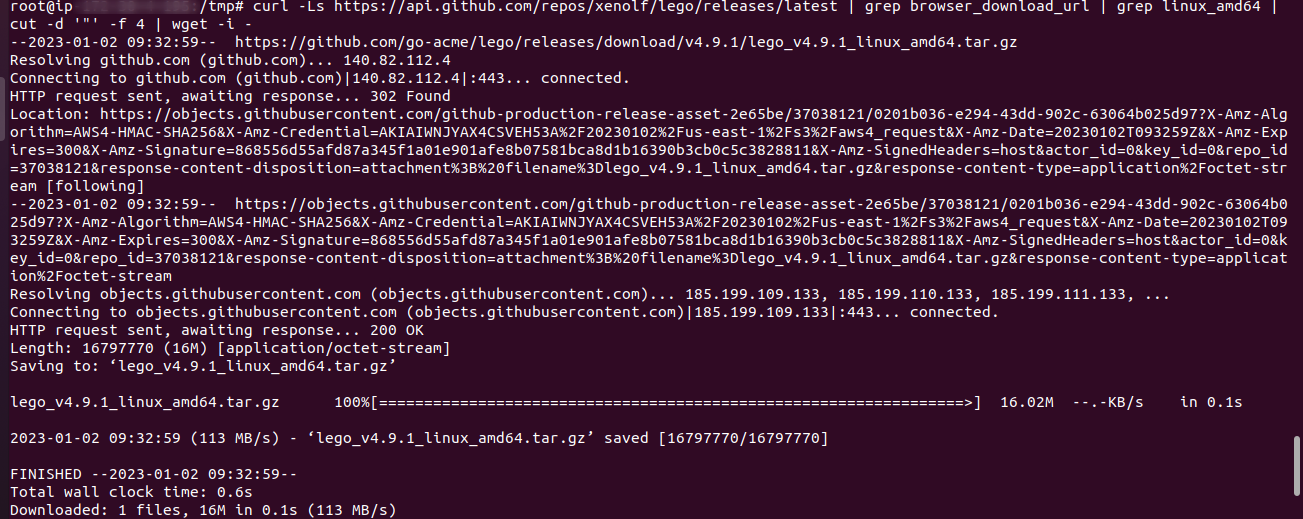
Note: At the time of this writing, we are using version 4.9.1 for Lego.
These are the steps to download, extract, and copy the Lego client to a directory in your path.
|
1 2 3 4 5 6 |
cd /tmp curl -Ls https://api.github.com/repos/xenolf/lego/releases/latest | grep browser_download_url | grep linux_amd64 | cut -d '"' -f 4 | wget -i - tar xf lego_v4.9.1_linux_amd64.tar.gz |
|
1 2 |
sudo mkdir -p /opt/certs/letsencrypt sudo mv lego /opt/certs/letsencrypt/lego |

Create a Cloudflare API key or Token
First, you need to create an API key that has ‘Read‘ access to the zone of your domain and permission to ‘Edit‘ DNS in Cloudflare. API Tokens use the standard Authorization.
To create your API Token, you need to go to the ‘API Tokens’ section of your user profile https://dash.cloudflare.com/profile/api-tokens
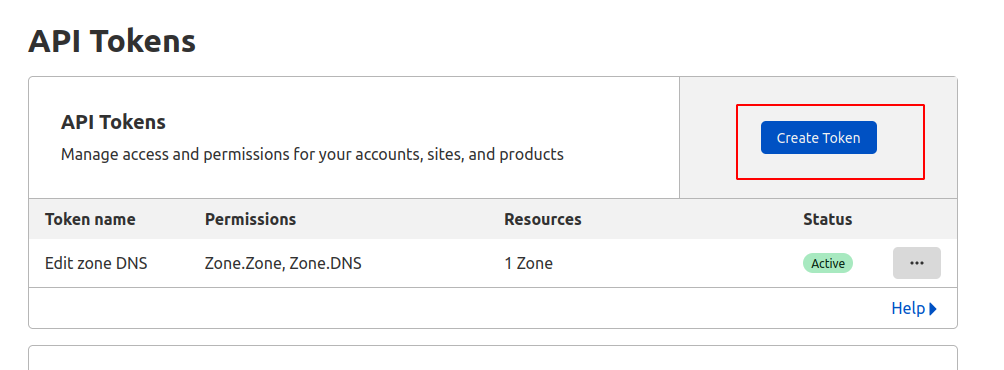
There are two ways to create your token –
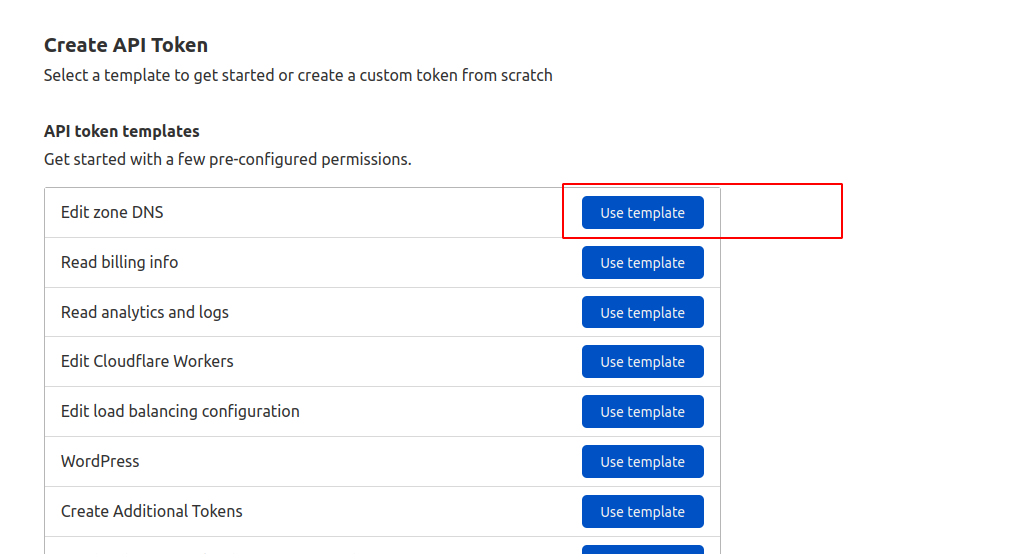
You can either create it from scratch through the “Create Custom Token” option or you can start with a predefined template, by selecting “Use template”.
Here, in this case, we will use the “Edit zone DNS” template to create an API Token that can edit a single zone’s DNS records.
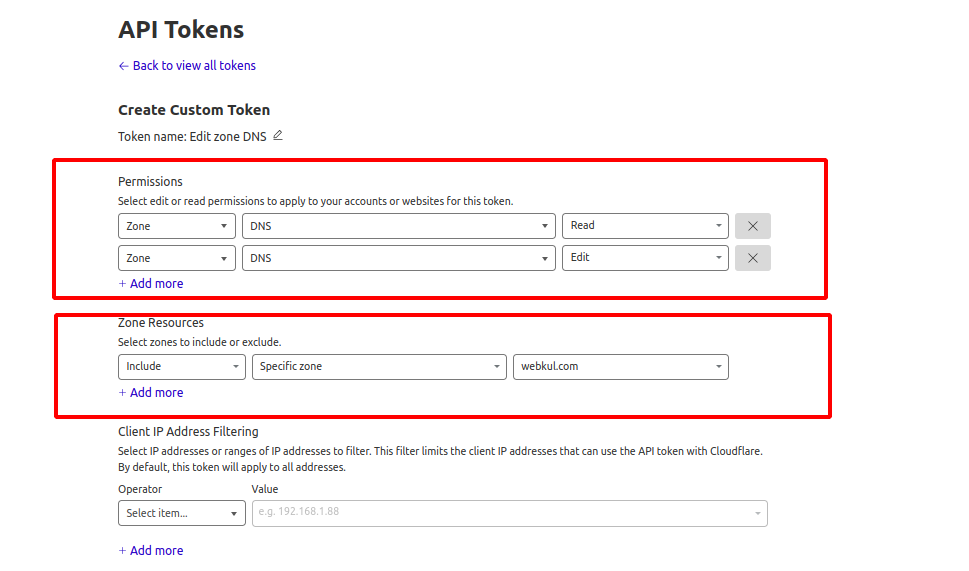
once the template is selected, you need to pick a zone for the API token.
Notice that the DNS Edit permission was already pre-selected. Enter a token descriptive name, then add one more permission-giving zone Read access as shown in the figure below
Once you select “Continue to the summary”, you are given a chance to review the selection.
Here, the resources and permissions are quite simple, but this gives you a chance to make sure you are giving the API Token exactly the correct amount of privilege before creating it.
Once created, you are presented with the API Token. This screen is the only time you will be presented with the secret so be sure to put the secret in a safe place!
Anyone with this secret can perform the granted actions on the resources specified to protect it like a password.
In the below screenshot, we have black-box the secret for obvious reasons.
If you happen to lose the secret, you can always regenerate it from the API Tokens table so you don’t have to configure all the permissions again
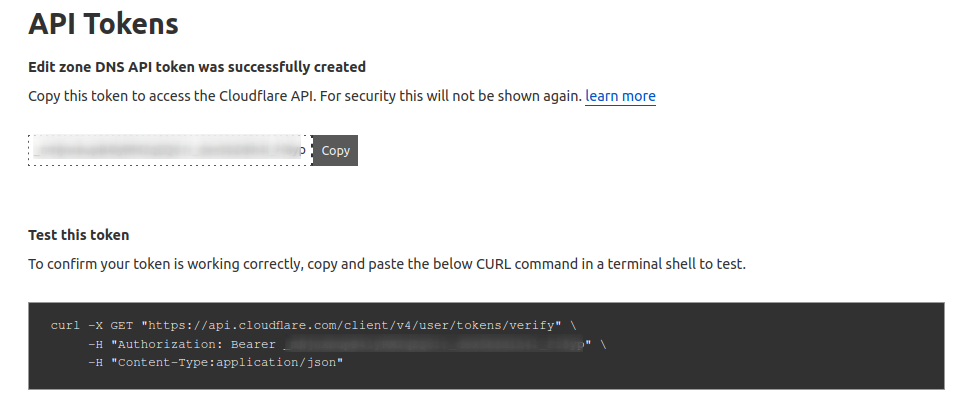
In addition to the secret itself, this page provides an example curl request that can be used to verify that the token was successfully created
Now, Generate a Let’s Encrypt Certificate
If you want to generate a new certificate for your domain, browse to the Lego installation directory and then run the following commands
Note: Please remember to replace your CLOUDFLARE_AND_API_TOKEN value, the Domain placeholder with your actual domain name, and the email address placeholder with your email address
|
1 |
sudo CLOUDFLARE_DNS_API_TOKEN=Your-token-number ./lego --dns cloudflare --domains your-domain-name --email admin@webkul.com --path="/opt/certs/letsencrypt" run |
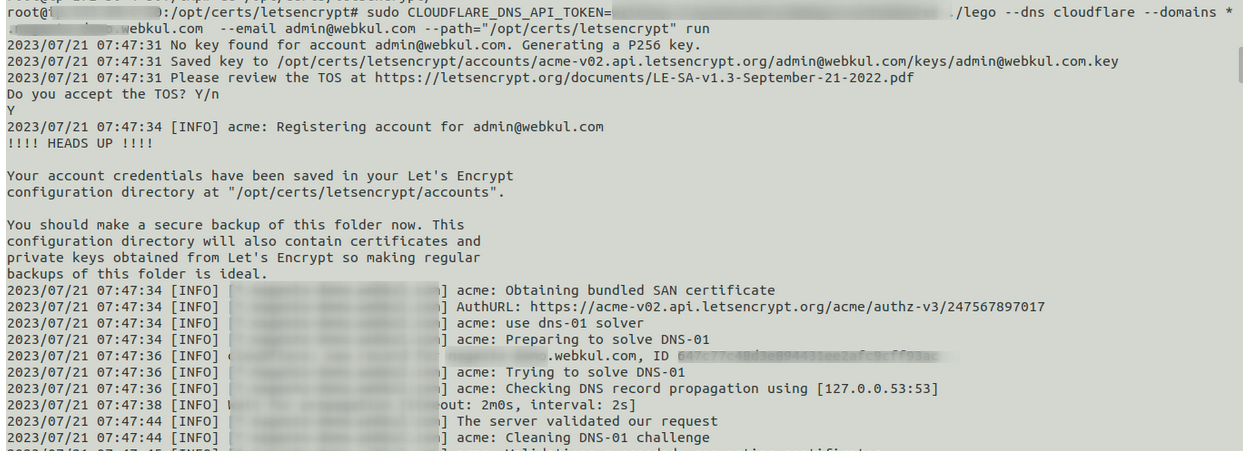
Then you will receive two folders within /opt/certs/letsencrypt/

Here, you need to map this key from your web server
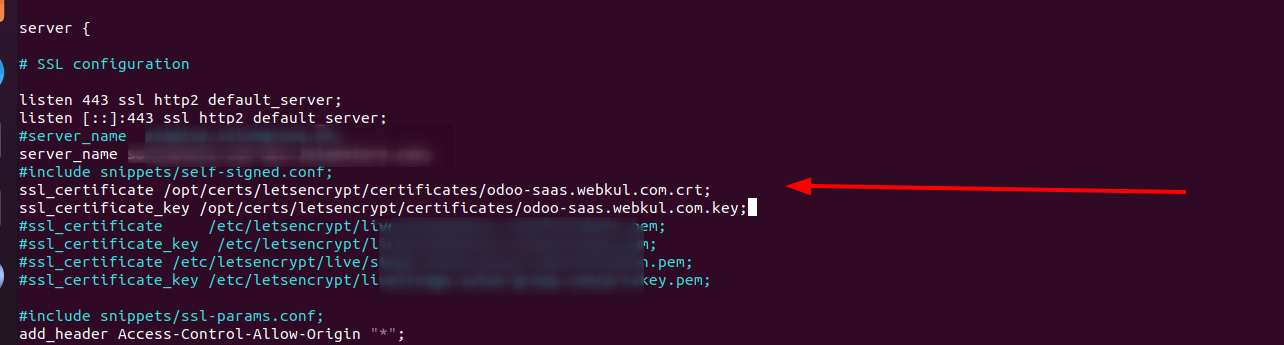
Restart your webserver, go to the browser, and Enter your domain
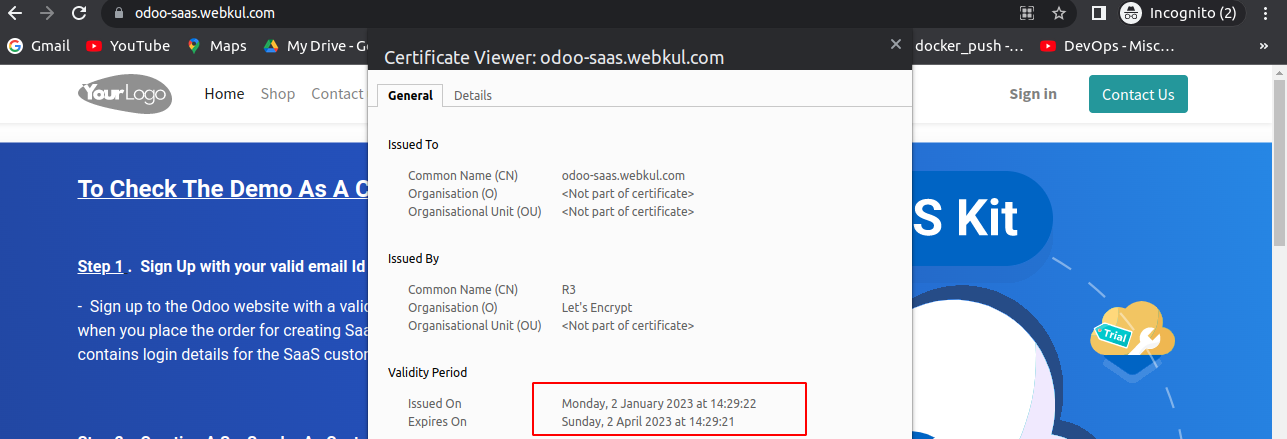
The SSL has been configured successfully with a validity of 90 days as shown in the above screenshot.
Now, to automatically renew your certificates before they expire, you need to write a script to perform the above tasks and schedule a cron job to run the script periodically (e.g. every 60 days ).
Take the following steps –
Write a script to renew the SSL certificate at the following path, you can change the path based on your installation.
|
1 2 3 |
sudo mkdir -p /opt/certs/letsencrypt/scripts sudo nano /opt/certs/letsencrypt/scripts/renew-certificate.sh |
nano editor will open the file, enter the following content into the script, and save it depending on if you have Apache and Nginx
Please remember to replace your CLOUDFLARE_AND_API_TOKEN value, the Domain placeholder with your actual domain name, and the Email-Address placeholder with your email address
For Apache:
|
1 2 3 4 5 6 7 |
#!/bin/bash cd /opt/certs/letsencrypt/ sudo CLOUDFLARE_DNS_API_TOKEN=Your API Token ./lego --dns cloudflare --domains domain.com --email admin@webkul.com --path="/opt/certs/letsencrypt" renew --days 10 sudo systemctl restart apache2 |
For Nginx :
|
1 2 3 4 5 6 7 |
#!/bin/bash cd /opt/certs/letsencrypt/ sudo CLOUDFLARE_DNS_API_TOKEN=Your API Token ./lego --dns cloudflare --domains domain.com --email admin@webkul.com --path="/opt/certs/letsencrypt" renew --days 10 sudo systemctl restart nginx |

Then press Ctrl+X to save the script and exit the nano editor.
Next, you need to make the script executable using the following command
|
1 |
sudo chmod +x /opt/certs/letsencrypt/scripts/renew-certificate.sh |
Next, execute the following command to open the crontab editor
|
1 |
sudo crontab -e |
Finally, add the below line lines to the crontab file and then press Ctrl + X to save it and exit the nano editor
0 0 * * * bash /opt/certs/letsencrypt/scripts/renew-certificate.sh 2> /dev/null

[0 0 * * *] is equivalent to the script running automatically every day and renewing the certificate 10 days ago from the expiration date
This is the whole process to generate your SSL certificate as well as renew your SSL certificate
You may also visit our Magento development services and quality Magento 2 Extensions.
For further help or queries, please contact us or raise a ticket.