In our previous blog, we created some understanding about amazon elastic load balancer, its features and applicability. We discussed about elastic load balancer’s classification as Classical load balancer and Application load balancer on a brief note. Here we will continue with creation of a HTTP classic load balancer and understanding its terminologies.
Getting Started With Classic Load Balancer
Classic load balancer distributes incoming application traffic, based on either application or network level information, across multiple EC2 instances in multiple Availability Zones. This increases the fault tolerance of your applications. Now, to create a HTTP classic load balancer, login to your AWS account and go to https://console.aws.amazon.com/ec2/ and select load balancers under the Load Balancing category.
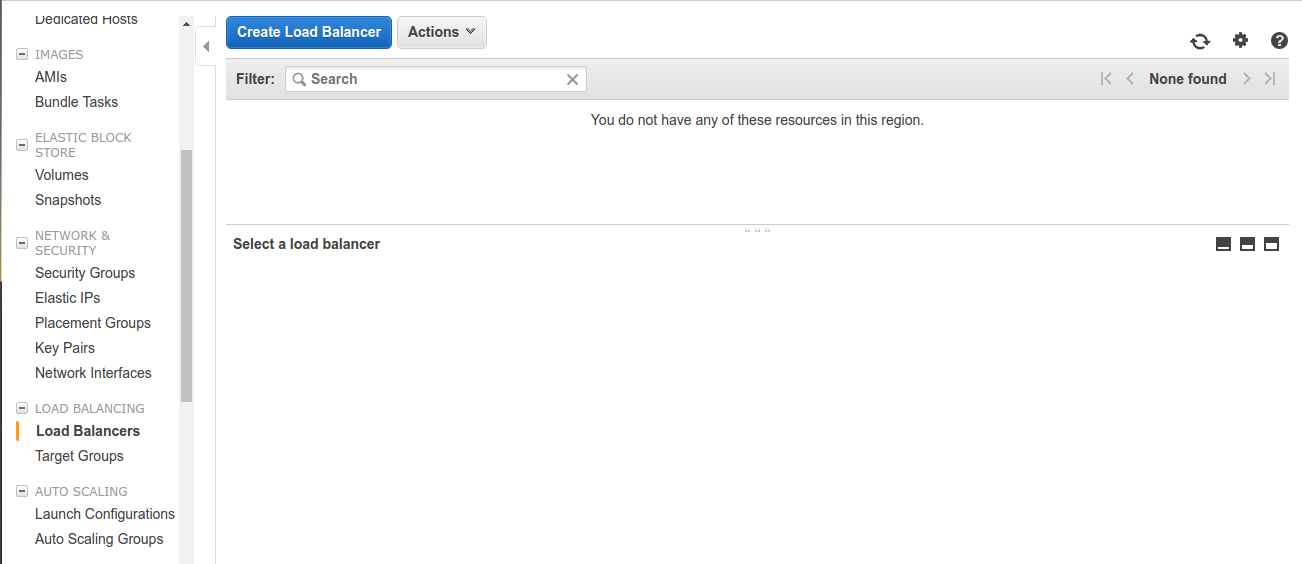
As no load balancer exists, click on Create Load Balancer to create a new one.
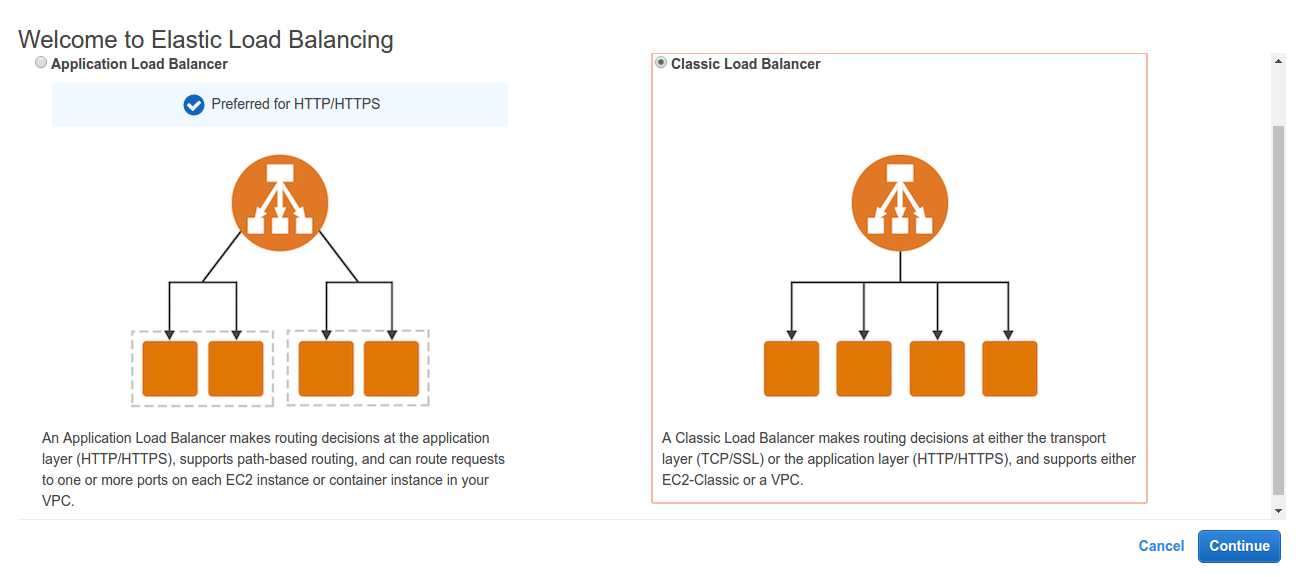 As we have discussed earlier, we will continue with classic load balancer.
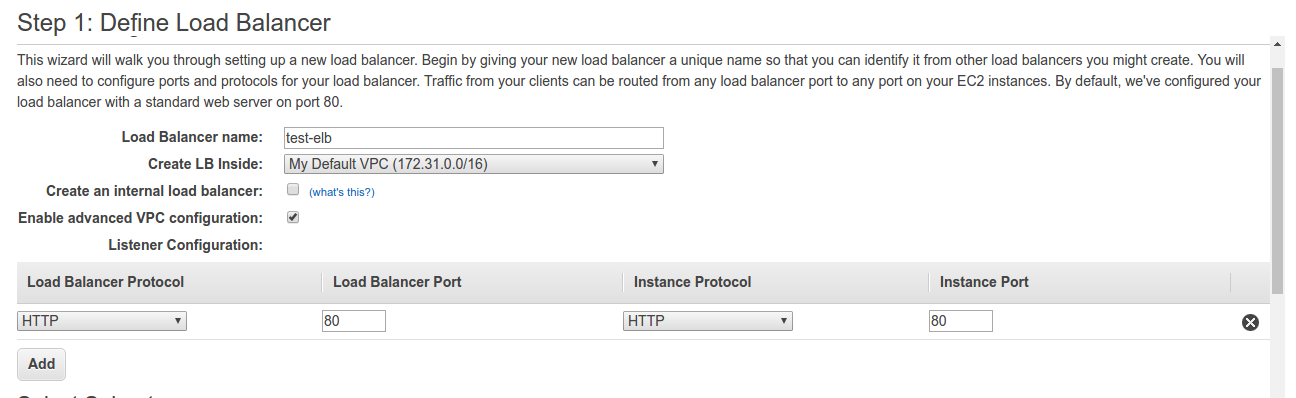 Define load balancer name that would be running under Default VPC. It going to be an internet facing type, so Create an internal load balancer remains unchecked. Moving on the configuration of Listener Configuration, here listener is a process that checks for connection requests. It is configured with a protocol and a port for front-end (client to load balancer) connections, and a protocol and a port for back-end (load balancer to back-end instance) connections. In our setup, we will be having just HTTP load balancer protocol configured for listener. Also, choose the subnets for our load balancer by enabling advanced VPC configuration.
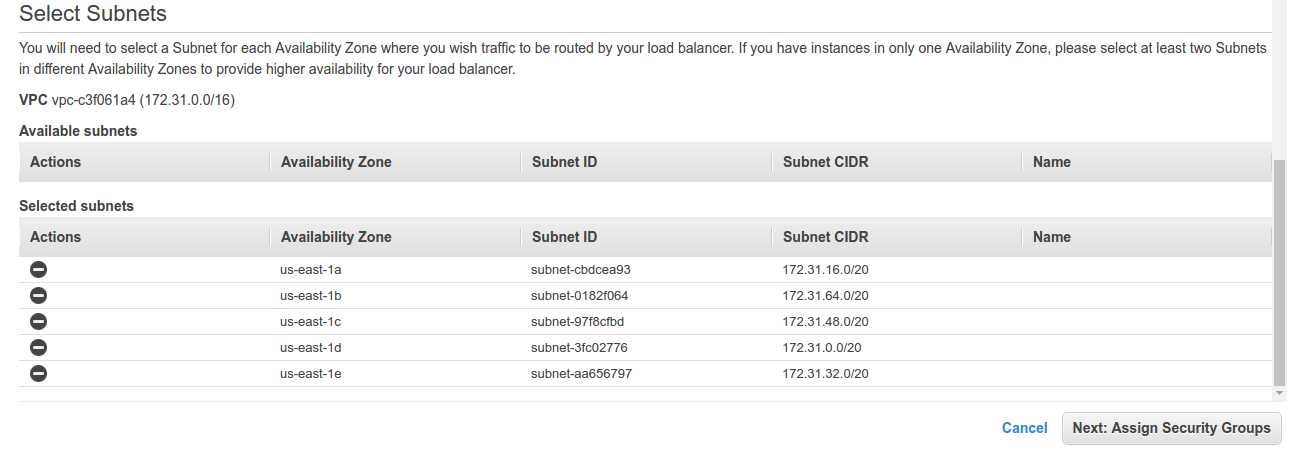
We have selected subnets over all availability zones over US-east region. Moving on to assigning our security groups.
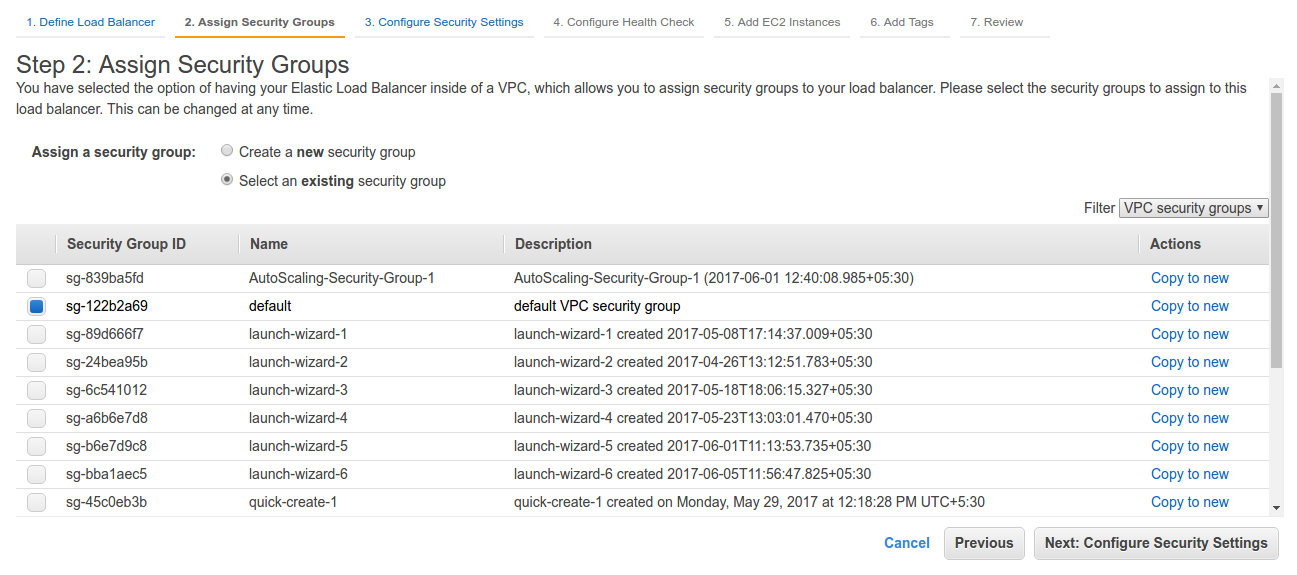 Create a new security group, setup ACL for inbound and outbound traffic for the load balancer or select an existing one. Configuring the security settings,
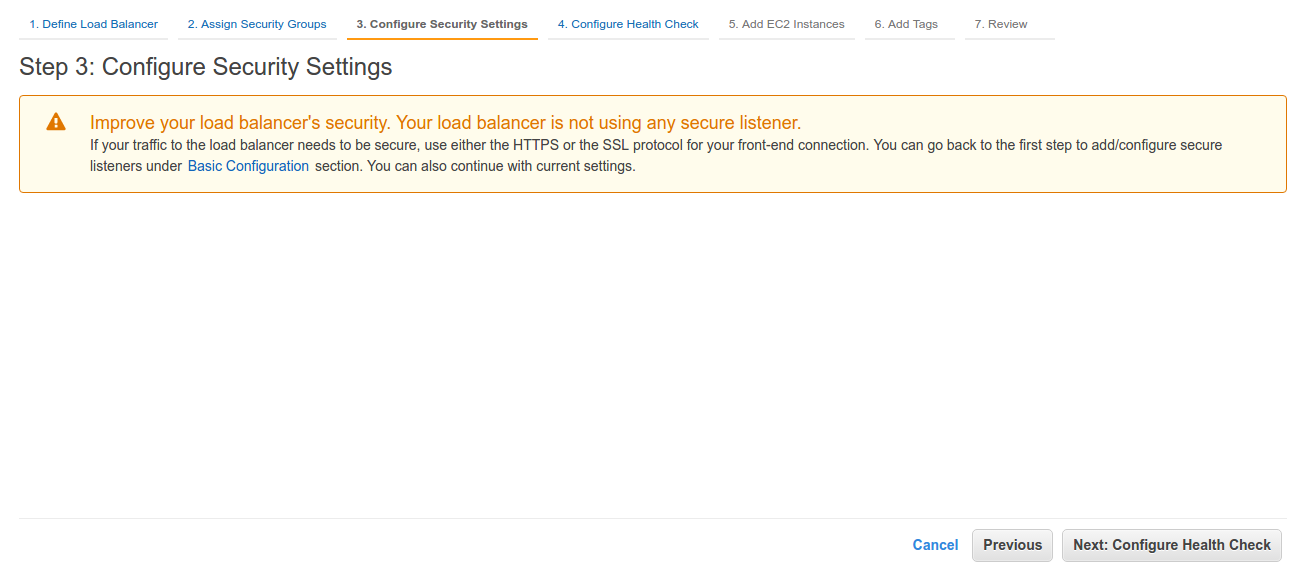 As we are not using SSL/TLS, we will make no further alterations in our security groups and move on to configuring health check.
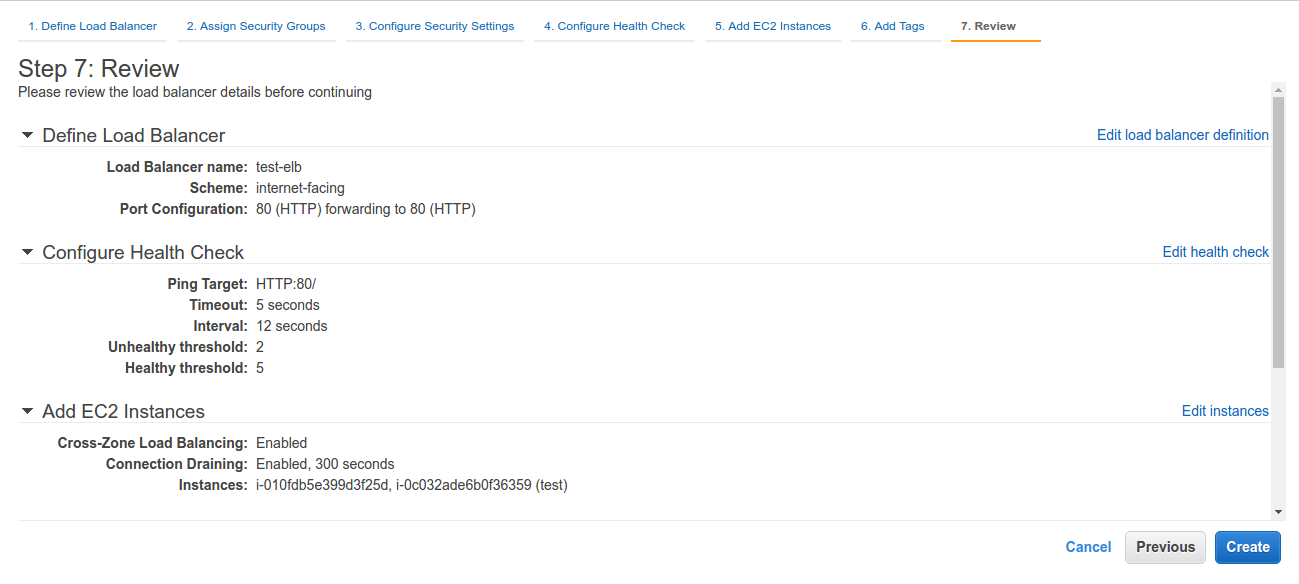
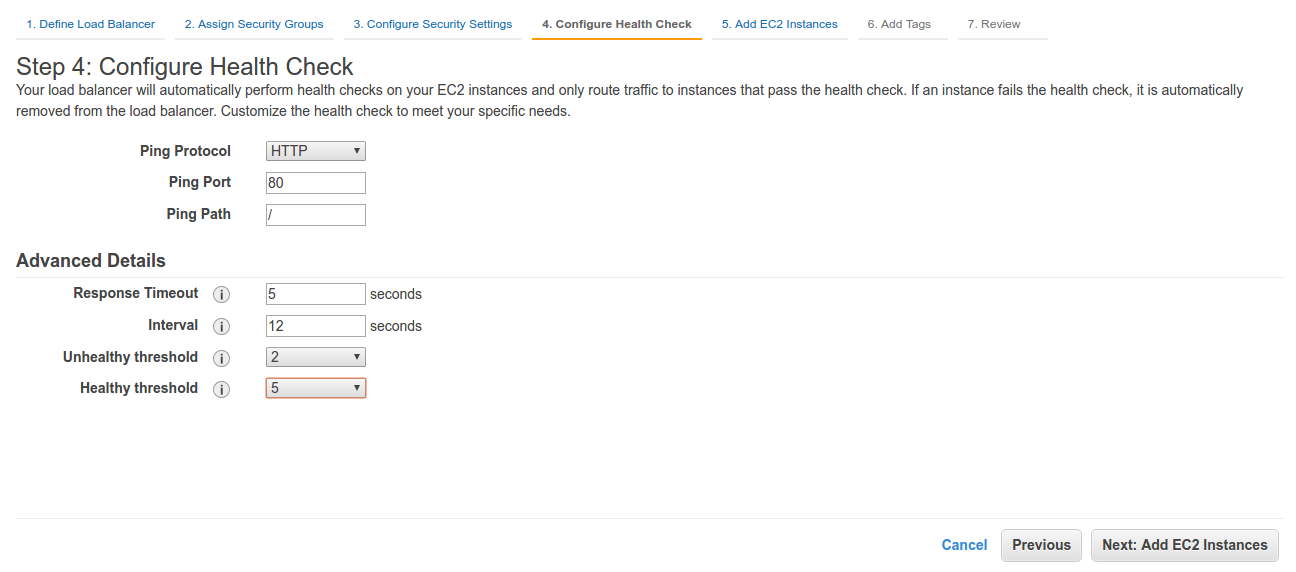 Elastic Load Balancing automatically checks the health of the EC2 instances for your load balancer. If Elastic Load Balancing finds an unhealthy instance, it stops sending traffic to the instance and reroutes traffic to healthy instances. In our configuration, Load balancer will ping on port 80 via HTTP protocol to our EC2 instances. It performs ping requests at the interval of 12 seconds and waits for 5 seconds before it closes the connection with the instances. It waits for 2 failed checks before it declares an instance as unhealthy. Also, it waits for 5 successful pings for considering an instance to be a healthy one. Now we will proceed with adding our EC2 instances.
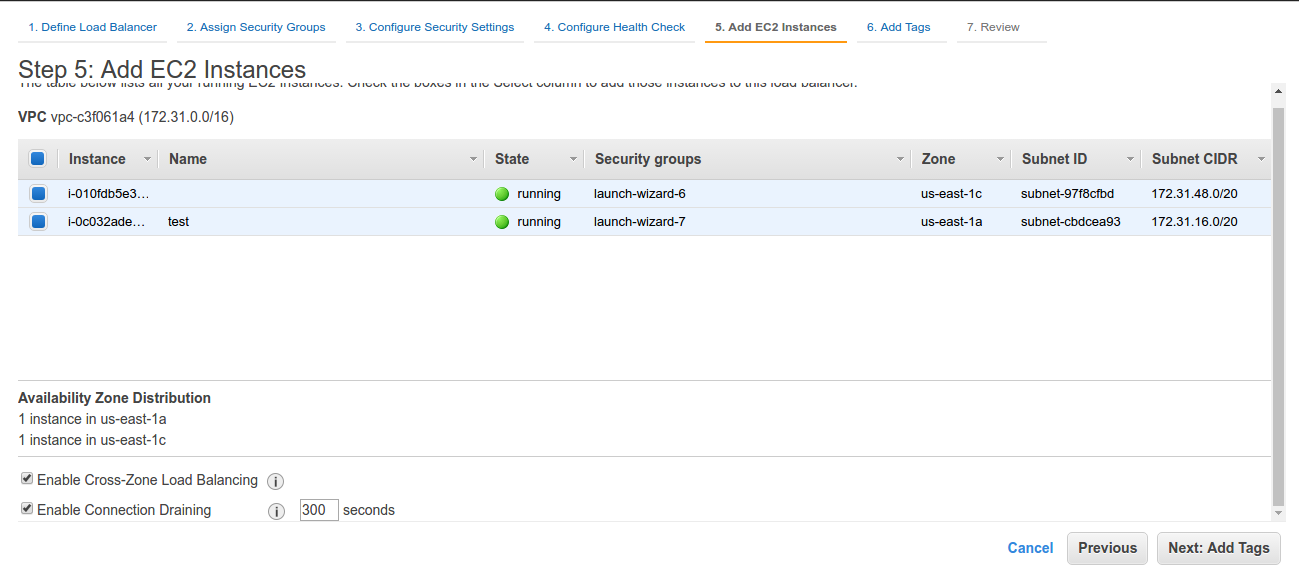 Select the running instances that you want to be under elastic load balancing. As we have two instances running in two different availability zones, selecting both of them. We will also enable Cross-Zone Load Balancing and Connection Draining (setting it up to 300 seconds).
By default, your Classic Load Balancer distributes incoming requests evenly across its enabled Availability Zones. Cross-Zone load balancing reduces the need to maintain equivalent numbers of instances in each enabled Availability Zone, and improves your application’s ability to handle the loss of one or more instances. Also, taking about Connection Draining, to ensure that a Classic Load Balancer stops sending requests to instances that are unhealthy, while keeping the existing connections open, use connection draining. This enables the load balancer to complete in-flight requests made to instances that are unhealthy.
Now, adding tags with the load balancer as,
 Now to review and create the load balancer
![]() Review your load balancer
Review your load balancer
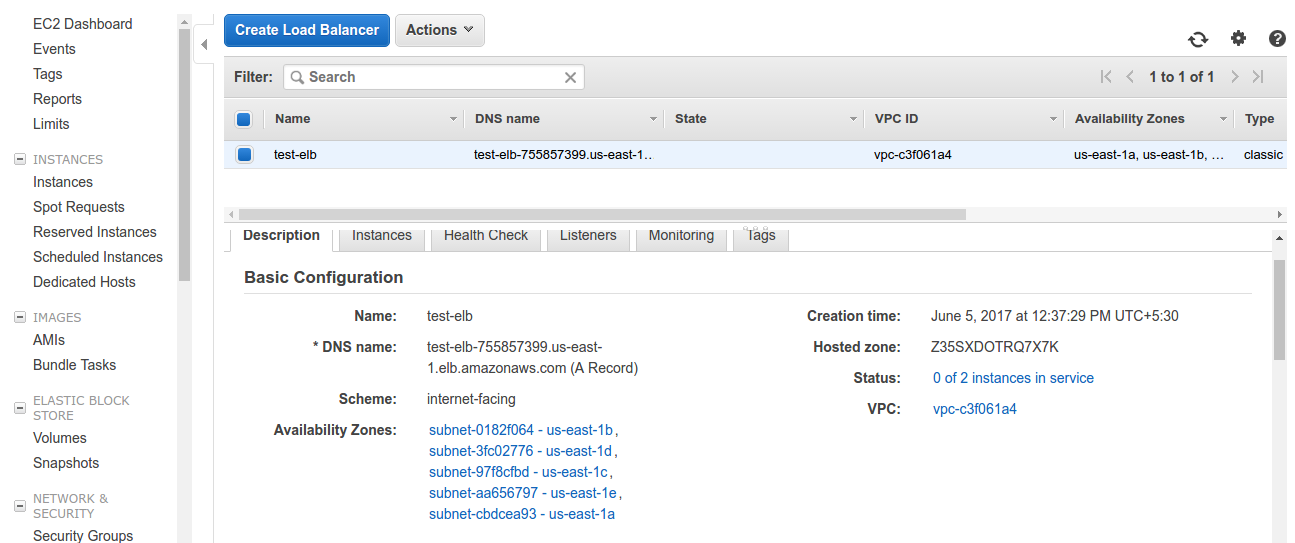 Our Elastic load balancer is all set up. Check out description of load balancer and you will find all details associated with it. DNS name is the name associated with our internet facing load balancer. Currently, as we can see in the status, no instances are in service as their still getting configured. After a while, we will find these instances in service. Make sure security groups of the load balancer and instances have permissions to access each other’s traffic.
So far we have discussed how to create our very first HTTP classic load balancer. In our next blog, we will explore more about amazon elastic load balancer

3 comments