Launch QloApps Instantly on AWS with Pre-configured AMI
Easily set up QloApps, the open-source hotel booking and reservation system built on PrestaShop, using our ready-made Amazon Machine Image (AMI) on AWS EC2.
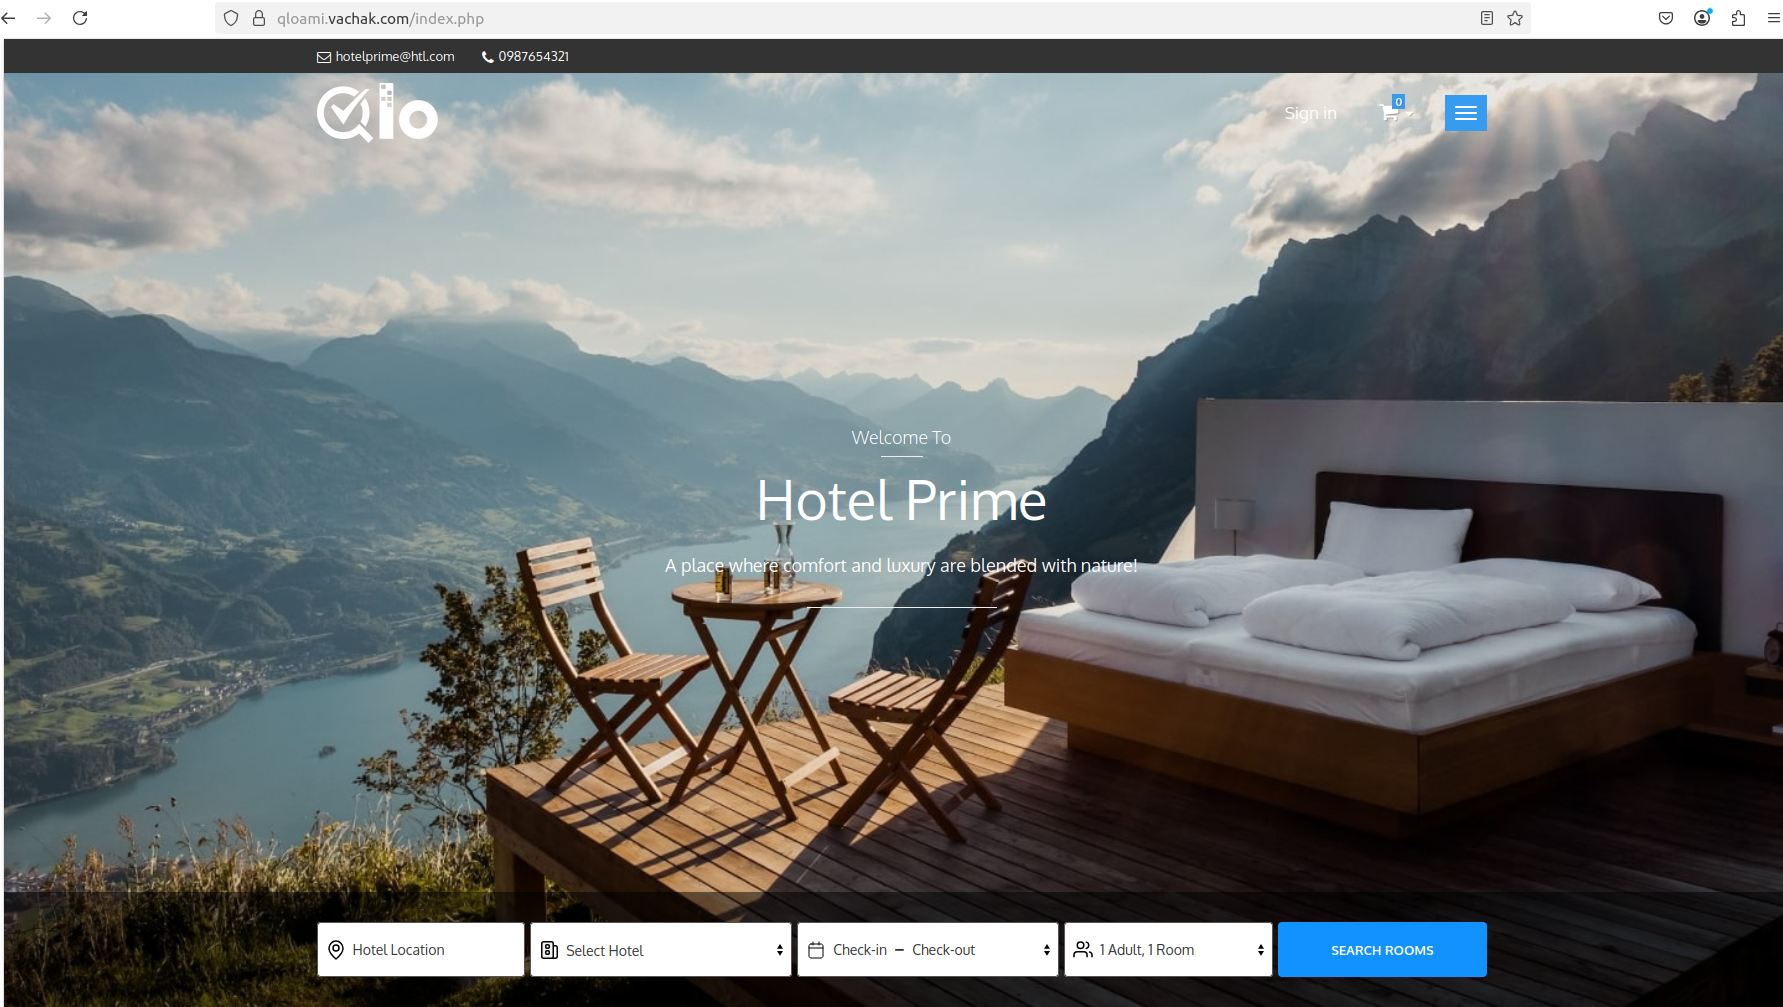
This AMI includes QloApps pre-installed, letting you launch your hotel booking website in minutes.
With SSL support and access via Domain, you can start managing room inventories, bookings, and reservations both online and offline right away.
1. Initial Setup
Just follow the steps below to get your instance ready, set up your domain, and finish installing Qloapps.
A. Go to AWS Marketplace and select the QloApps AMI.
B. Choose an instance type like t3.medium (2 vCPUs, 4GB RAM) for smooth performance.
C. In the Key Pair (login) section, select or create a PEM key and store it securely.
D. Enable Auto-assign Public IP or attach an Elastic IP for a static address.
E. Set up the Security Group with these rules:
- Port 22 (SSH) – Allow from your IP
- Port 80 (HTTP) – Allow from 0.0.0.0/0
- Port 443 (HTTPS) – Allow from 0.0.0.0/0 (optional for SSL)
F. Review all settings and launch the instance.
G. After launch, note the public IP from your EC2 dashboard.
You’re now ready to map your domain and complete the QloApps setup!
2. Point Your Domain to the QloApps EC2 Instance
A. Log in to your Domain Registrar (e.g., GoDaddy, Namecheap, Google Domains).
B. Create an A Record in DNS settings:
- Point your domain (e.g.,
yourdomain.com) to your EC2 public or Elastic IP (e.g.,203.0.113.10). - Tip: Use Elastic IP for a static address.
C. Disable Proxy (like Cloudflare) during SSL setup to avoid issues with Let’s Encrypt verification. You can re-enable it after SSL is active.
D. Verify DNS Propagation:
- Wait a few minutes to hours.
|
1 |
dig A yourdomain.com |
- Ensure the A record points to your instance’s public IP.
3. Set Up Free SSL for Your QloApps Site
A. SSH into Your Instance
Use your .pem key to connect
|
1 |
ssh -i your-key.pem ubuntu@your-public-ip |
B. Run the SSL Setup Script
Execute the pre-installed script
NOTE: This script will create a MySQL database, user, and password, and assign the user full access to that database. These credentials will be used later for QloApps installation.
It also auto-generates an SSL certificate after verifying the domain is linked to the server’s IP.
|
1 |
sudo /root/setup_master.sh |
When you run the script, you’ll see two options:
1. MySQL Database Setup
2. Apache / Nginx SSL Setup (Let’s Encrypt)
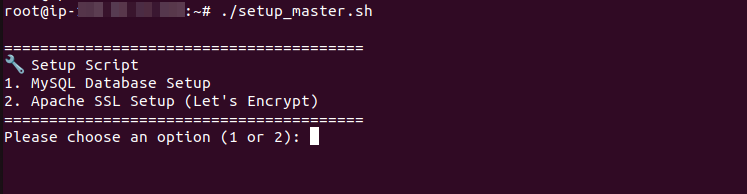
You can run either first, but it’s recommended to set up the database (DB name, user, and password) for QloApps first, then generate the SSL certificate for your domain using the same script.
C. Enter Required Info
- Enter the name of the new MySQL database: qloappsdb
- Enter the MySQL username to create: qloappsuser
- Enter the password for the new user: secretpassword
- Enter password: secretpassword

D. Enter Required Info
- Domain name (e.g.,
yourdomain.com - Email for Let’s Encrypt alerts (e.g.,
admin@example.com)
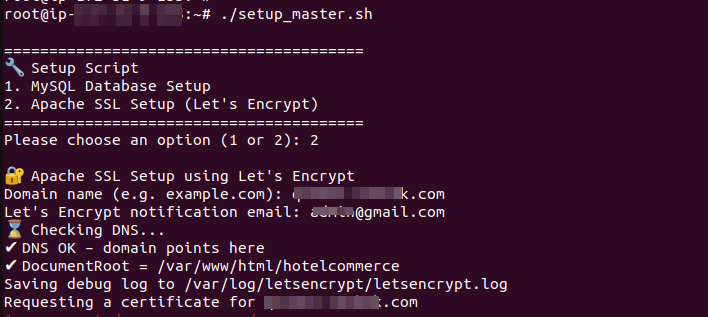
E. The script will
- Verify domain DNS → instance IP
- Generate a Let’s Encrypt SSL certificate
- Configure Apache / Nginx for HTTPS with auto-renewal
- Redirect all HTTP traffic to HTTPS
4. Complete the QloApps Web Installer
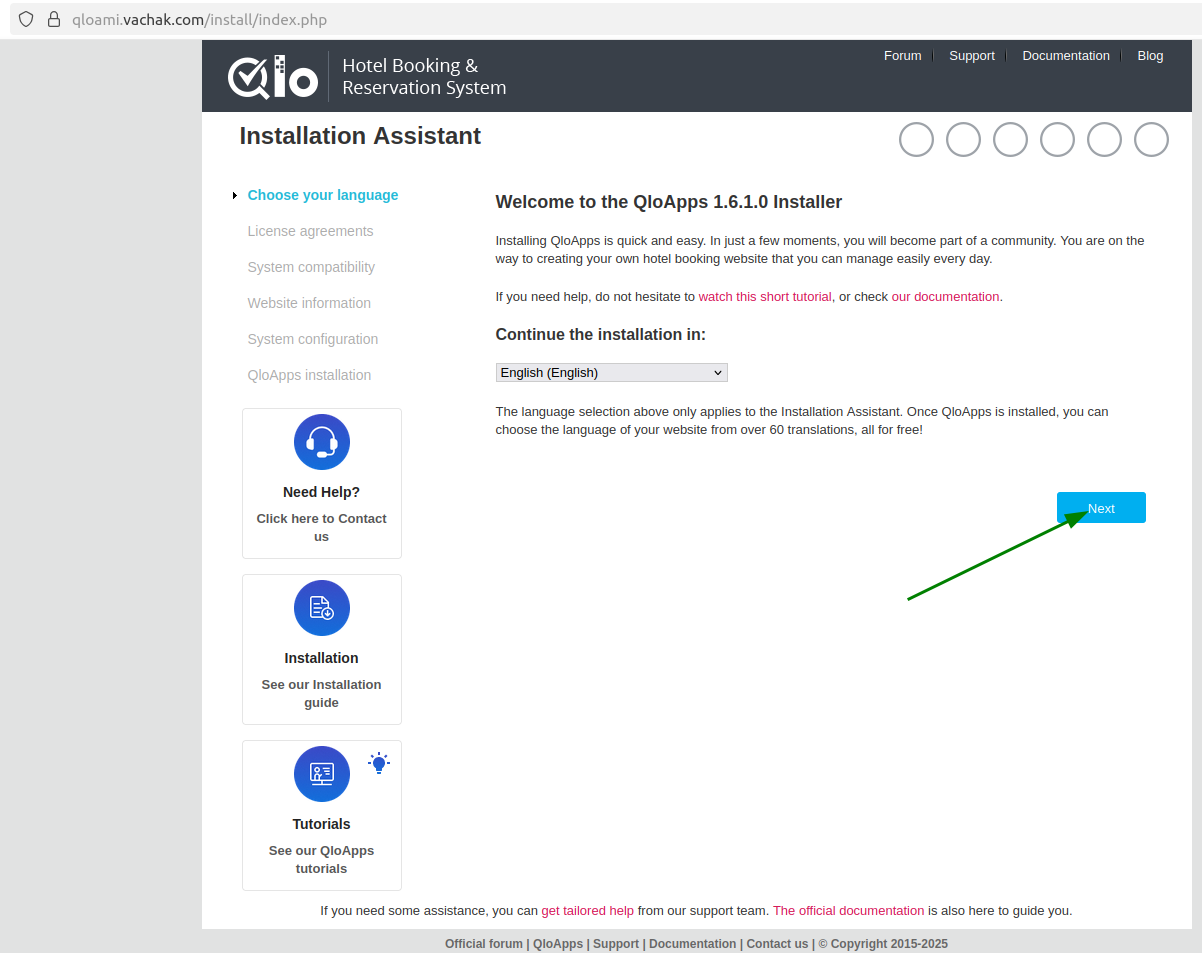
Access the QloApps Installer:
- In a web browser, navigate to https://
yourdomain.com - The QloApps installer should load securely over HTTPS.
- Click Next on the first page of the installer.
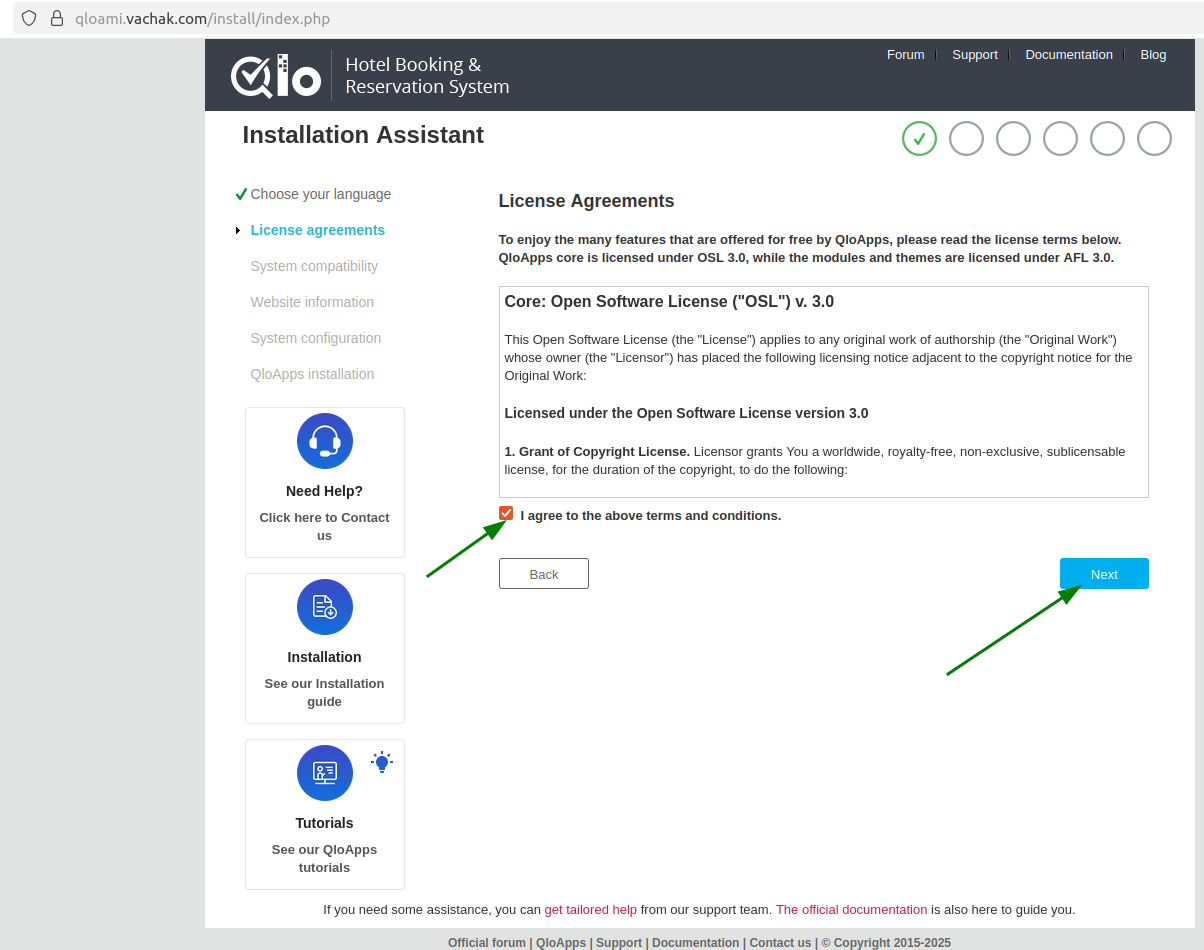
Fill in the required fields (e.g., site name, admin email, password).
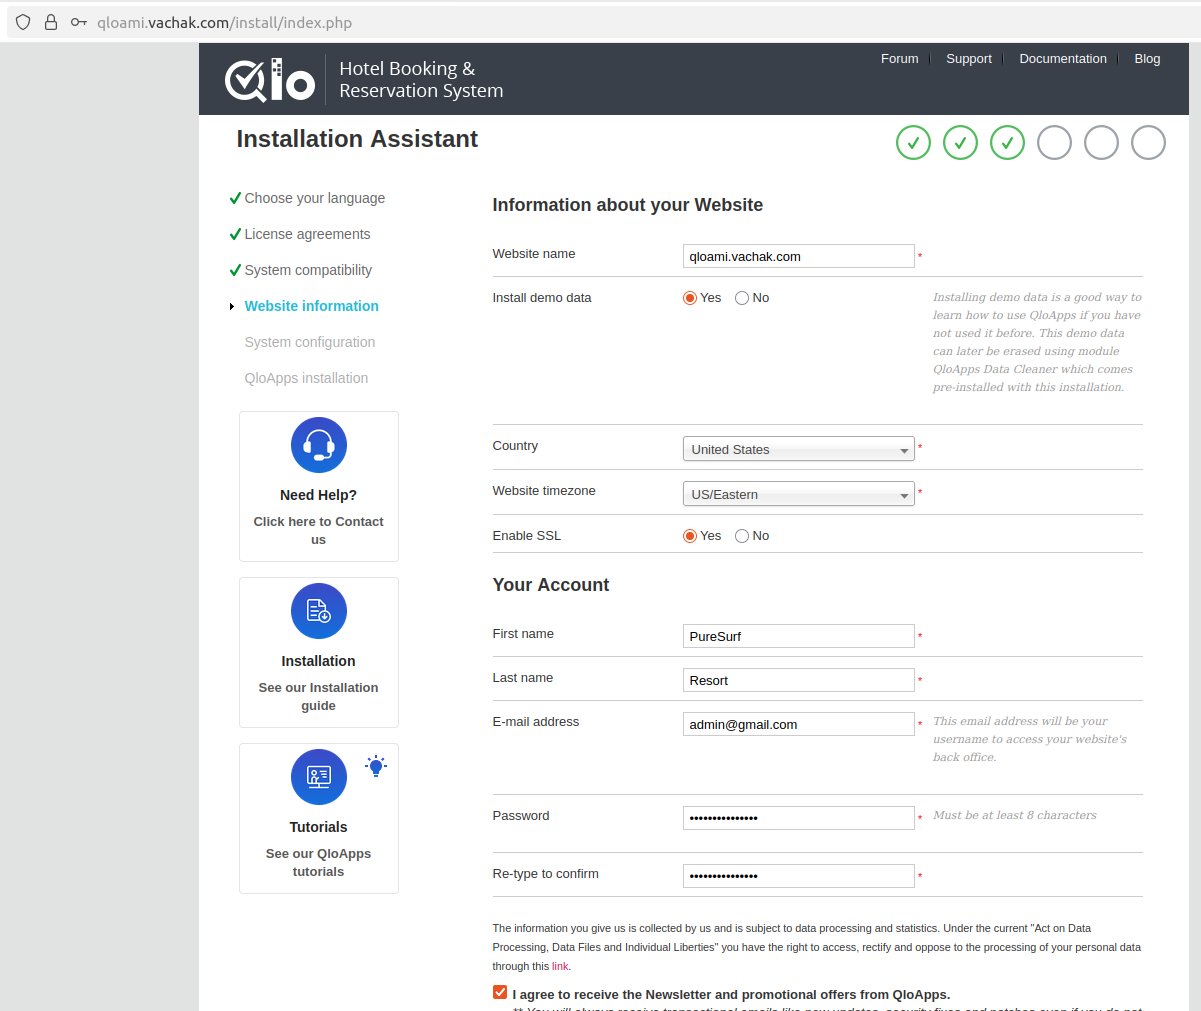
Configure the Database in QloApps
In Point 3, Subpoint C, use the database name, user, and password that you generated earlier by running the script.
- In the QloApps installer’s database configuration section, enter:
- Database Server: localhost
- Database Name: yourdbname
- Database Login: yourqloappsuser
- Database Password: yourqloappsuserpassword
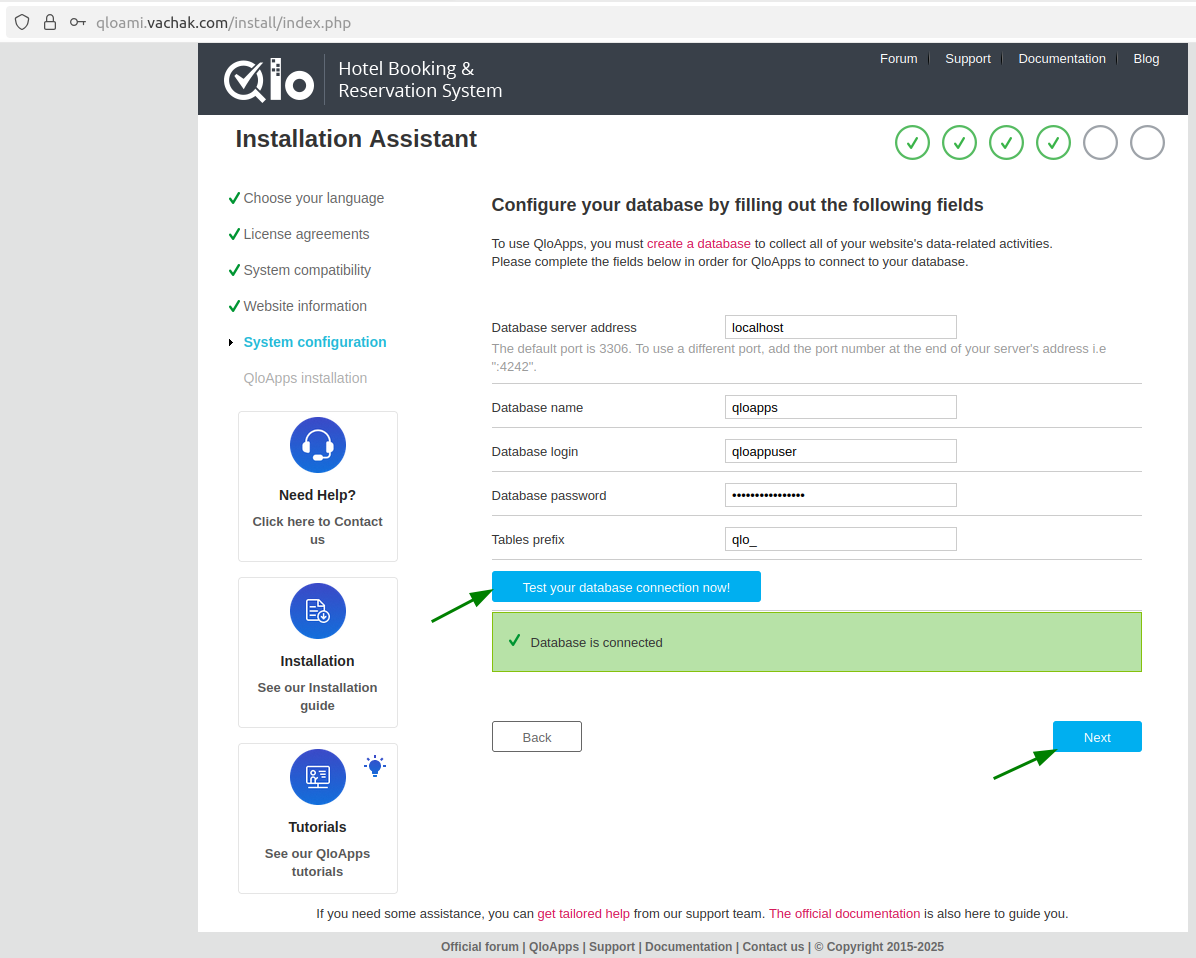
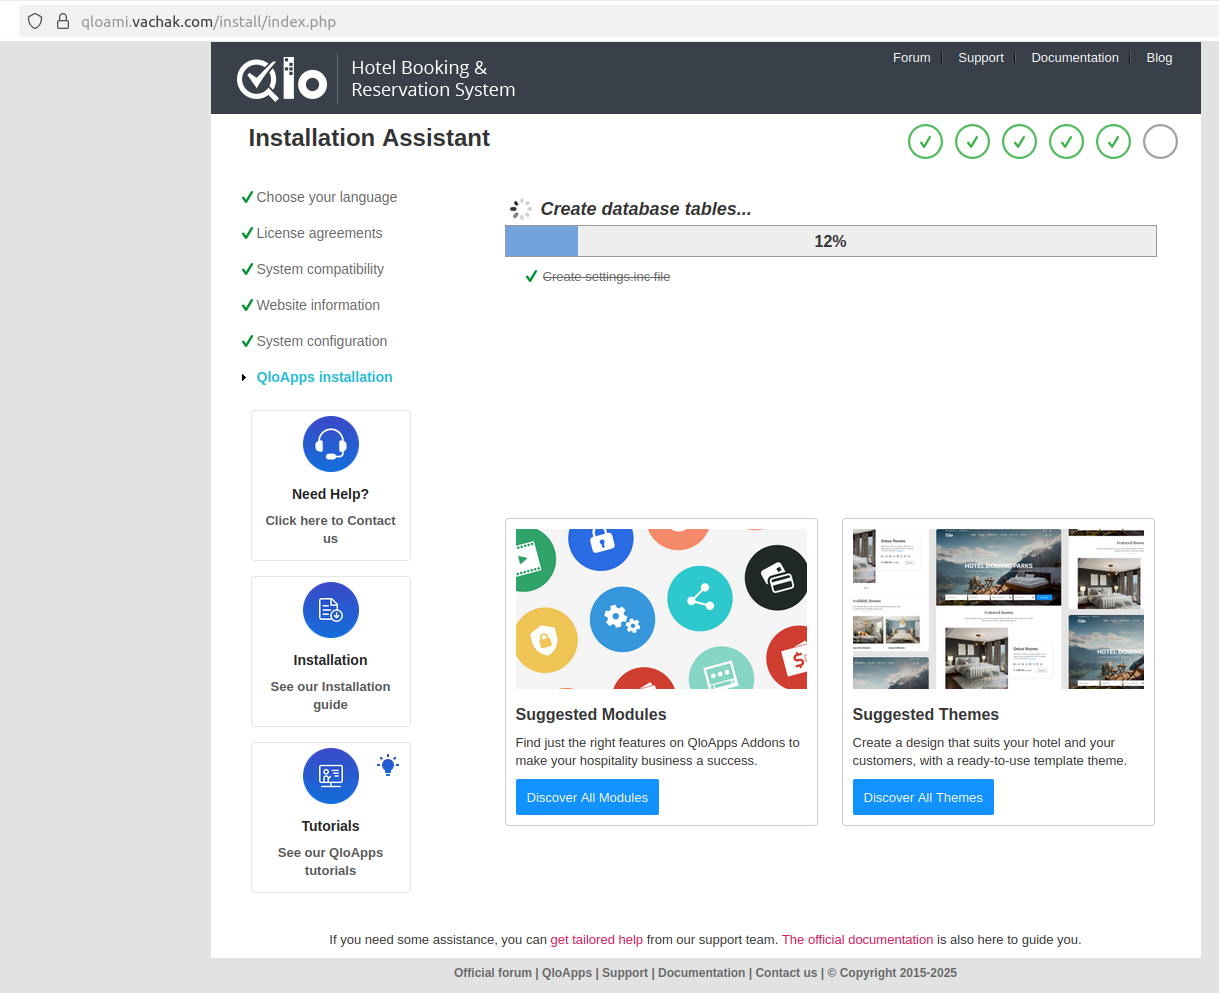
- Your QloApps is currently being installed.
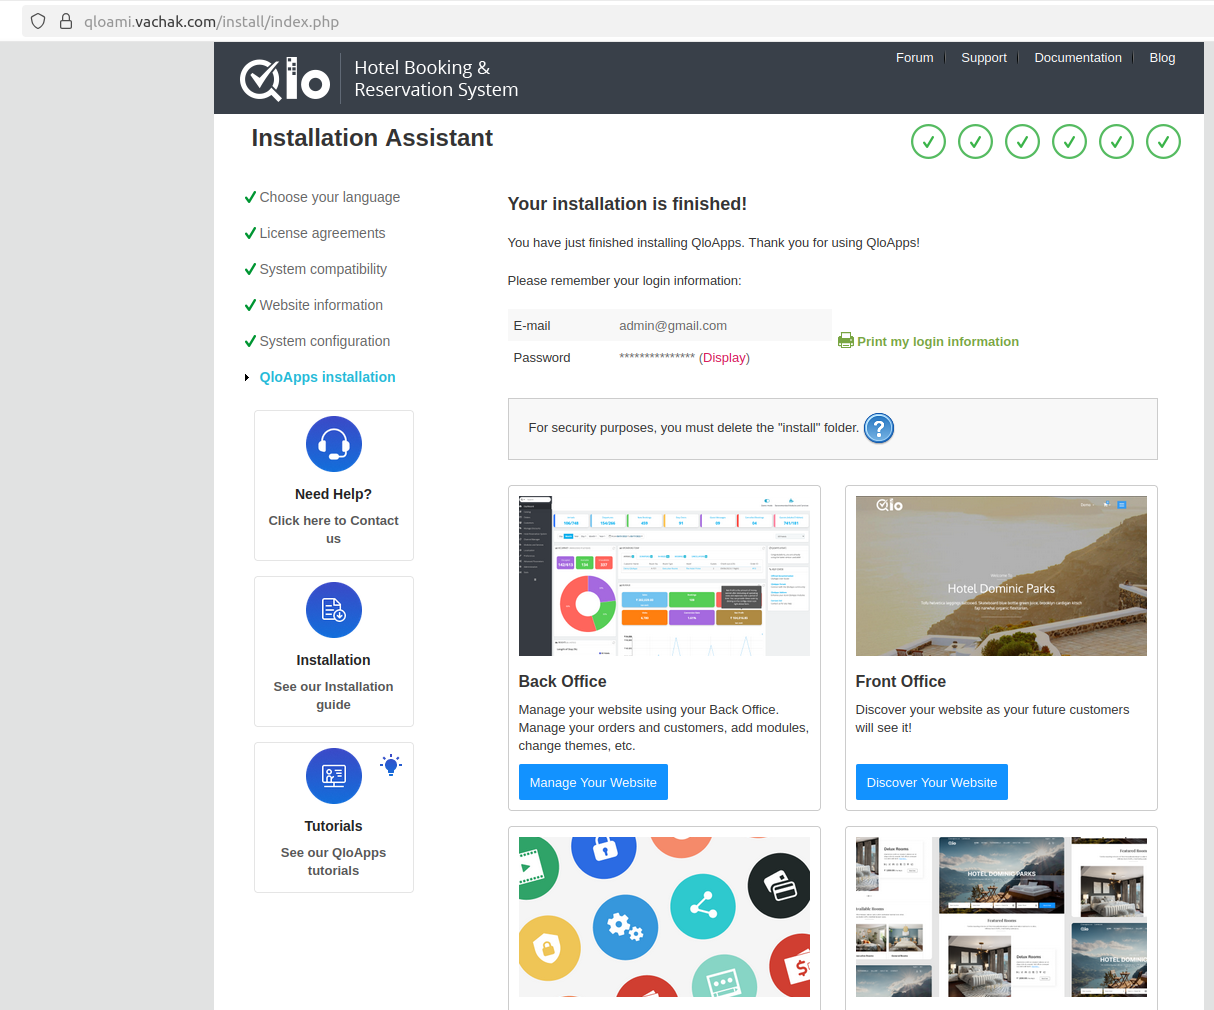
5. Remove the Install Folder
Remove the Install Folder
- After completing the QloApps installer, remove the install folder to secure the site.
For Apache
|
1 |
sudo rm -rf /var/www/html/hotelcommerce/install |
For Nginx
|
1 |
sudo rm -rf /var/www/html/qloapps/install |
Verify SSL Setup
Visit https:// in a browser. You should see the QloApps installer over HTTPS.yourdomain.com
Security Best Practices
- Restrict SSH Access: Update the security group to limit port 22 (SSH) to specific IP addresses after setup.
- Use an Elastic IP: Ensure a static IP for consistent DNS configuration.
- Monitor Logs:
- For Apache: Check
/var/log/apache2/ - For Nginx: Check
/var/log/nginx/ - MySQL logs: /var/log/mysql/
- For Apache: Check
- Update Regularly: Run sudo apt update && sudo apt upgrade -y to keep the instance updated.
Troubleshooting
- Installer Not Loading:
- Ensure ports 80 and 443 are open in the security group.
- Check your web server status:
- For Apache:
|
1 |
sudo systemctl status apache2 |
- For Nginx:
|
1 |
sudo systemctl status nginx |
- Test MySQL connection and verify qloappuser can execute a simple query
|
1 |
mysql -u qloappuser -p -e "SELECT 1 FROM DUAL;" |
SSL Script Failure: Confirm the domain’s A record points to the instance’s IP without a proxy. Check /var/log/letsencrypt/letsencrypt.log for errors.
Contact Support: Refer to the QloApps documentation or contact the AMI provider for further assistance.